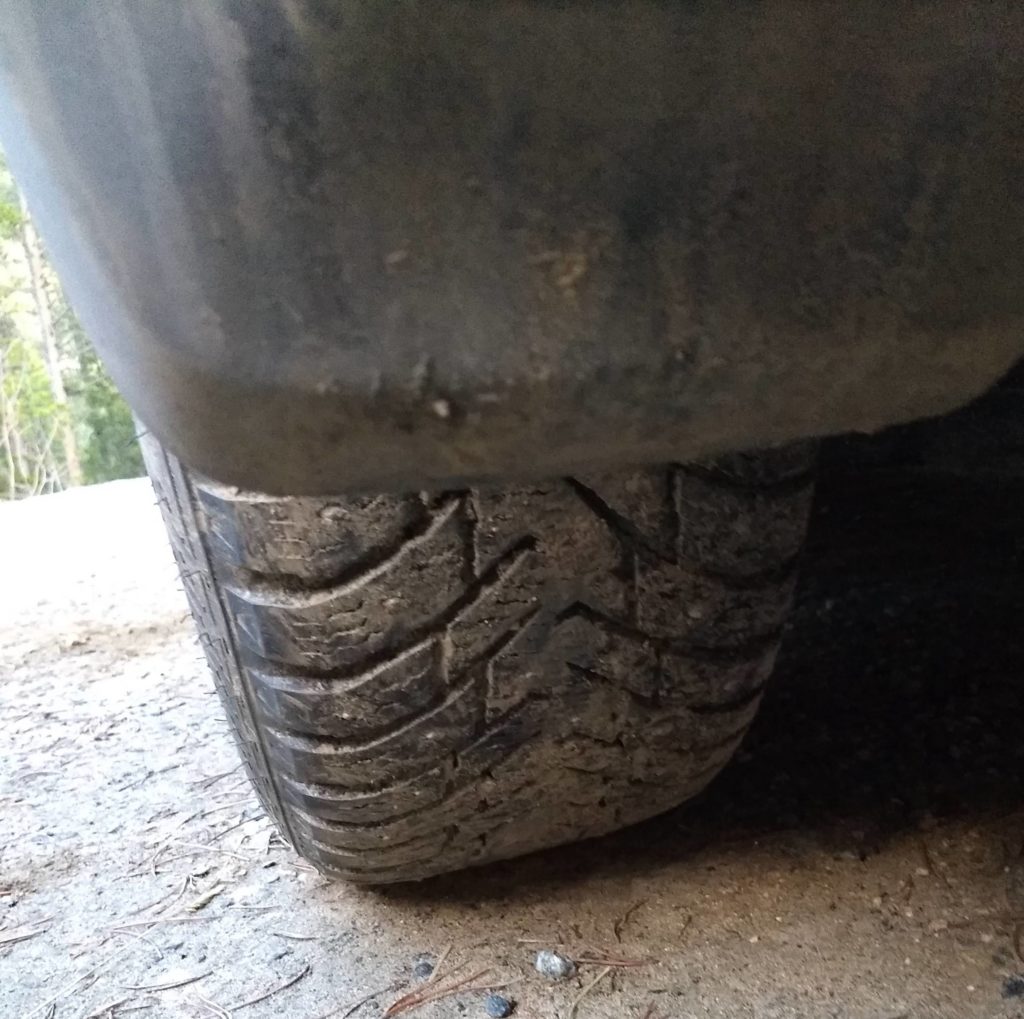
I had been dealing with excessive tire wear on the outside edges of this 240D for the past 10-20,000 miles. It had been getting progressively worse. The most recent set of tires lasted a mere 4,000 miles before the outer shoulder of the tire was down to the wear bars. Rotating the tires every 1,000 miles was no longer enough.
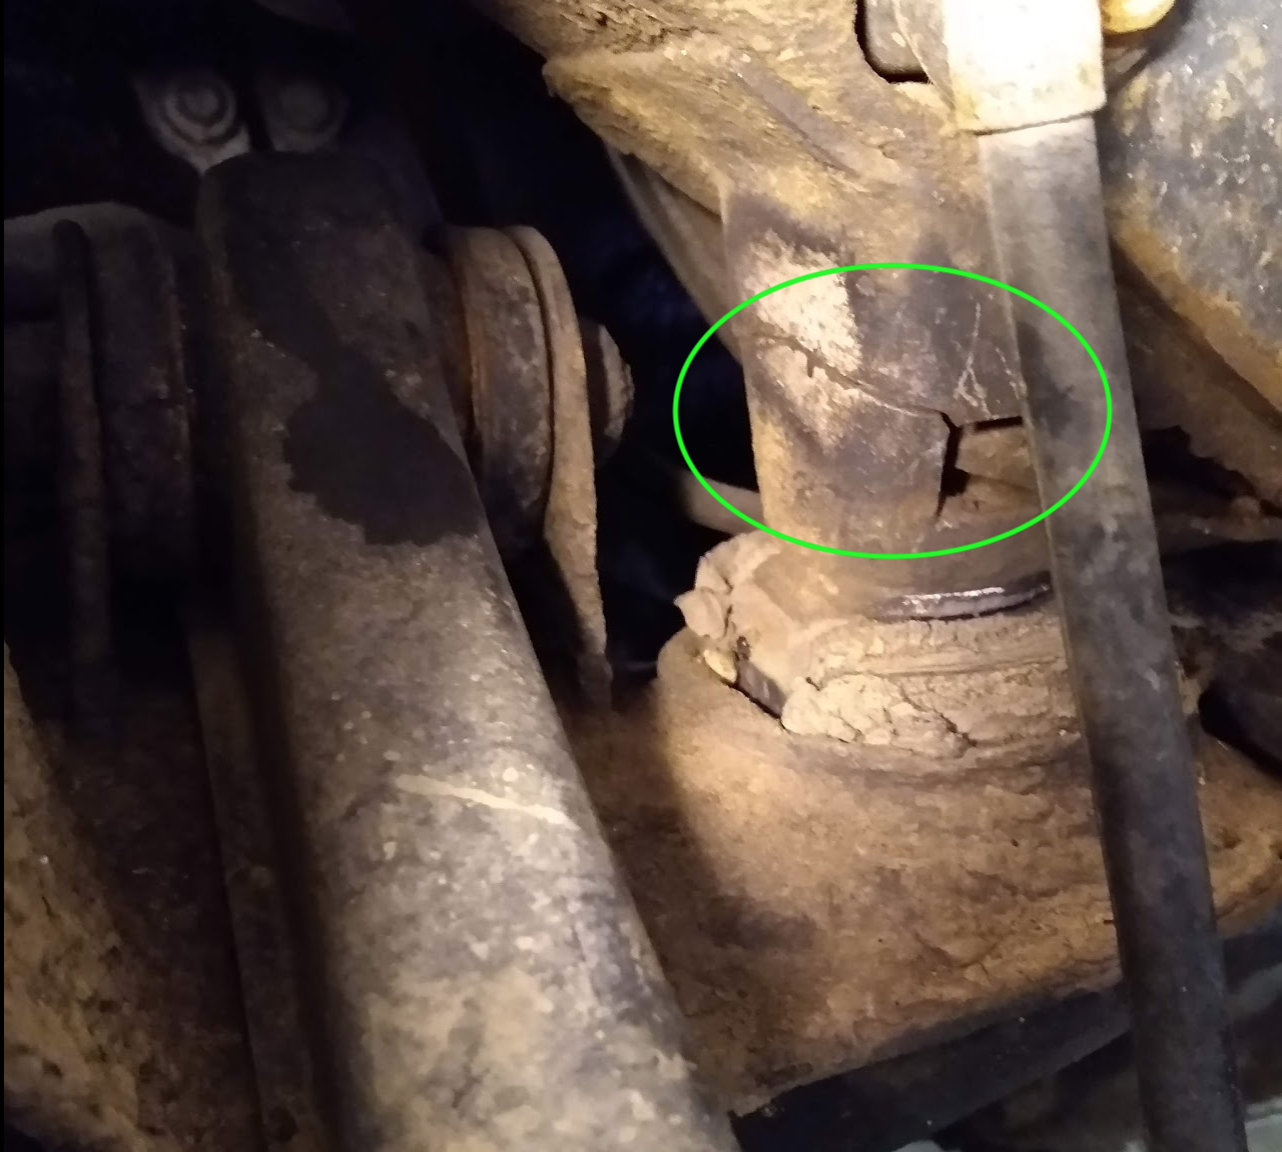
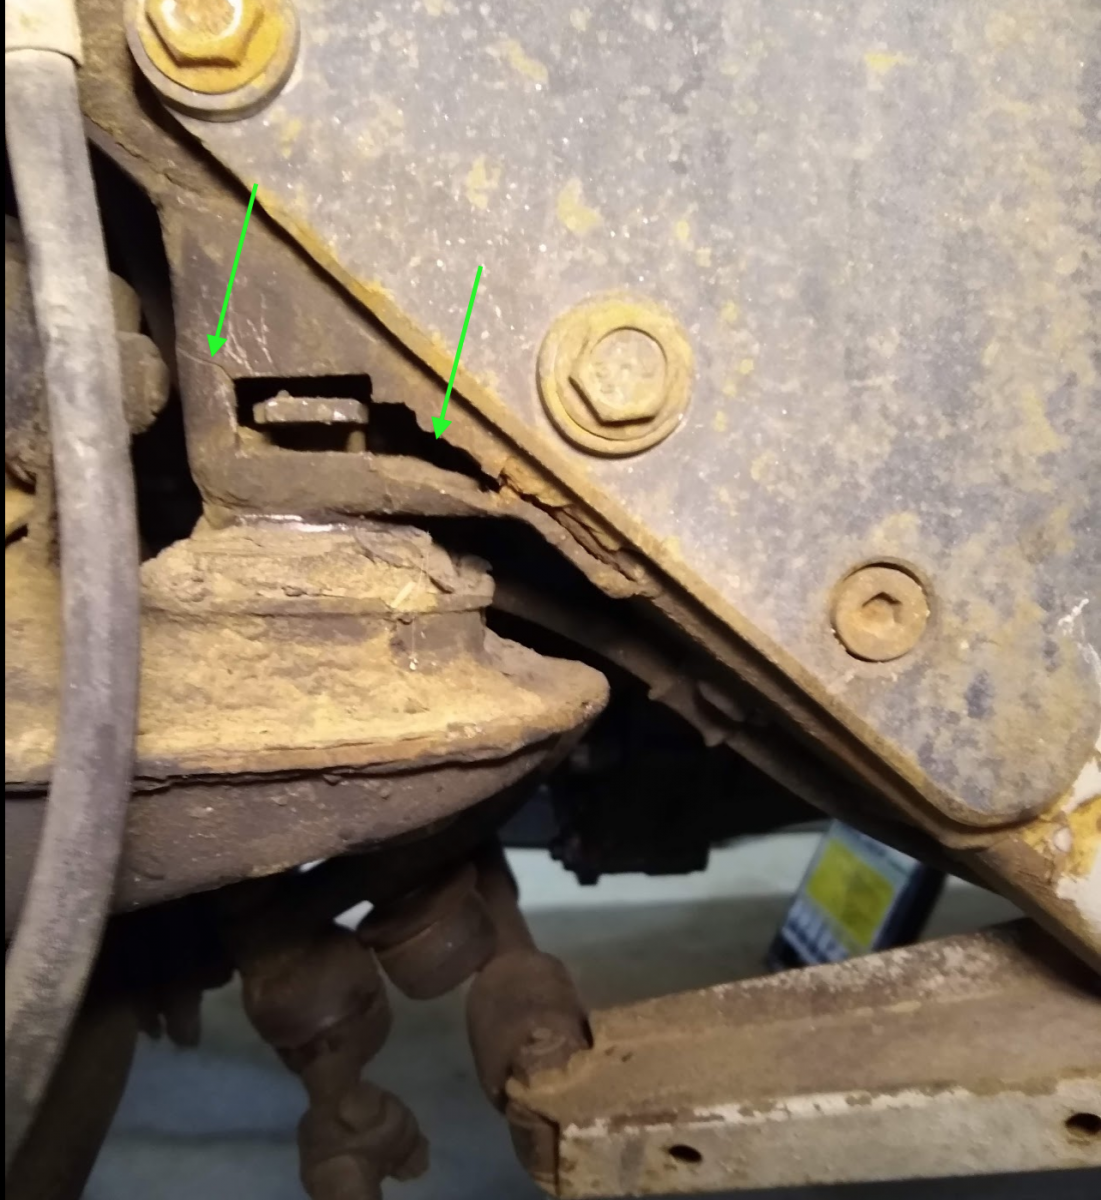
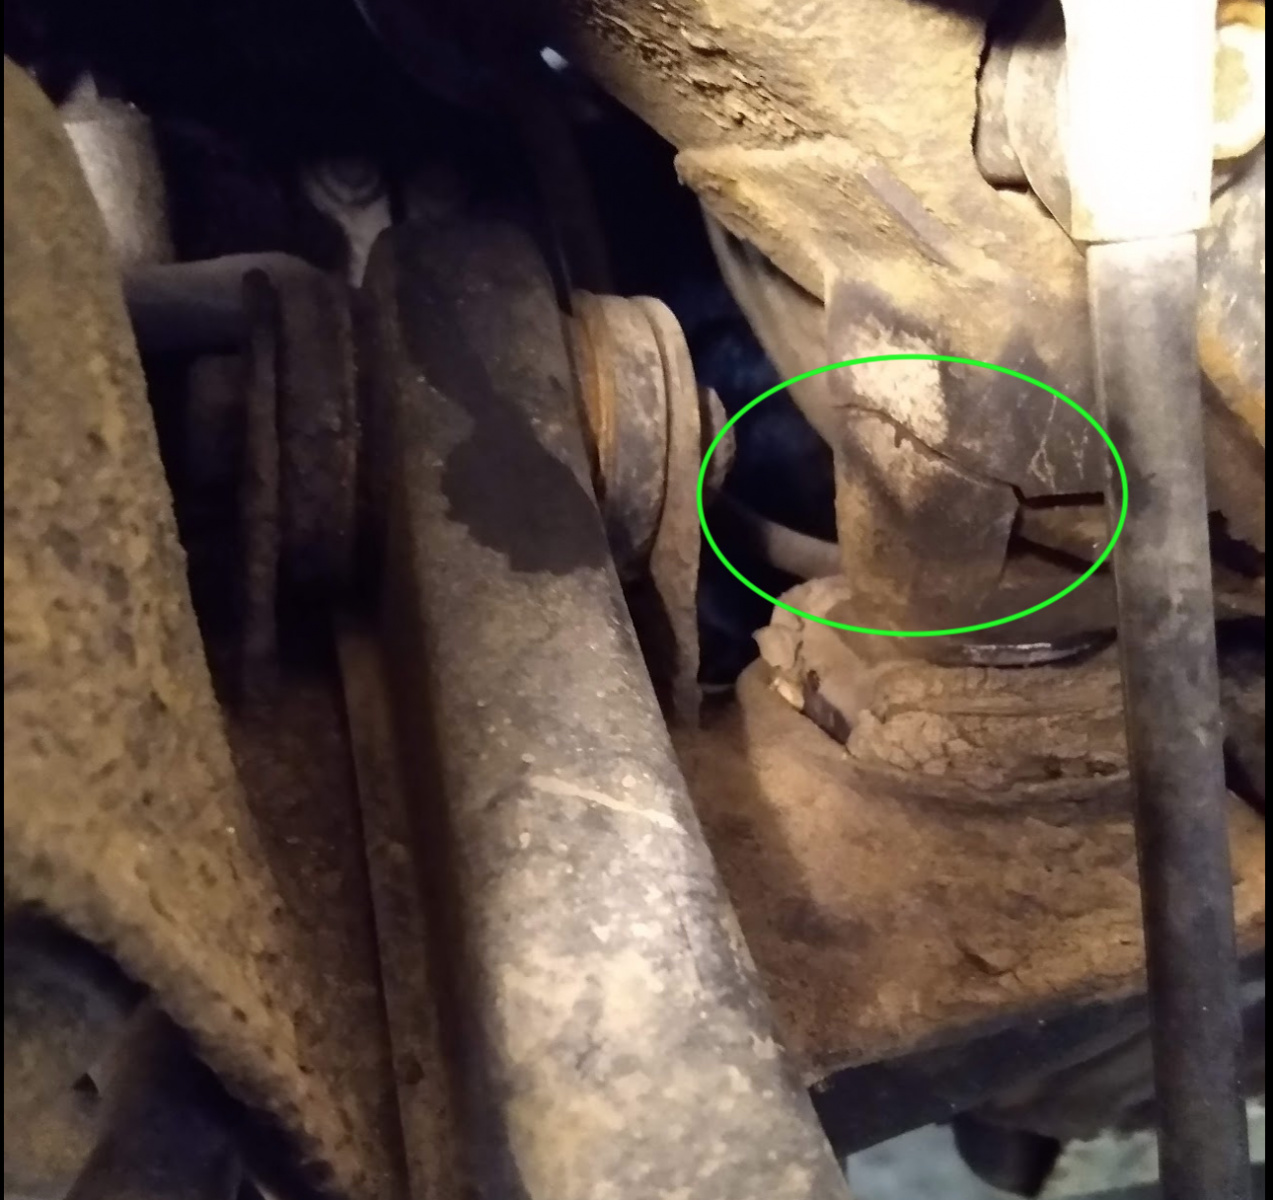
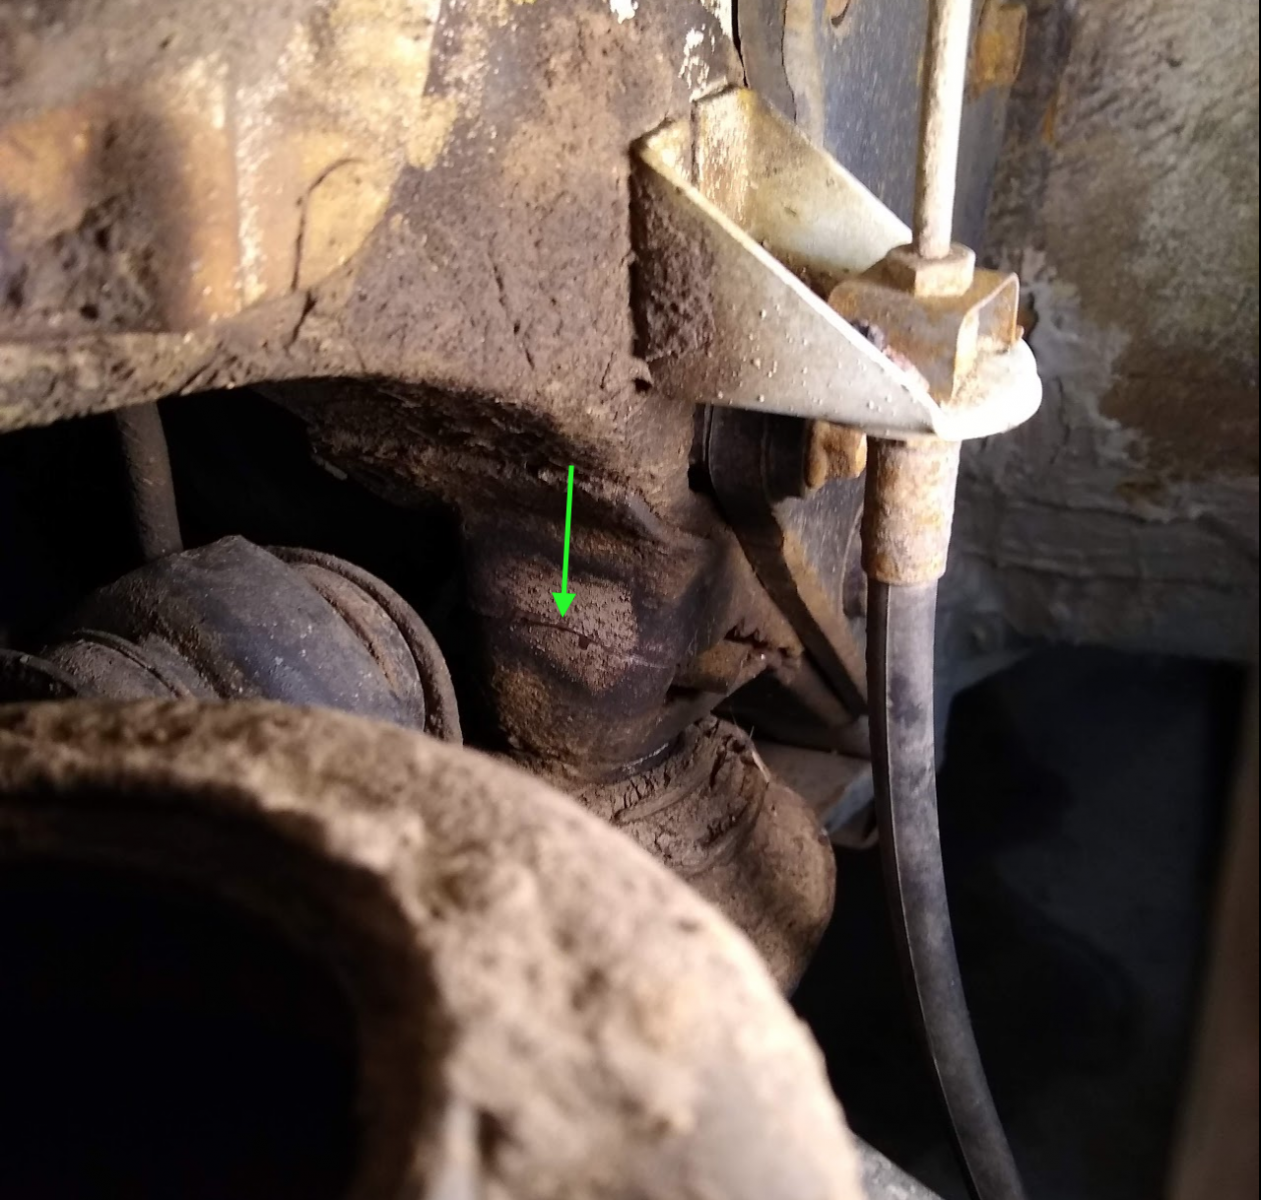
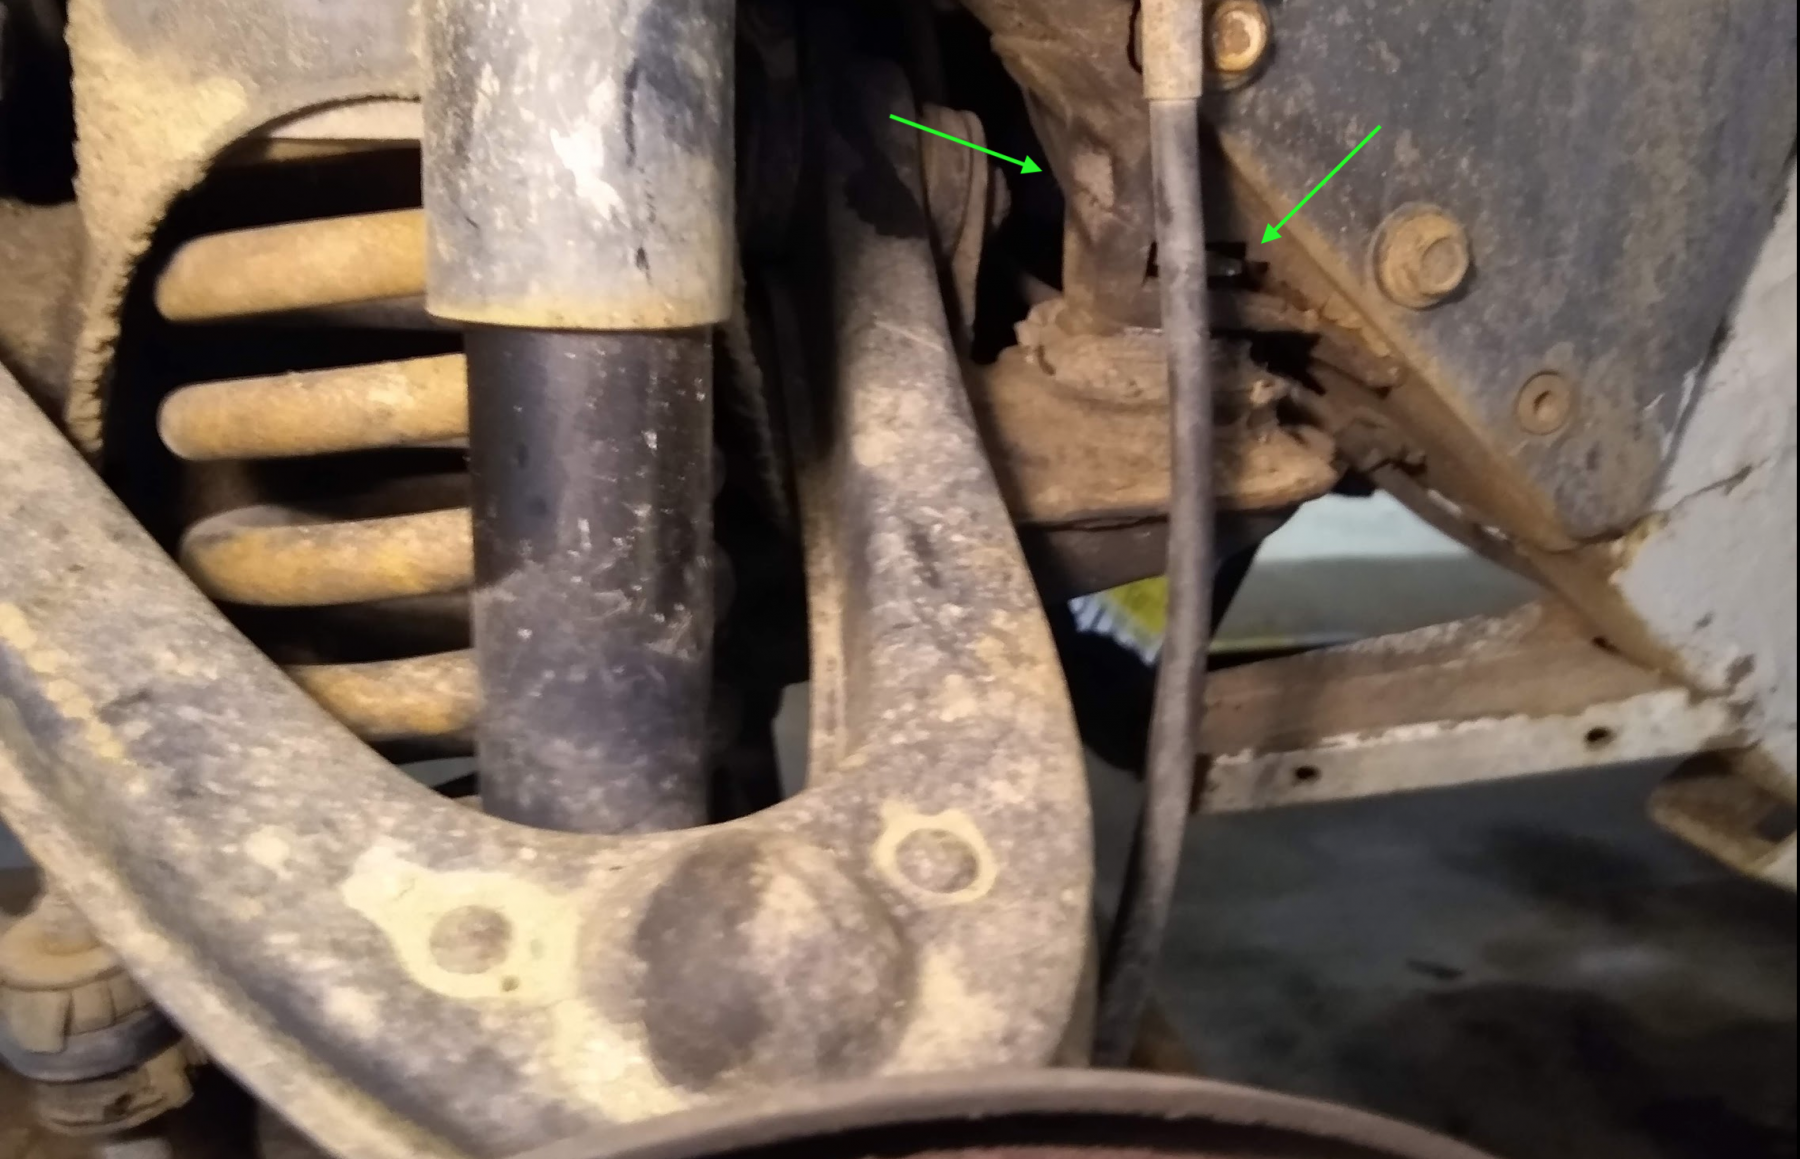
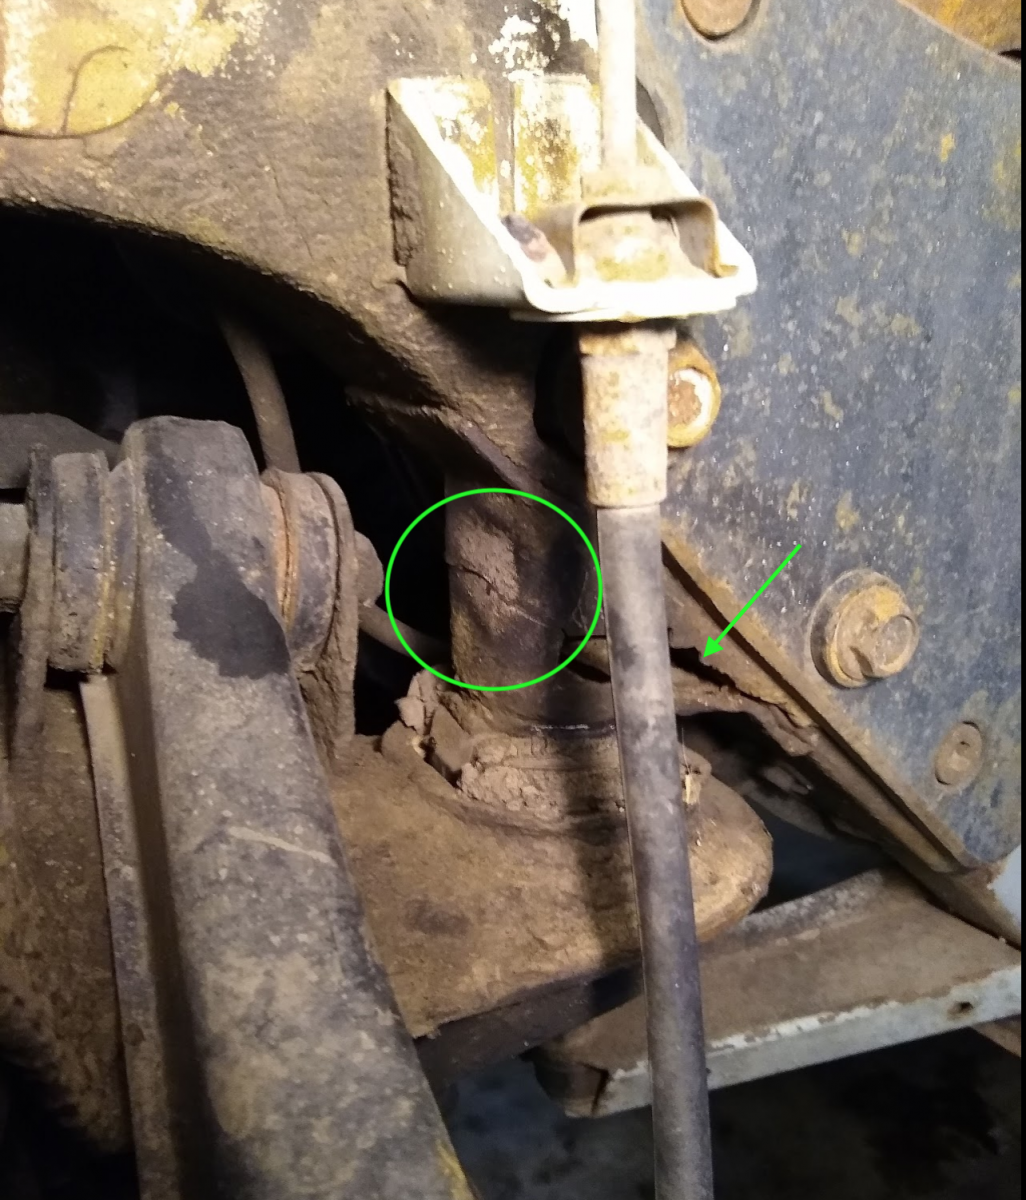
It was time for a front-end rebuild–or so I thought. I was envisioning needing to replace bushings on the A-arms and possibly ball-joints. However, once I removed the wheels and started looking critically at the front end components, it became clear what the issue was: a cracked front subframe mount on the driver’s side.
End of the Line?
The images below show the cracked mount. This explains the excessive tire wear. The car is currently parked as this is a serious safety issue.
Given the choice between AWD or studded snow tires, I’ll take the studded snow tires. The best way to do snow tires is with a second set of wheels. Which is great until you find yourself dealing with the government-mandated TPMS (Tire Pressure Monitoring System). And, it’s even worse if you find yourself driving a Honda with their implementation of the TPMS.
Klondike’s tank treads (aka studded Hakkapeliitta Nokian snow tires).
TPMS Idiot Light Could Leave You Stuck
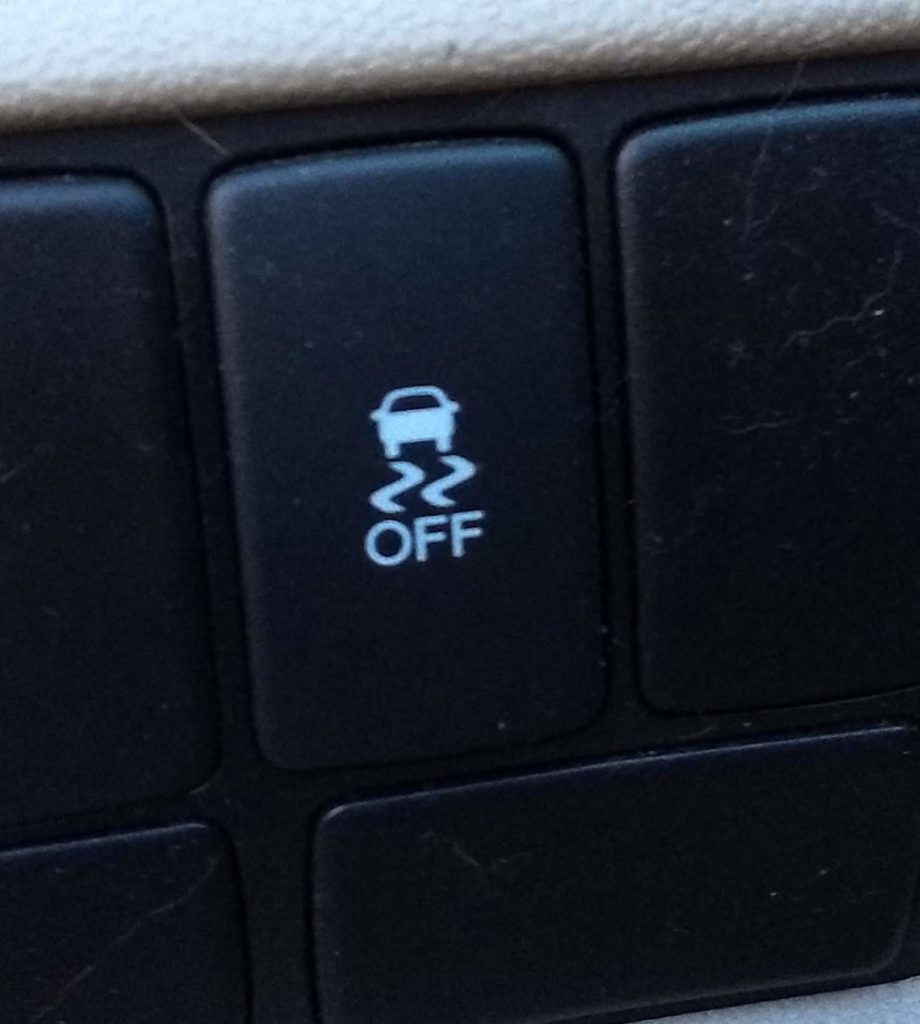
When the TPMS light is on (error mode) Honda will not let you disable the VSA (Vehicle Stability Assist). VSA helps bail out the great unwashed when they are about to fail a vehicular physics experiment, but sometimes you NEED to disable it. Honda even provides a handy button for you to do this.
Button to disable the electronic VSA safety net so you can do smoky burnouts with your cool minivan.
Why, you ask? VSA prevents slides, spin-outs, or other unwanted vehicle behavior when traction is lost (within the realm of physics–if you really brick it you might still need to change your underwear or worse). VSA also prevents your drive wheels from spinning if they break traction. All this electronic nannying is great until you WANT wheel spin. Like when you’re stuck in snow or mud and need to rock your vehicle out. Or if you’re trying to pull a snowy hill. Or, your daughter wants to impress her friends with an awesome burnout on your new set of tires. Etc. You get the idea.
But, if your TPMS light is on, none of this is possible. The VSA button goes inert and will not turn off VSA. But, if you’re stuck in snow and a wheel spins with any throttle, the VSA cuts the throttle and you get nothing but the gnashing of the ABS. You’re stuck because you can’t turn off the nanny and let things get a little wild. Or are you?
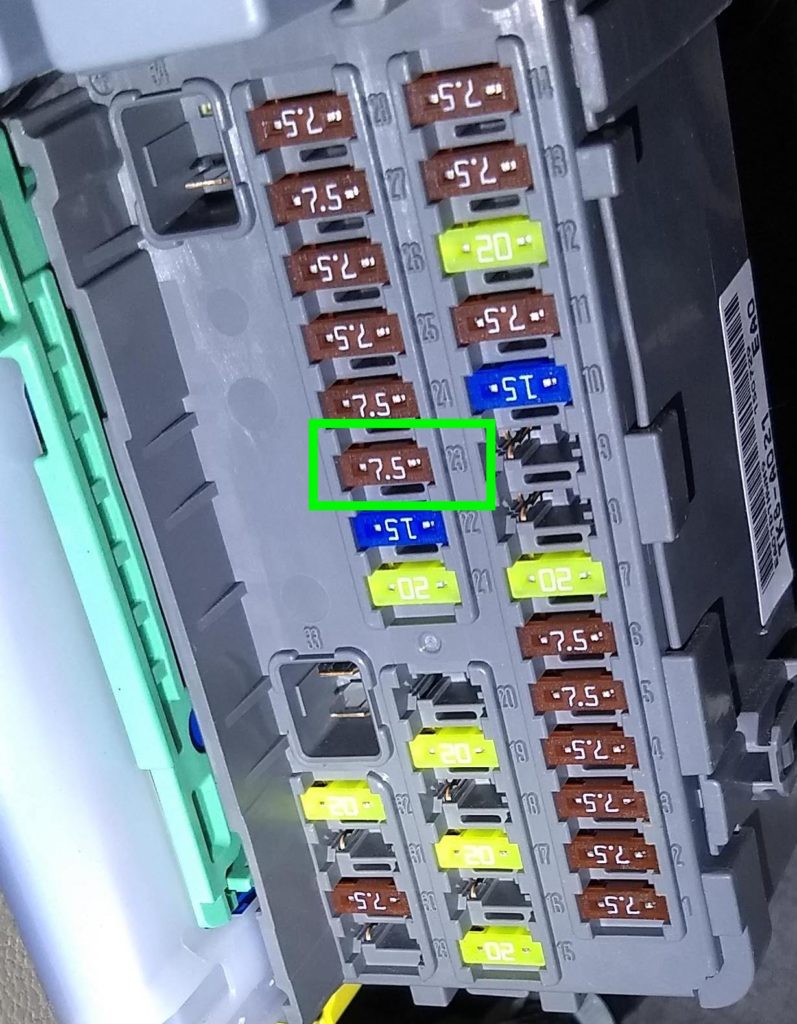
Tell the VSA Off
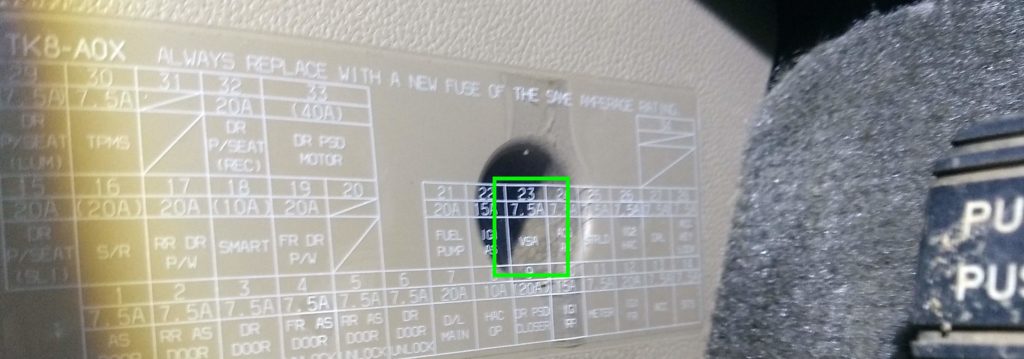
You will not find this in your manual, but you can pull the fuse to disable VSA system. On my 2016 Honda Odyssey LX it is a little 7.5A fuse in position #23 in the fuse block. I pulled that little sucker and could spin the wheels with the TPMS light on. The minivan was liberated from the chains of government and Honda suppression. But, the nanny was not happy and angrily flashed all sorts of idiot lights at me, including a particularly interesting show of the flashing “D” light while in “P.” Cool.
Proof
Pull the Fuse
VSA fuse identified in the diagram.Pull fuse to break a federal law.
Obviously, you should only use this hack when you need wheel spin to get unstuck or for a track day. Only a bozo would drive with this fuse out and the VSA disabled.
Honda: Your TPMS Sucks
Now that we’ve liberated your Honda, let’s look at why Honda’s implementation of TPMS is particularly bad.
I wanted to be a good kid so I bought my second set of wheels with Honda TPMS installed. Guess what? Honda only allows a SINGLE SET of wheels (x4 TPMS sensors) to be linked to the vehicle at any one time (at least on my lowly LX model). And, it gets better: Only the Honda stealership can connect sensors to your car. So, in this scenario, each time you swap your summer wheels/tires for your winter wheels/tires, the dealer would have to reconnect each set’s TPMS. That’s at least an hour of shop labor. Seriously, Honda? Your dealers are busy enough with all of the Takata recalls (you mean the first recall airbag has been recalled? What’s that? A re-recall?)
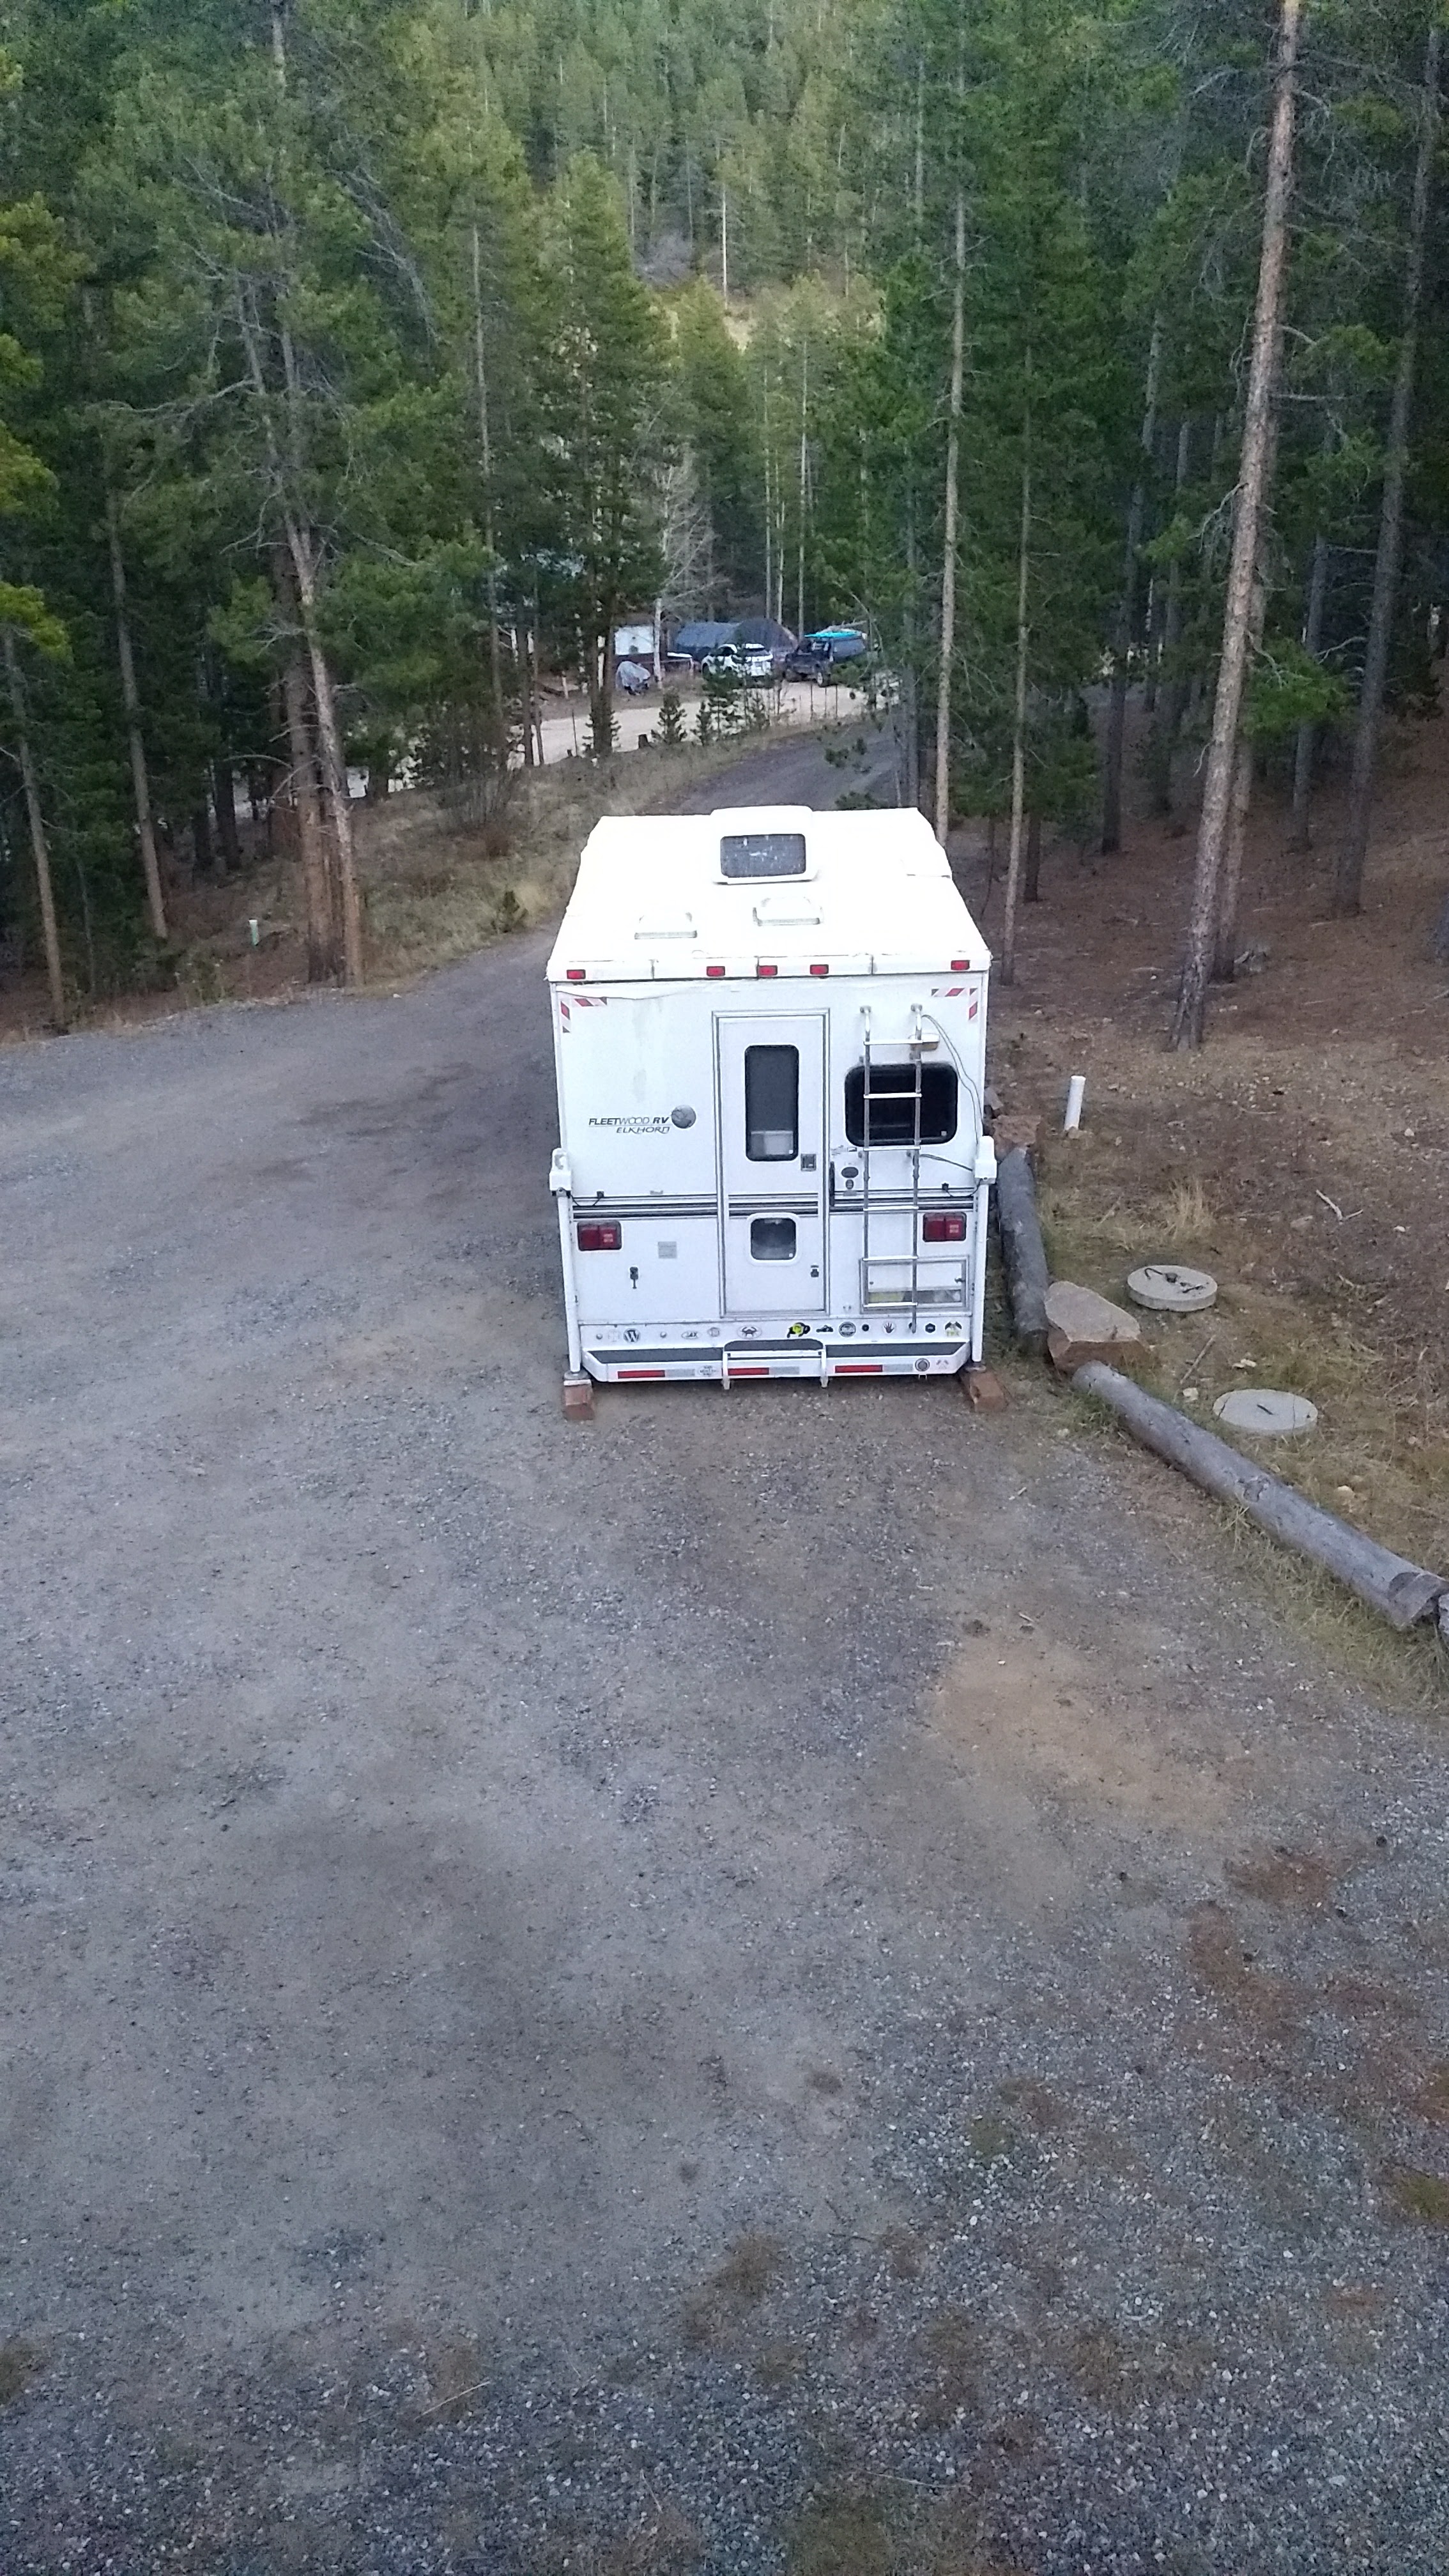
On our last camping trip, I noticed some oil spots on the back of the camper. I found a leak that was appearing at the bottom/back of the oil pan that was dripping one or two drops per second, but only when the truck was hot and running. It didn’t leak when parked or when driven on short trips.
I started by checking the usual suspects: Oil leaks from the HPOP (high pressure oil pump) items in the valley and the turbocharger’s oil seals. These leaks can run down the weep hole at the back passenger side of the valley in the center of the engine’s “V”, but everything was dry.
I checked the oil galley plugs at the back of cylinder heads, but these were dry as well. I was down to what I suspected was either an oil pan gasket or rear main seal leak. I was not looking forward to pulling either the engine or transmission to repair one of these.
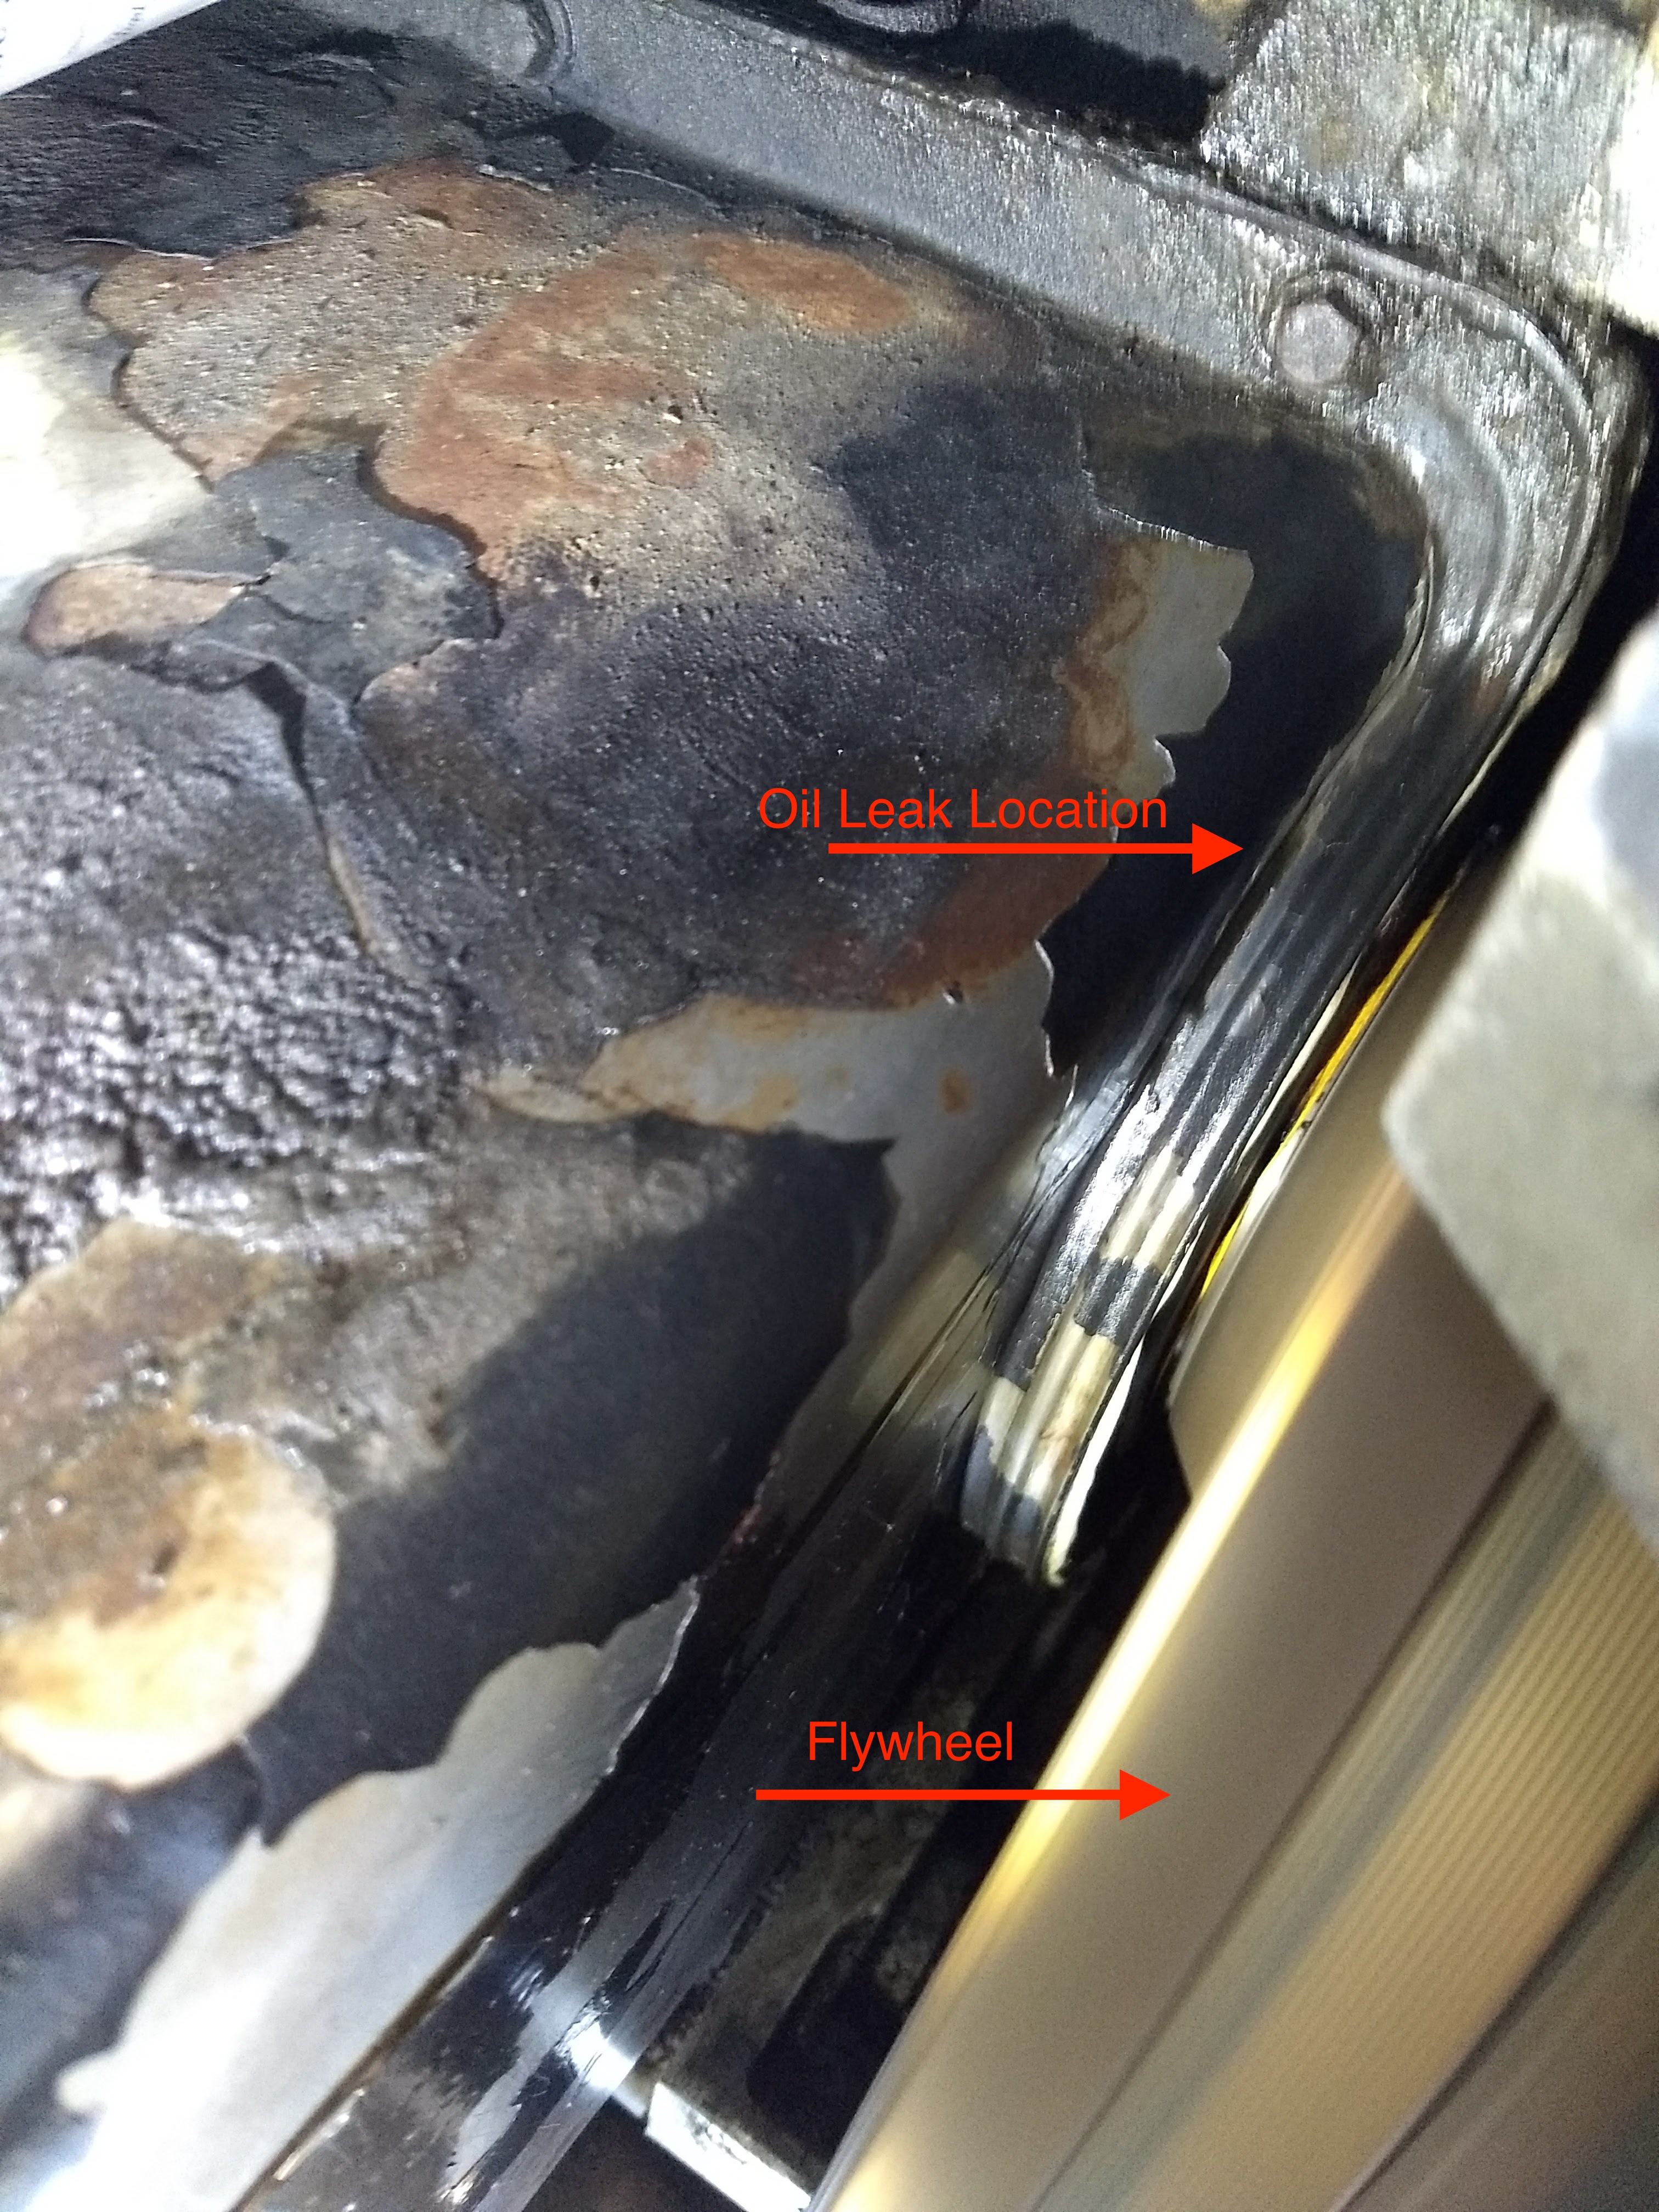
Diagnosis: Hole in Oil Pan From Clutch/Flywheel Inspection Cover
I drove the truck about 20 miles to warm it up. Sure enough, it was dripping several drops per second. I carefully inspected the pan and rear main seal areas, but couldn’t definitively tell where the leak was coming from. I pulled the flywheel inspection cover and could see a leak where oil was visibly running down the back of the pan, but it didn’t look like either the pan gasket or rear main seal.
I cleaned everything up, restarted the truck and looked again (making sure not to get anything caught in the spinning flywheel of death). The rear main looked dry as did the oil pan gasket. The oil was appearing to ooze out of an area of the oil pan near where the flywheel inspection cover lip was contacting the oil pan. I cleaned it up again, and sure enough, the inspection cover had worn a hole in the oil pan. You can see the area in the picture below:
Oil leak from a hole in the oil pan where the flywheel inspection cover rubbed through the pan.
In the videos you can see where the oil emerges from the pan where the flywheel cover came into contact with it and runs down the back of the pan to drip off the bottom.
I found a Ford TSB (technical service bulletin) Ford #95-14-12 where this issue is described. 1994-1995 Powerstroke 7.3 engines are affected by this. Ford released an updated flywheel cover, Ford part # F5TZ-7007-AD to resolve this.
The Planned Cheap Fix: Seal the Pan
The “official” fix from Ford is to replace the oil pan and install the updated flywheel cover. This is not a good options for me right now. Other than a small external head gasket leak near the oil cooler (it’s not the oil cooler–that’s already been rebuilt with new o-rings), the engine is in excellent shape and I’d prefer to avoid pulling it out to replace the pan. I’d rather wait for a “real” reason to dig in that far…
My plan is to attempt to seal the pan and cut off the offending lip on the flywheel cover. I’m researching the best sealant. JB Weld and Quicksteel are contenders for their temperature range and resistance to diesel and oil. I’m going to wire brush the area on the pan, sand, and clean it with brake cleaner prior to putting on the sealant. Once cured, the sealant will be followed by a paint/sealant like POR-15.
Update
It’s been almost 3 years and 10,000 miles since I tried the repair proposed above and everything is still holding solid.
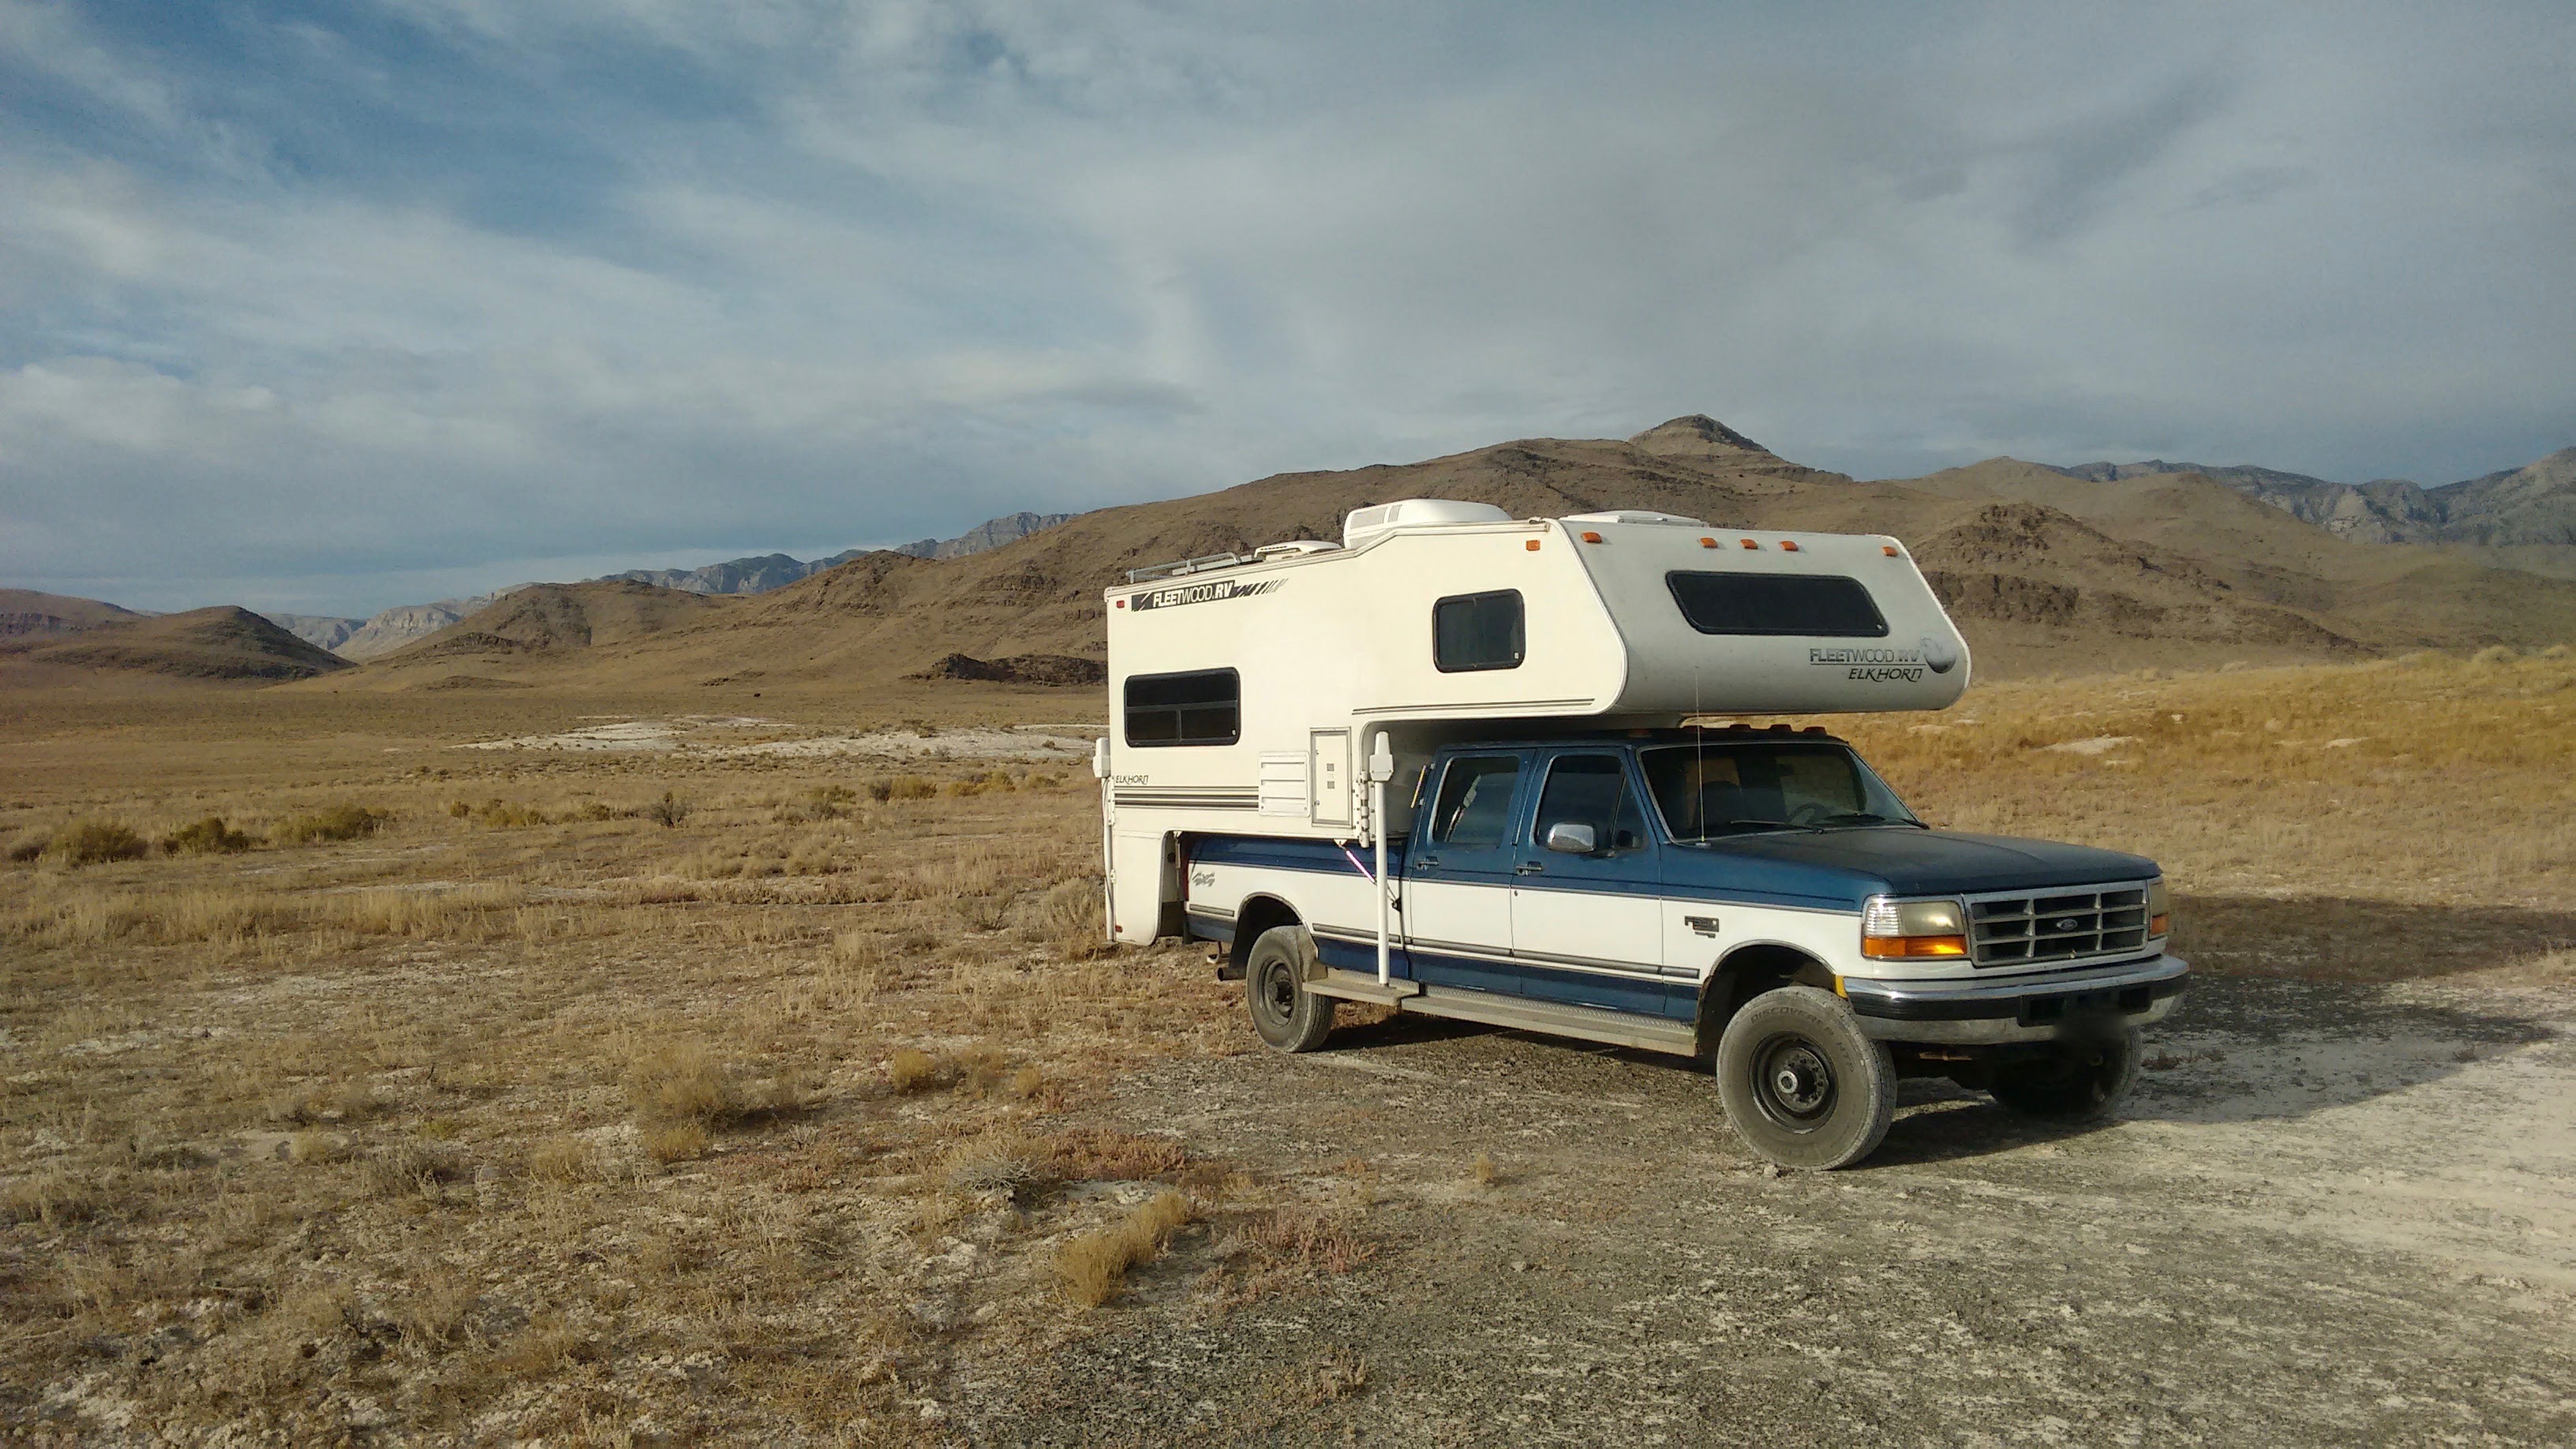
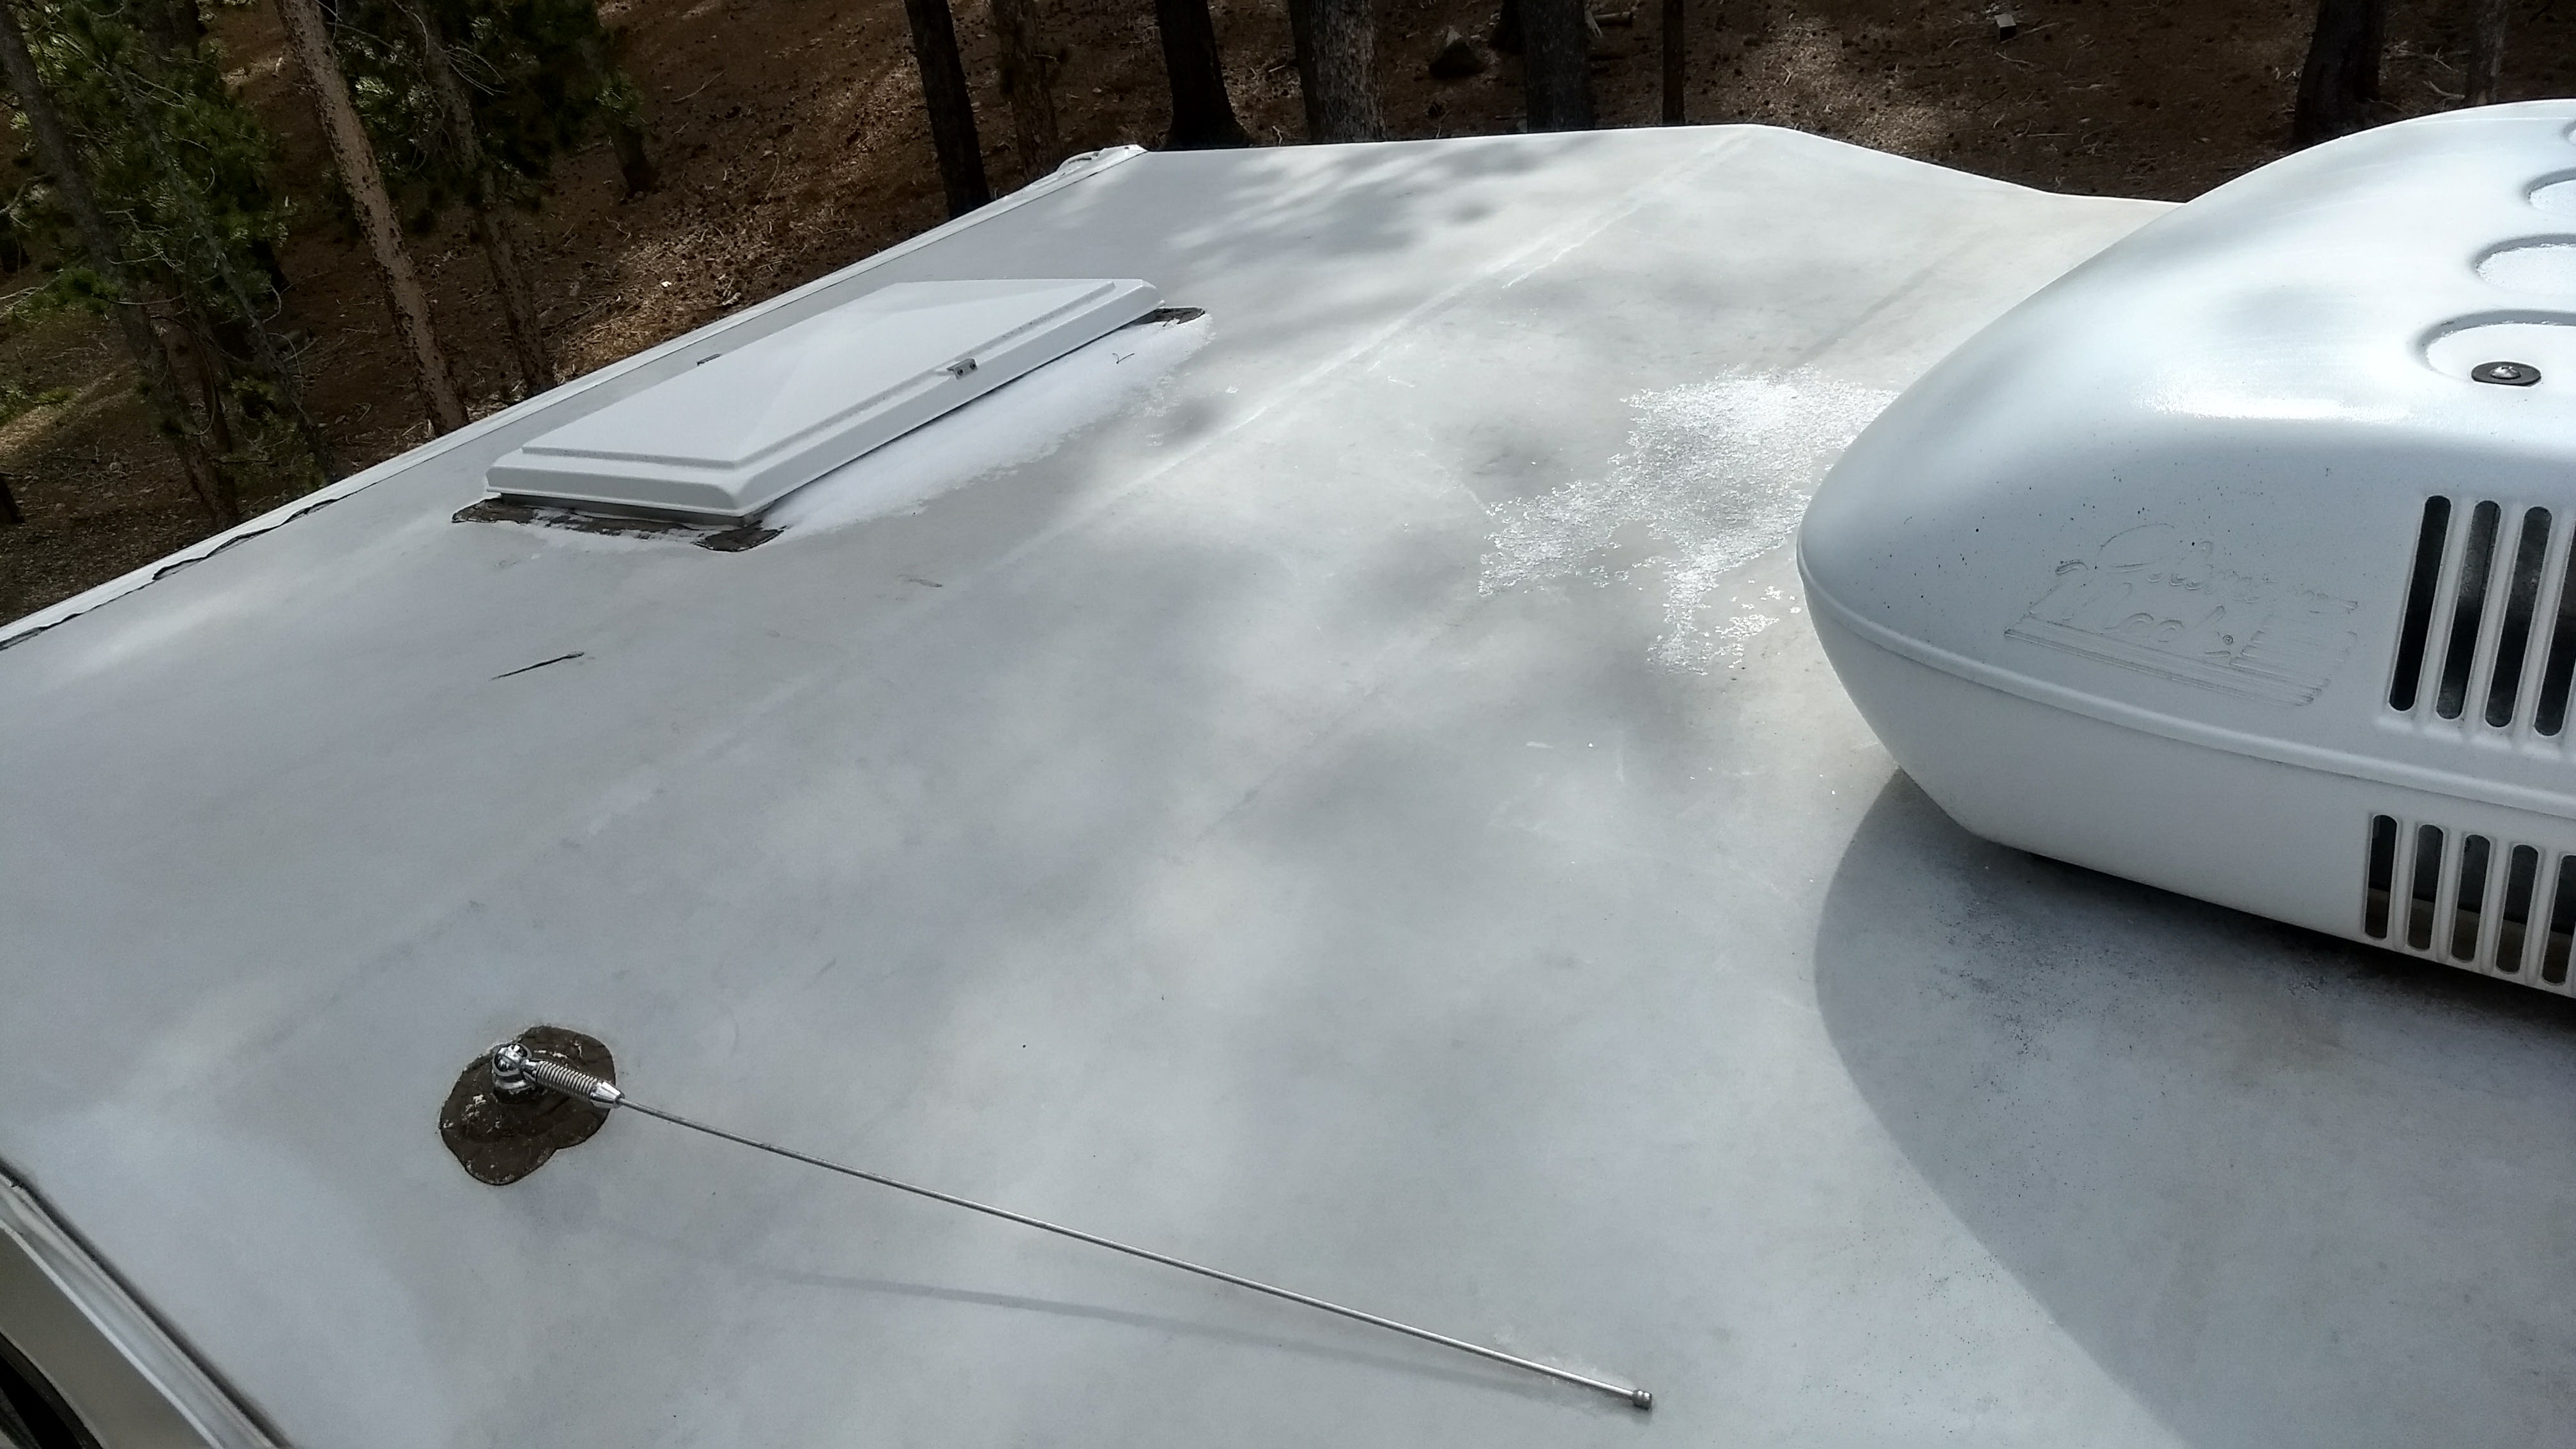
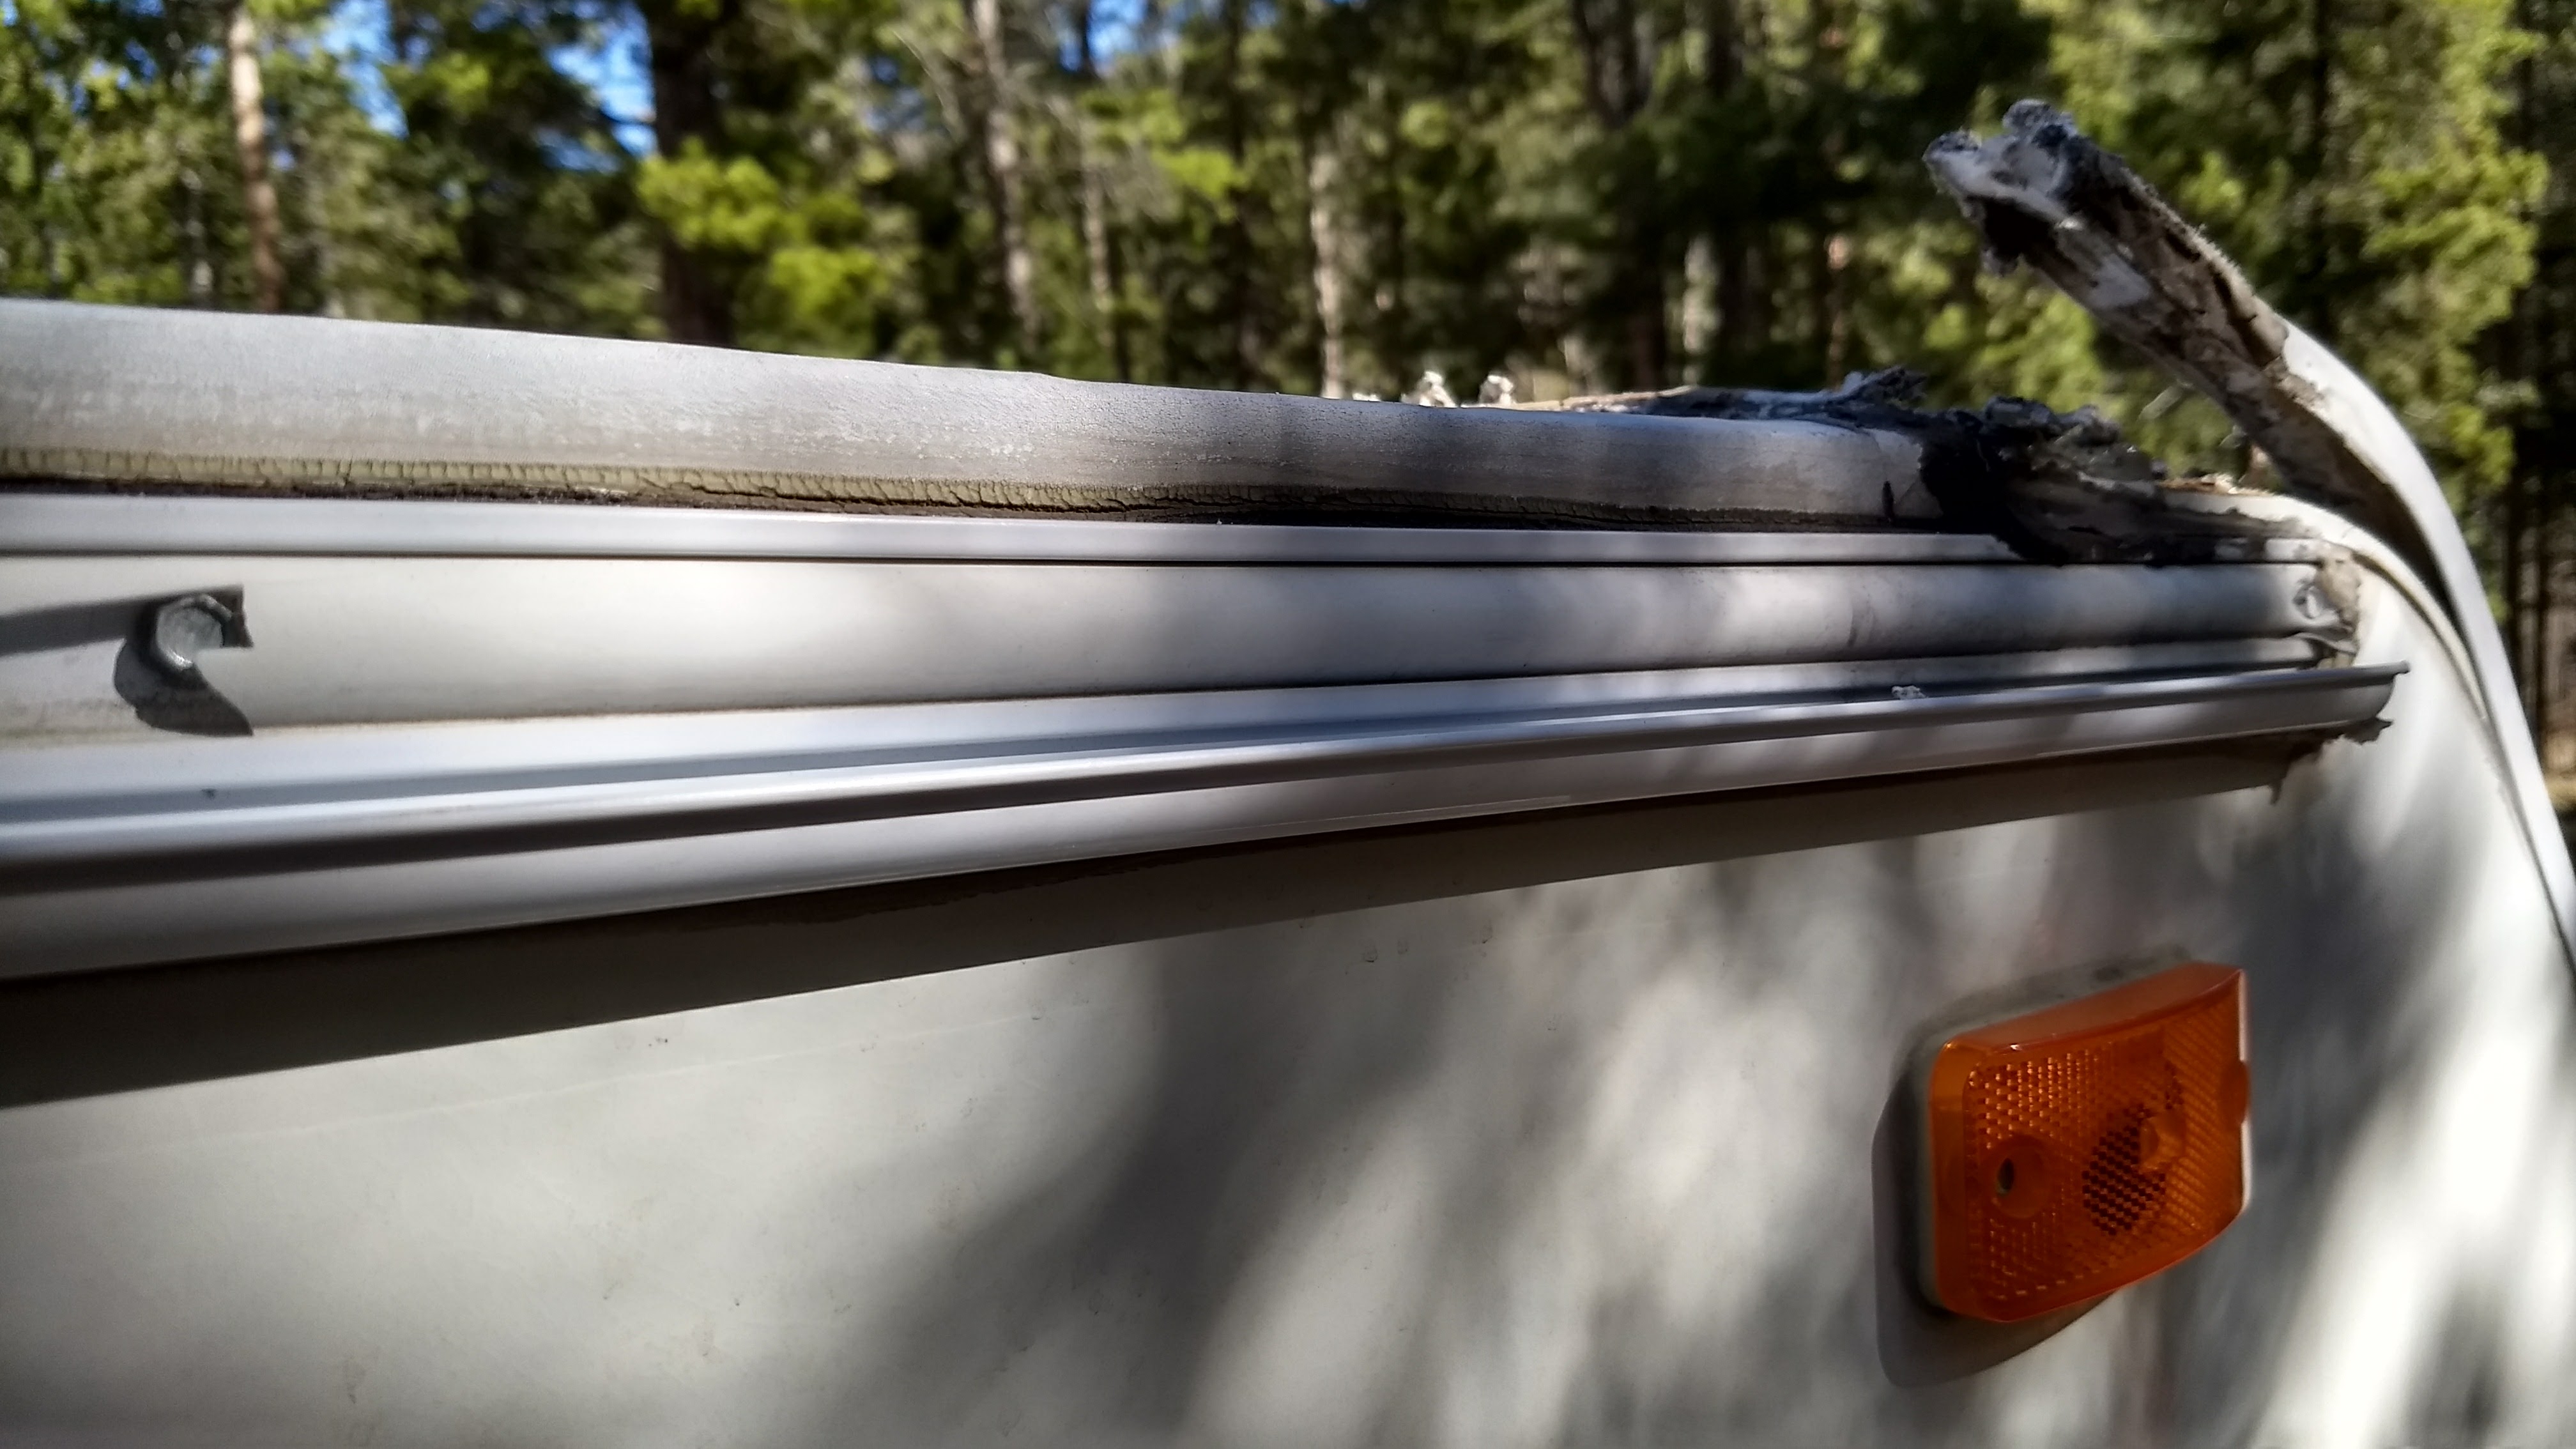
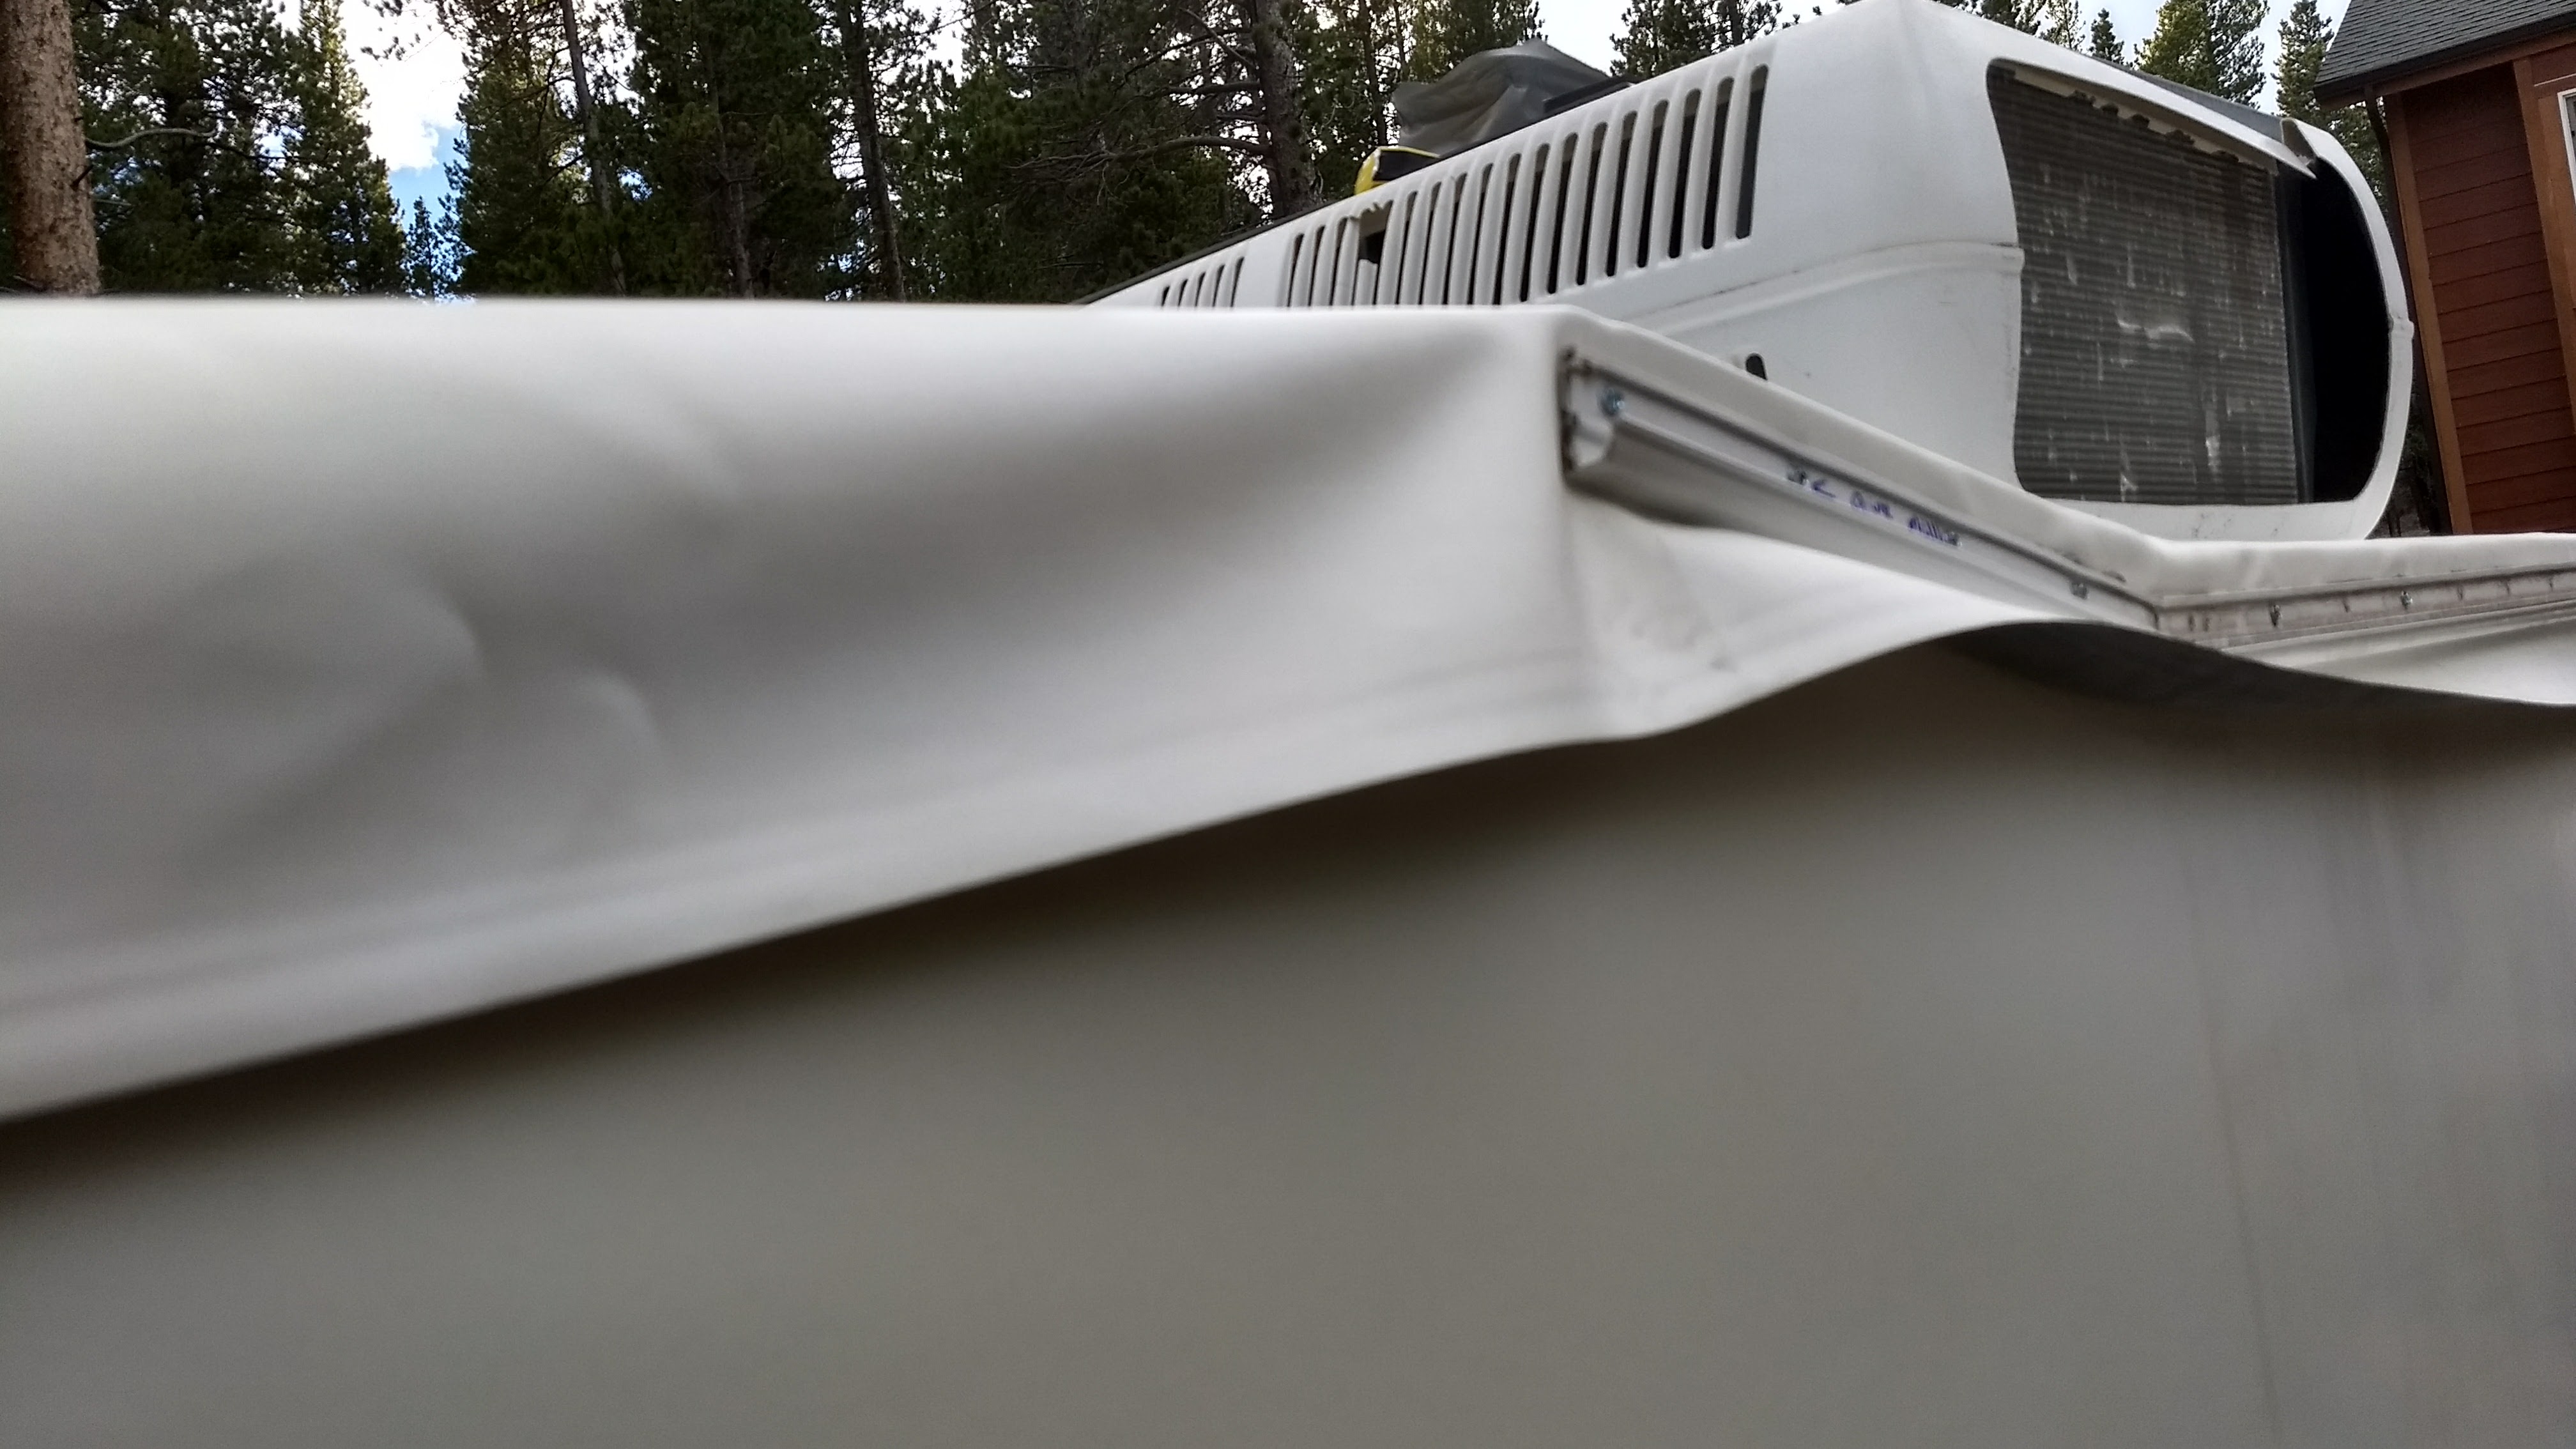
I bought this truck camper in 2009 in Rio Rancho, New Mexico. It was always garaged before coming home with me, but I didn’t have that luxury. It spent the next 8 years out in the New Mexico and Colorado sun. Looking back, I wish I had taken better care of the roof. Stripping off the old goop and refreshing it with new self-leveling sealant around the fixtures and roof penetrations would have preserved the roof for a few more years.
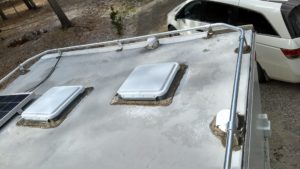
I knew the old sealant was cracking and I attempted to patch it up over the years with silicone (don’t do this), butyl seal tape, and dicor patches. It’s questionable as to whether this half-effort did any good. This past fall I noticed a “bubble” in the bathroom ceiling that felt a little soft. This was at the left rear corner where I’d been trying to patch. I knew it was time to take the roof seriously.
You can see the chalky old EPDM, cracked sealant, and half-bad repairs.
More old chalky EPDM with an old school FM antenna.
The DIY Decision
I checked around at a couple of RV dealers to get an idea of what a roof repair would cost. I was quoted prices well over what I had paid for the camper back in 2009. They were asking $600 for a 17′ roll of EPDM. Amazon was pricing it out at $17 per foot. How hard can replacing the roof possibly be? With winter already beginning to make guest appearances in October, I decided it was time and ordered everything from Amazon (parts list below).
Replacing the Roof
Step 1: Take Everything Off.
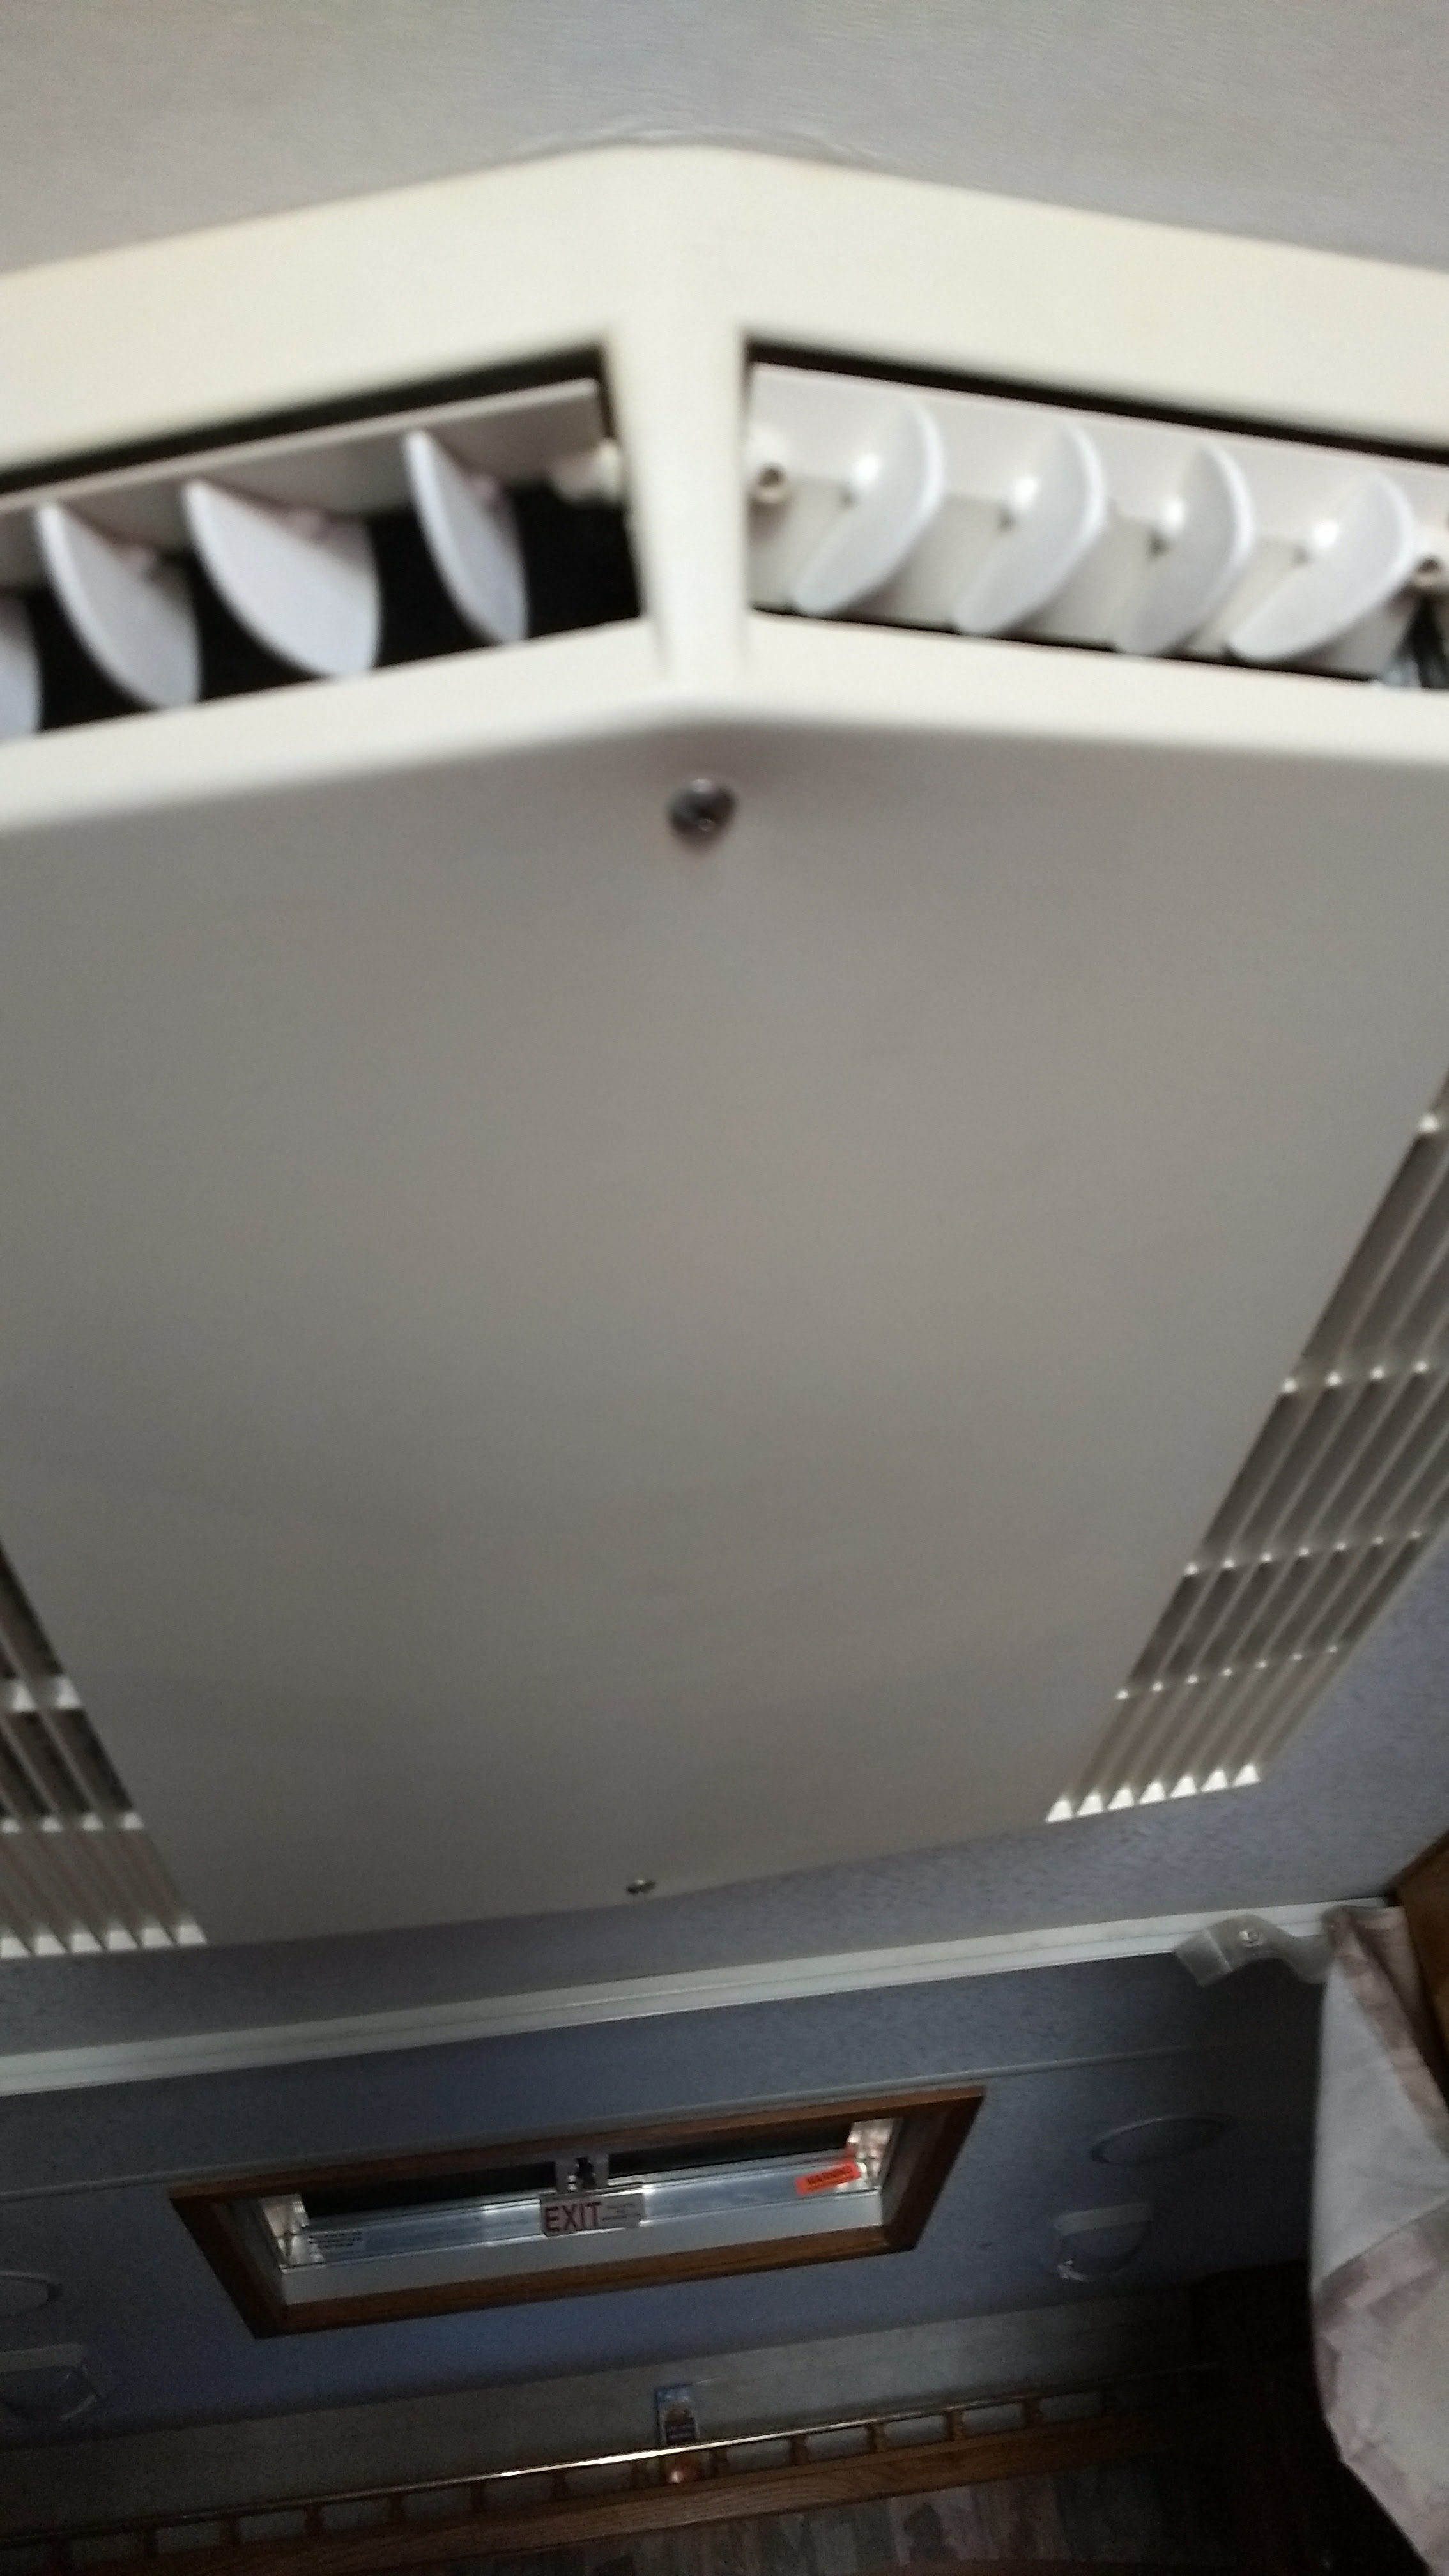
I decided I would start with the old Coleman Mach III A/C unit first. I figured that if this was a fail, I’d still have a roof and could regroup. I started inside the camper and removed the fan speed and temperature control knobs. Then, I pulled the bottom cover off with the two Phillips head screws.
Pull the two knobs and these two Phillips screws and the cover will come right off.
Cover removed on A/C.
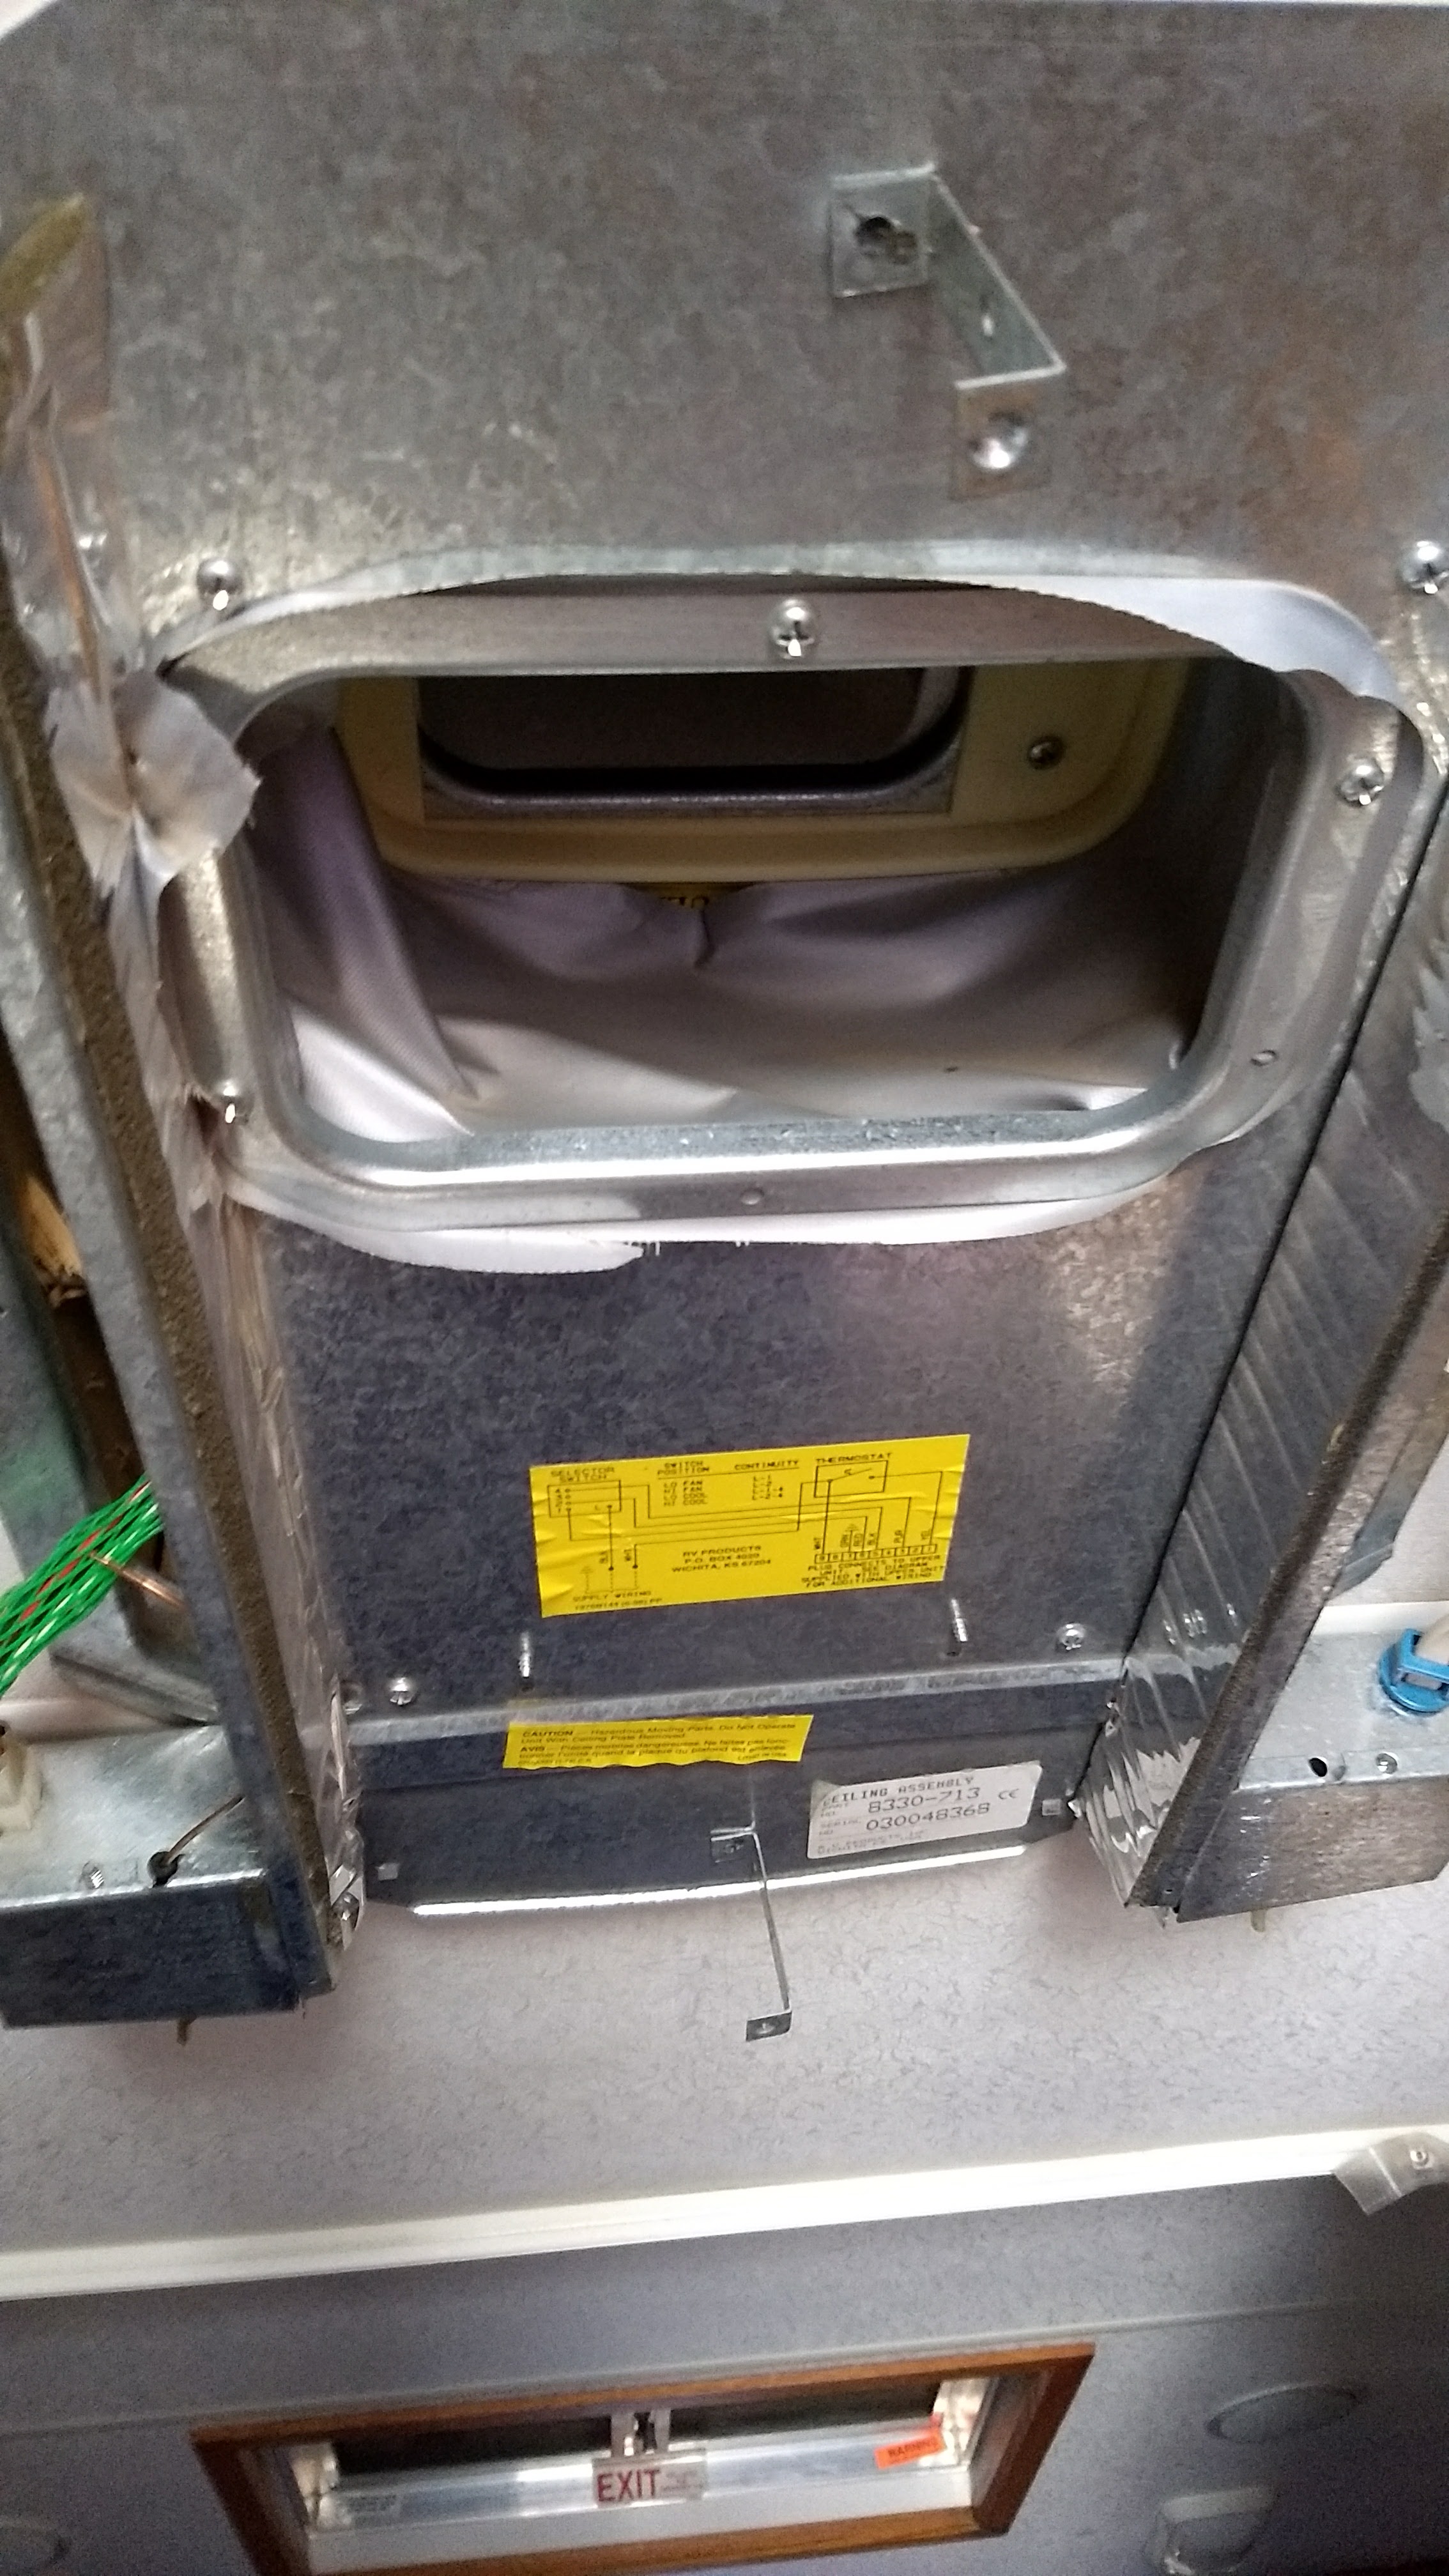
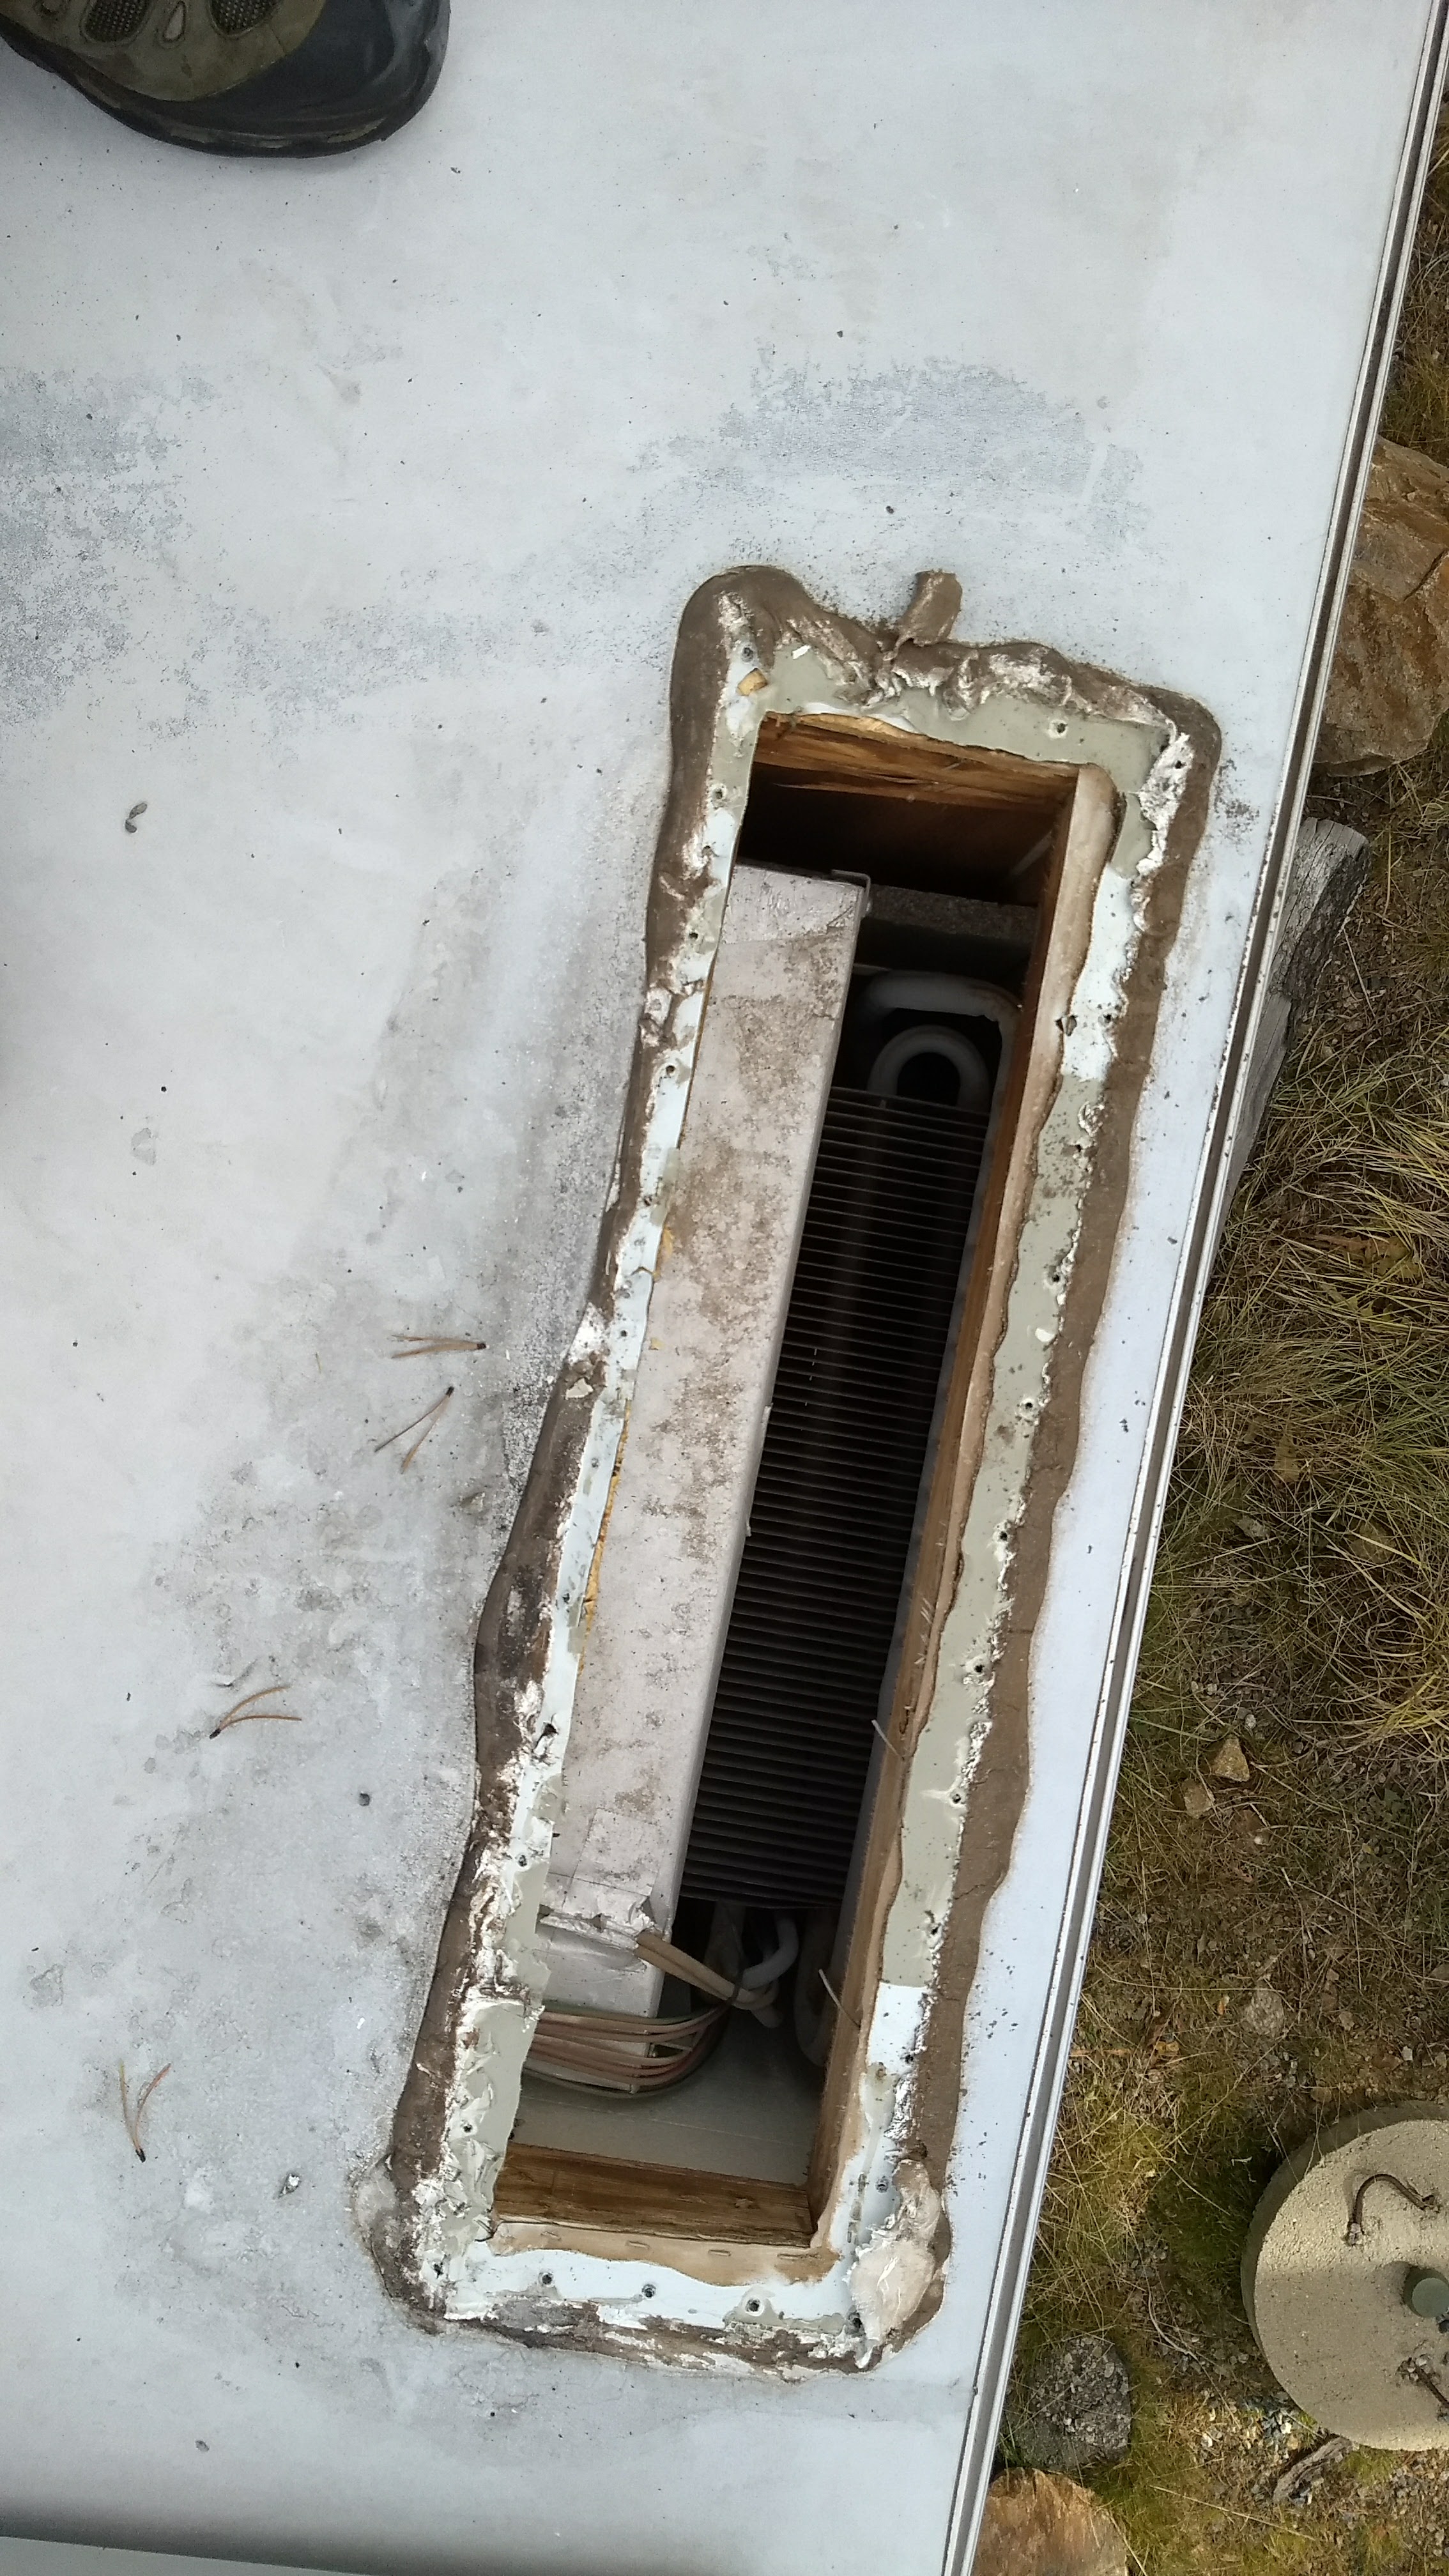
At this point, I double-checked that the camper power was off and unplugged the A/C unit. I removed the metal panel via the sheet metal screws and the somewhat flexible duct. Once the metal panel was out, I removed the 4 corner bolts sandwiching the mounting plate and A/C.
I went back up top and lifted the A/C unit to the side. I was surprised by how heavy the A/C was and decided that given the weight and brittleness of the shroud that I’d leave the unit upside down on the roof and work around it.
Now that the A/C was successfully and, dare I say, easily removed I decided to proceed. I grabbed a gasket scraper, the drill with a 1/4″ driver, and a heat gun. Applying heat to the ancient sun-baked self-leveling sealant helped me scrape off enough of the gunk to get at the bazillion 1/4″ screw heads holding everything together.
Starting with the refrigerator top vent I began heating, scraping, unscrewing, peeling, and prying things off the roof.
Given how brittle the refrigerator vent cover was, I decided to yank the top cover off. That was mostly successful.
I then spent 30 minutes getting the goo off of the screw heads so the rest of the vent could be removed.
Refrigerator vent removed.
Scraping the goop was slow going.
Heat gunning and gasket scraping Ventline roof vent.
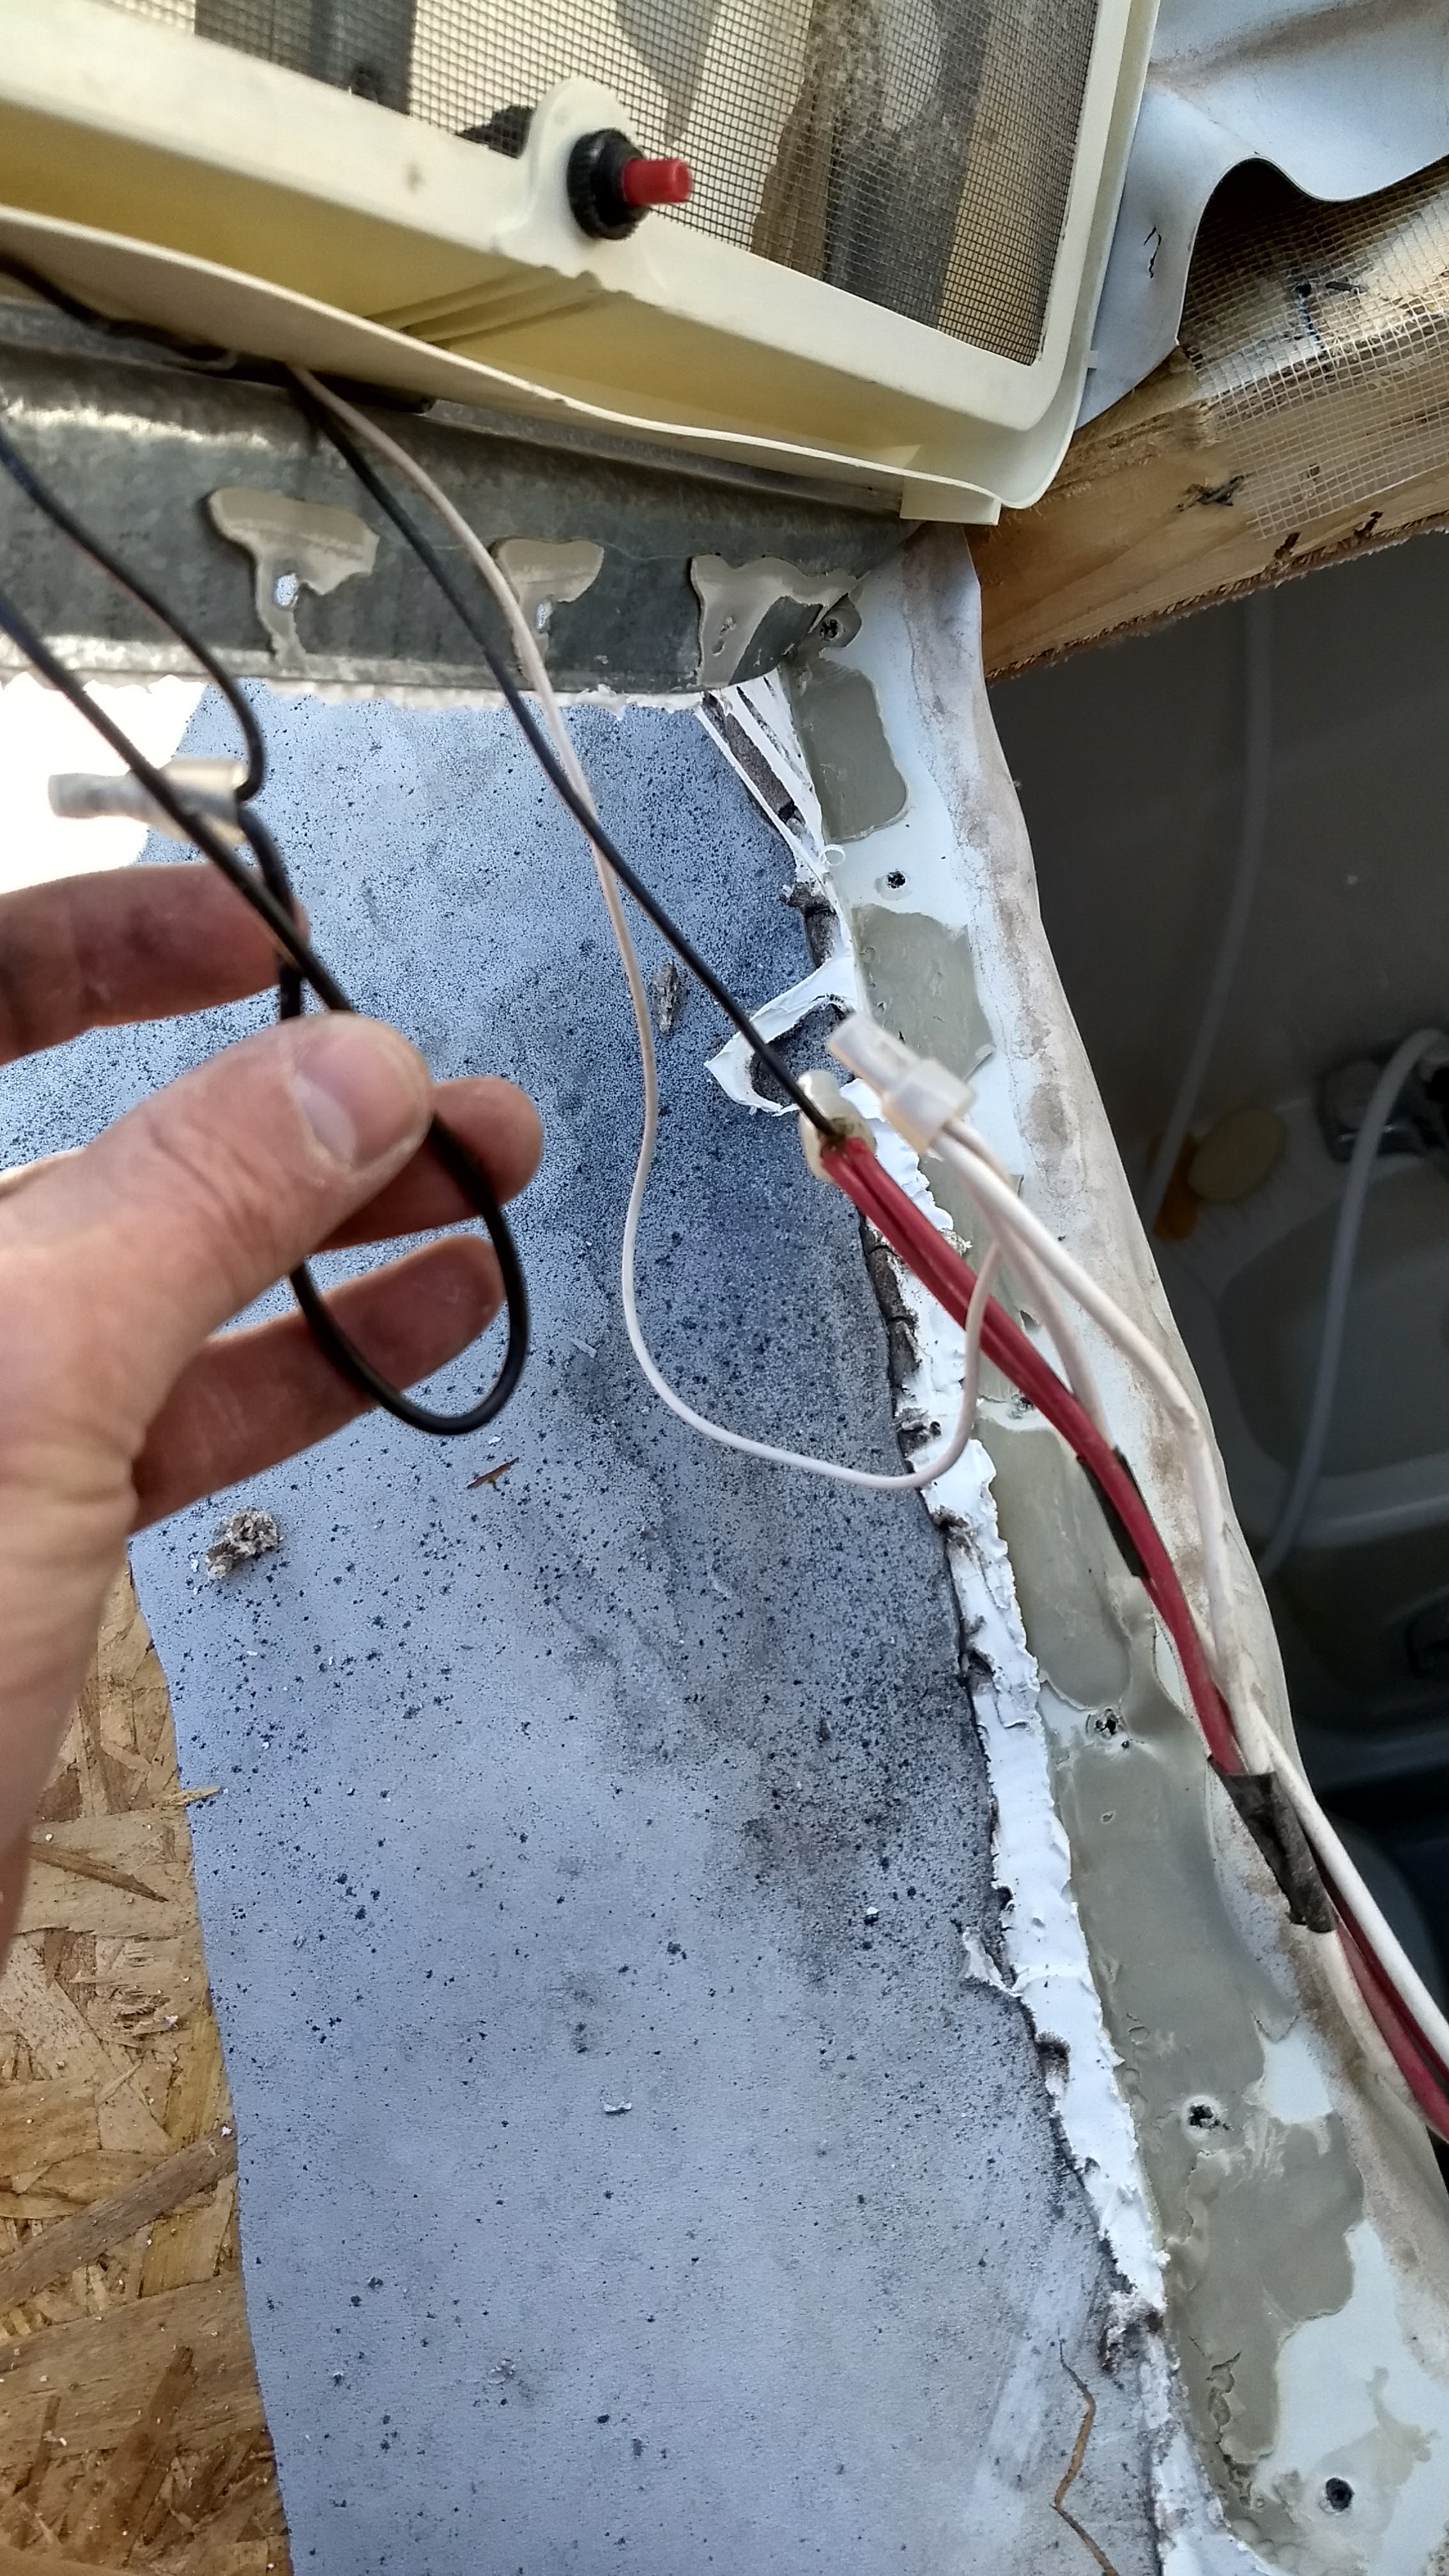
Ventline bathroom fan coming out with a shot of the wiring.
Goop-covered FM Antenna.
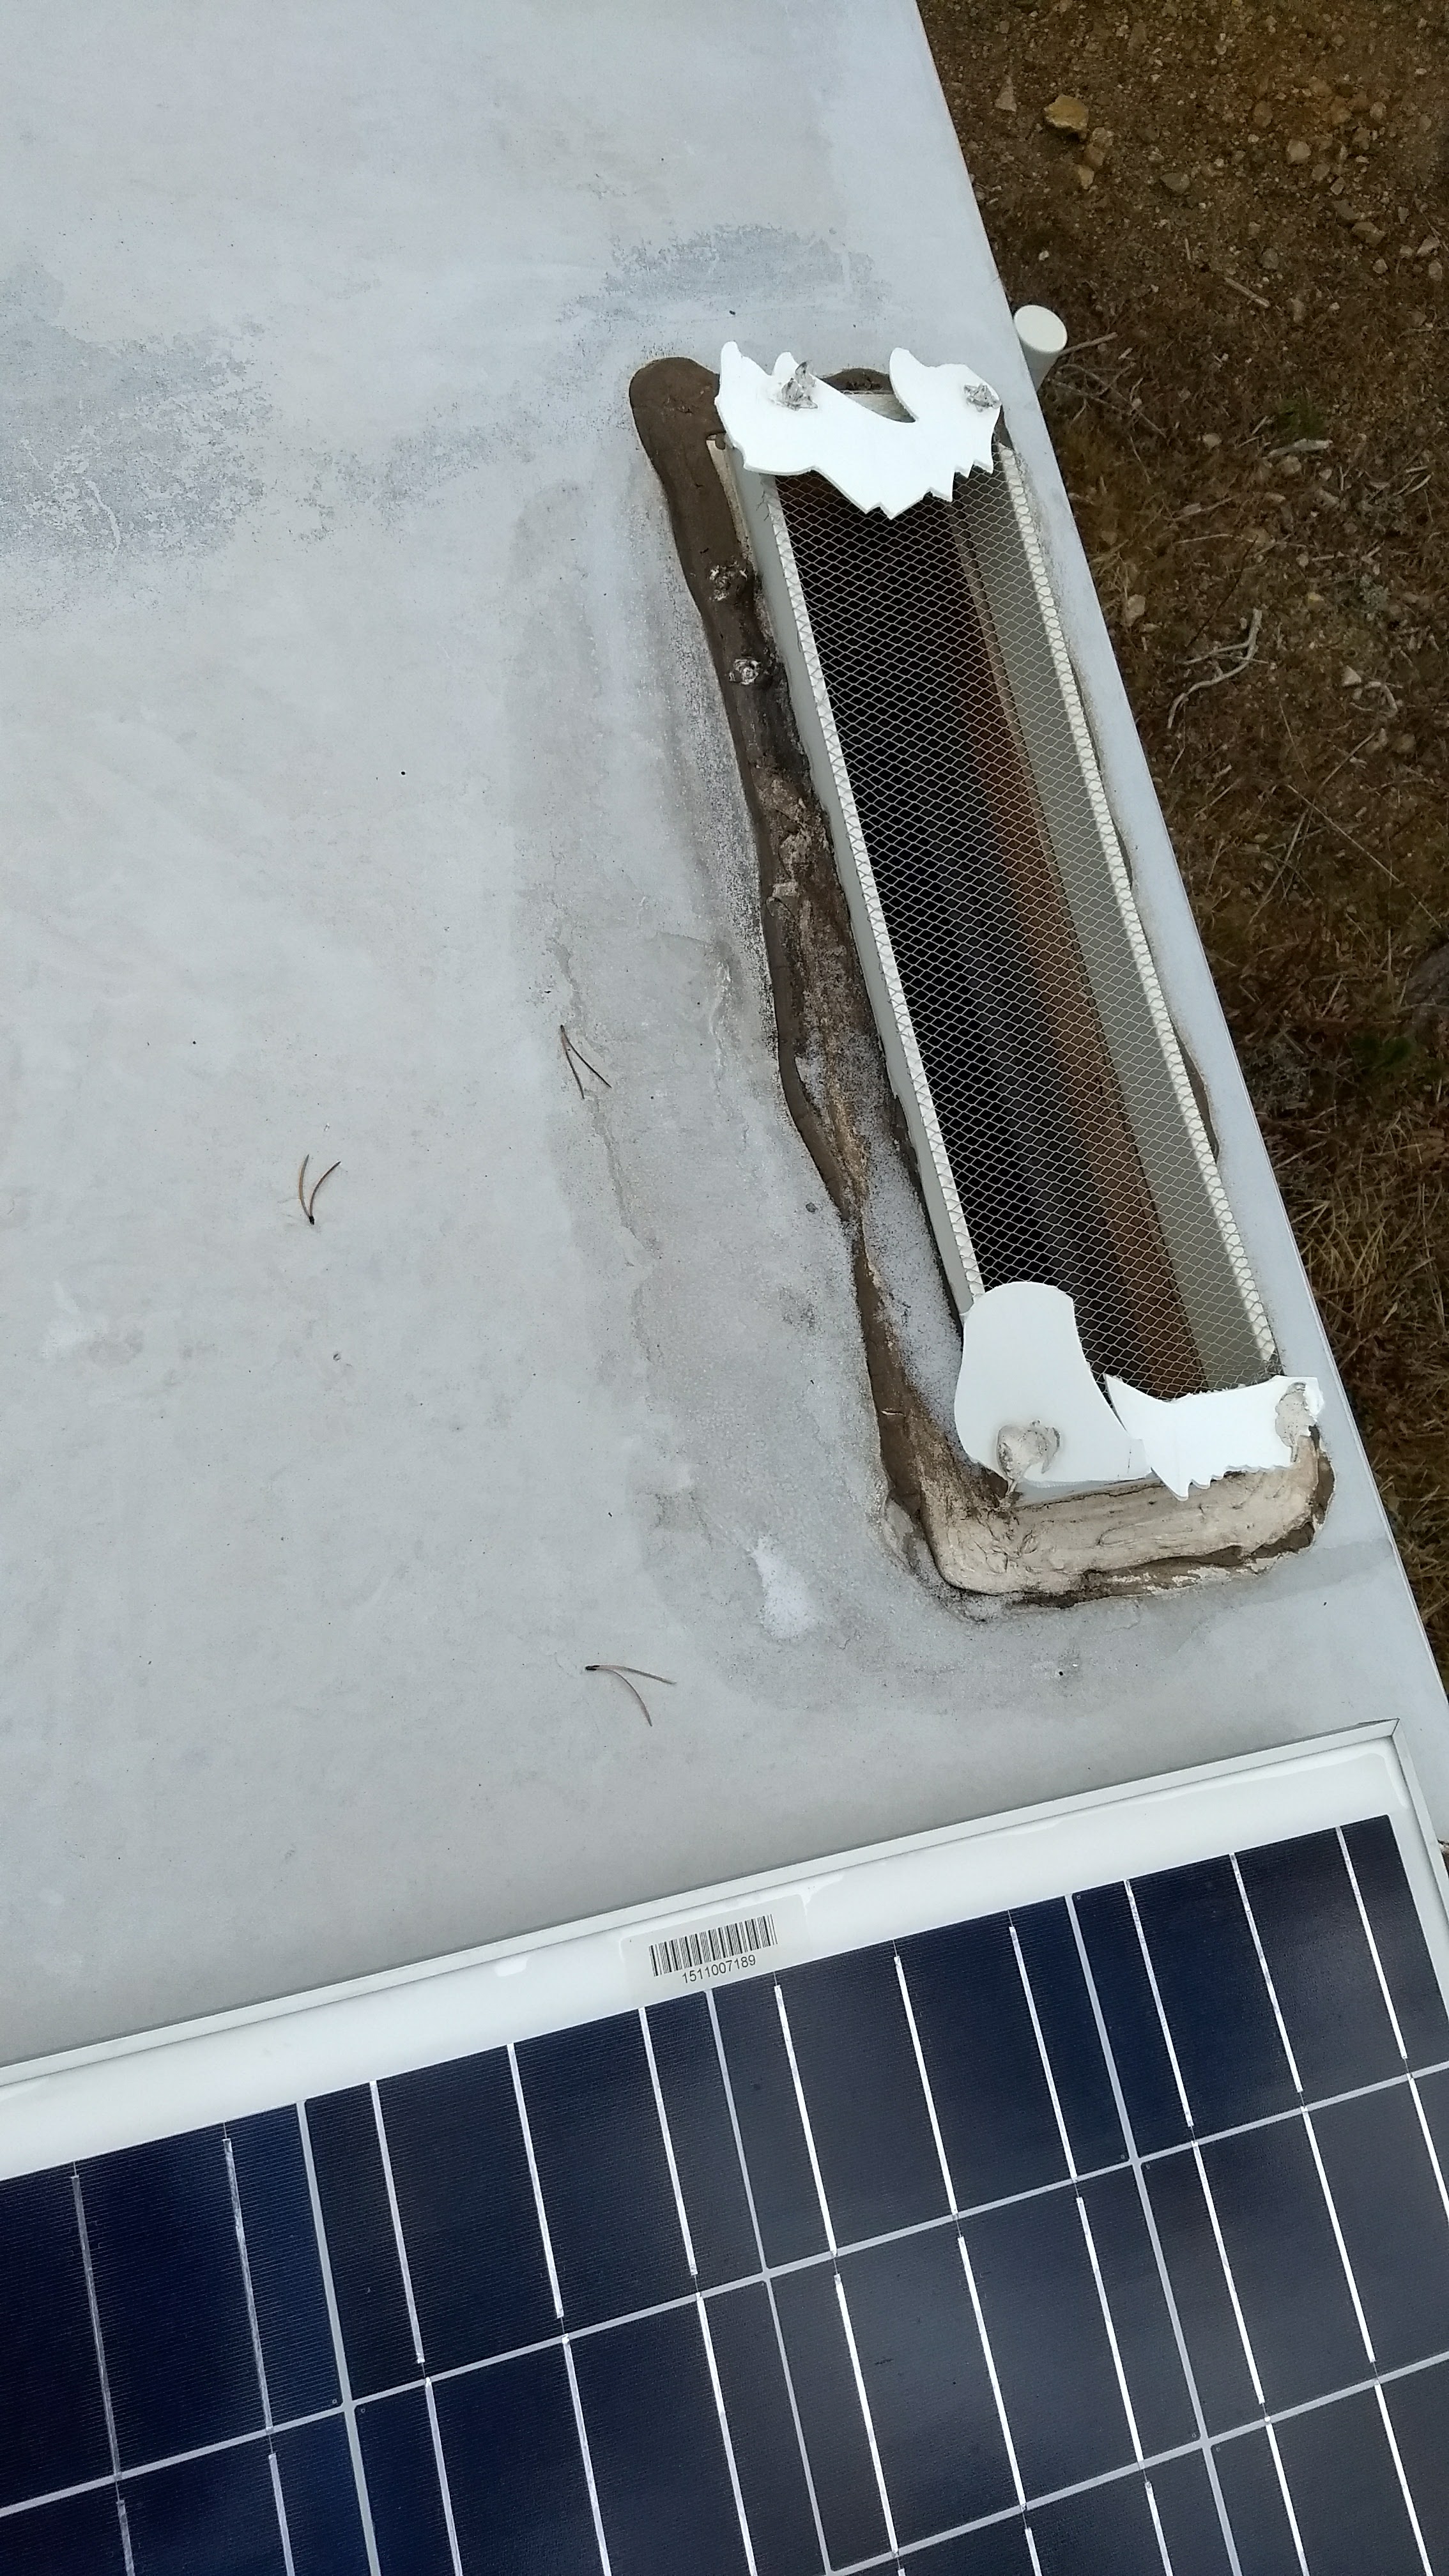
I decided that I wanted as few roof penetrations as possible on my new roof. The FM antenna, satellite coax jack, and roof rack were not coming back.
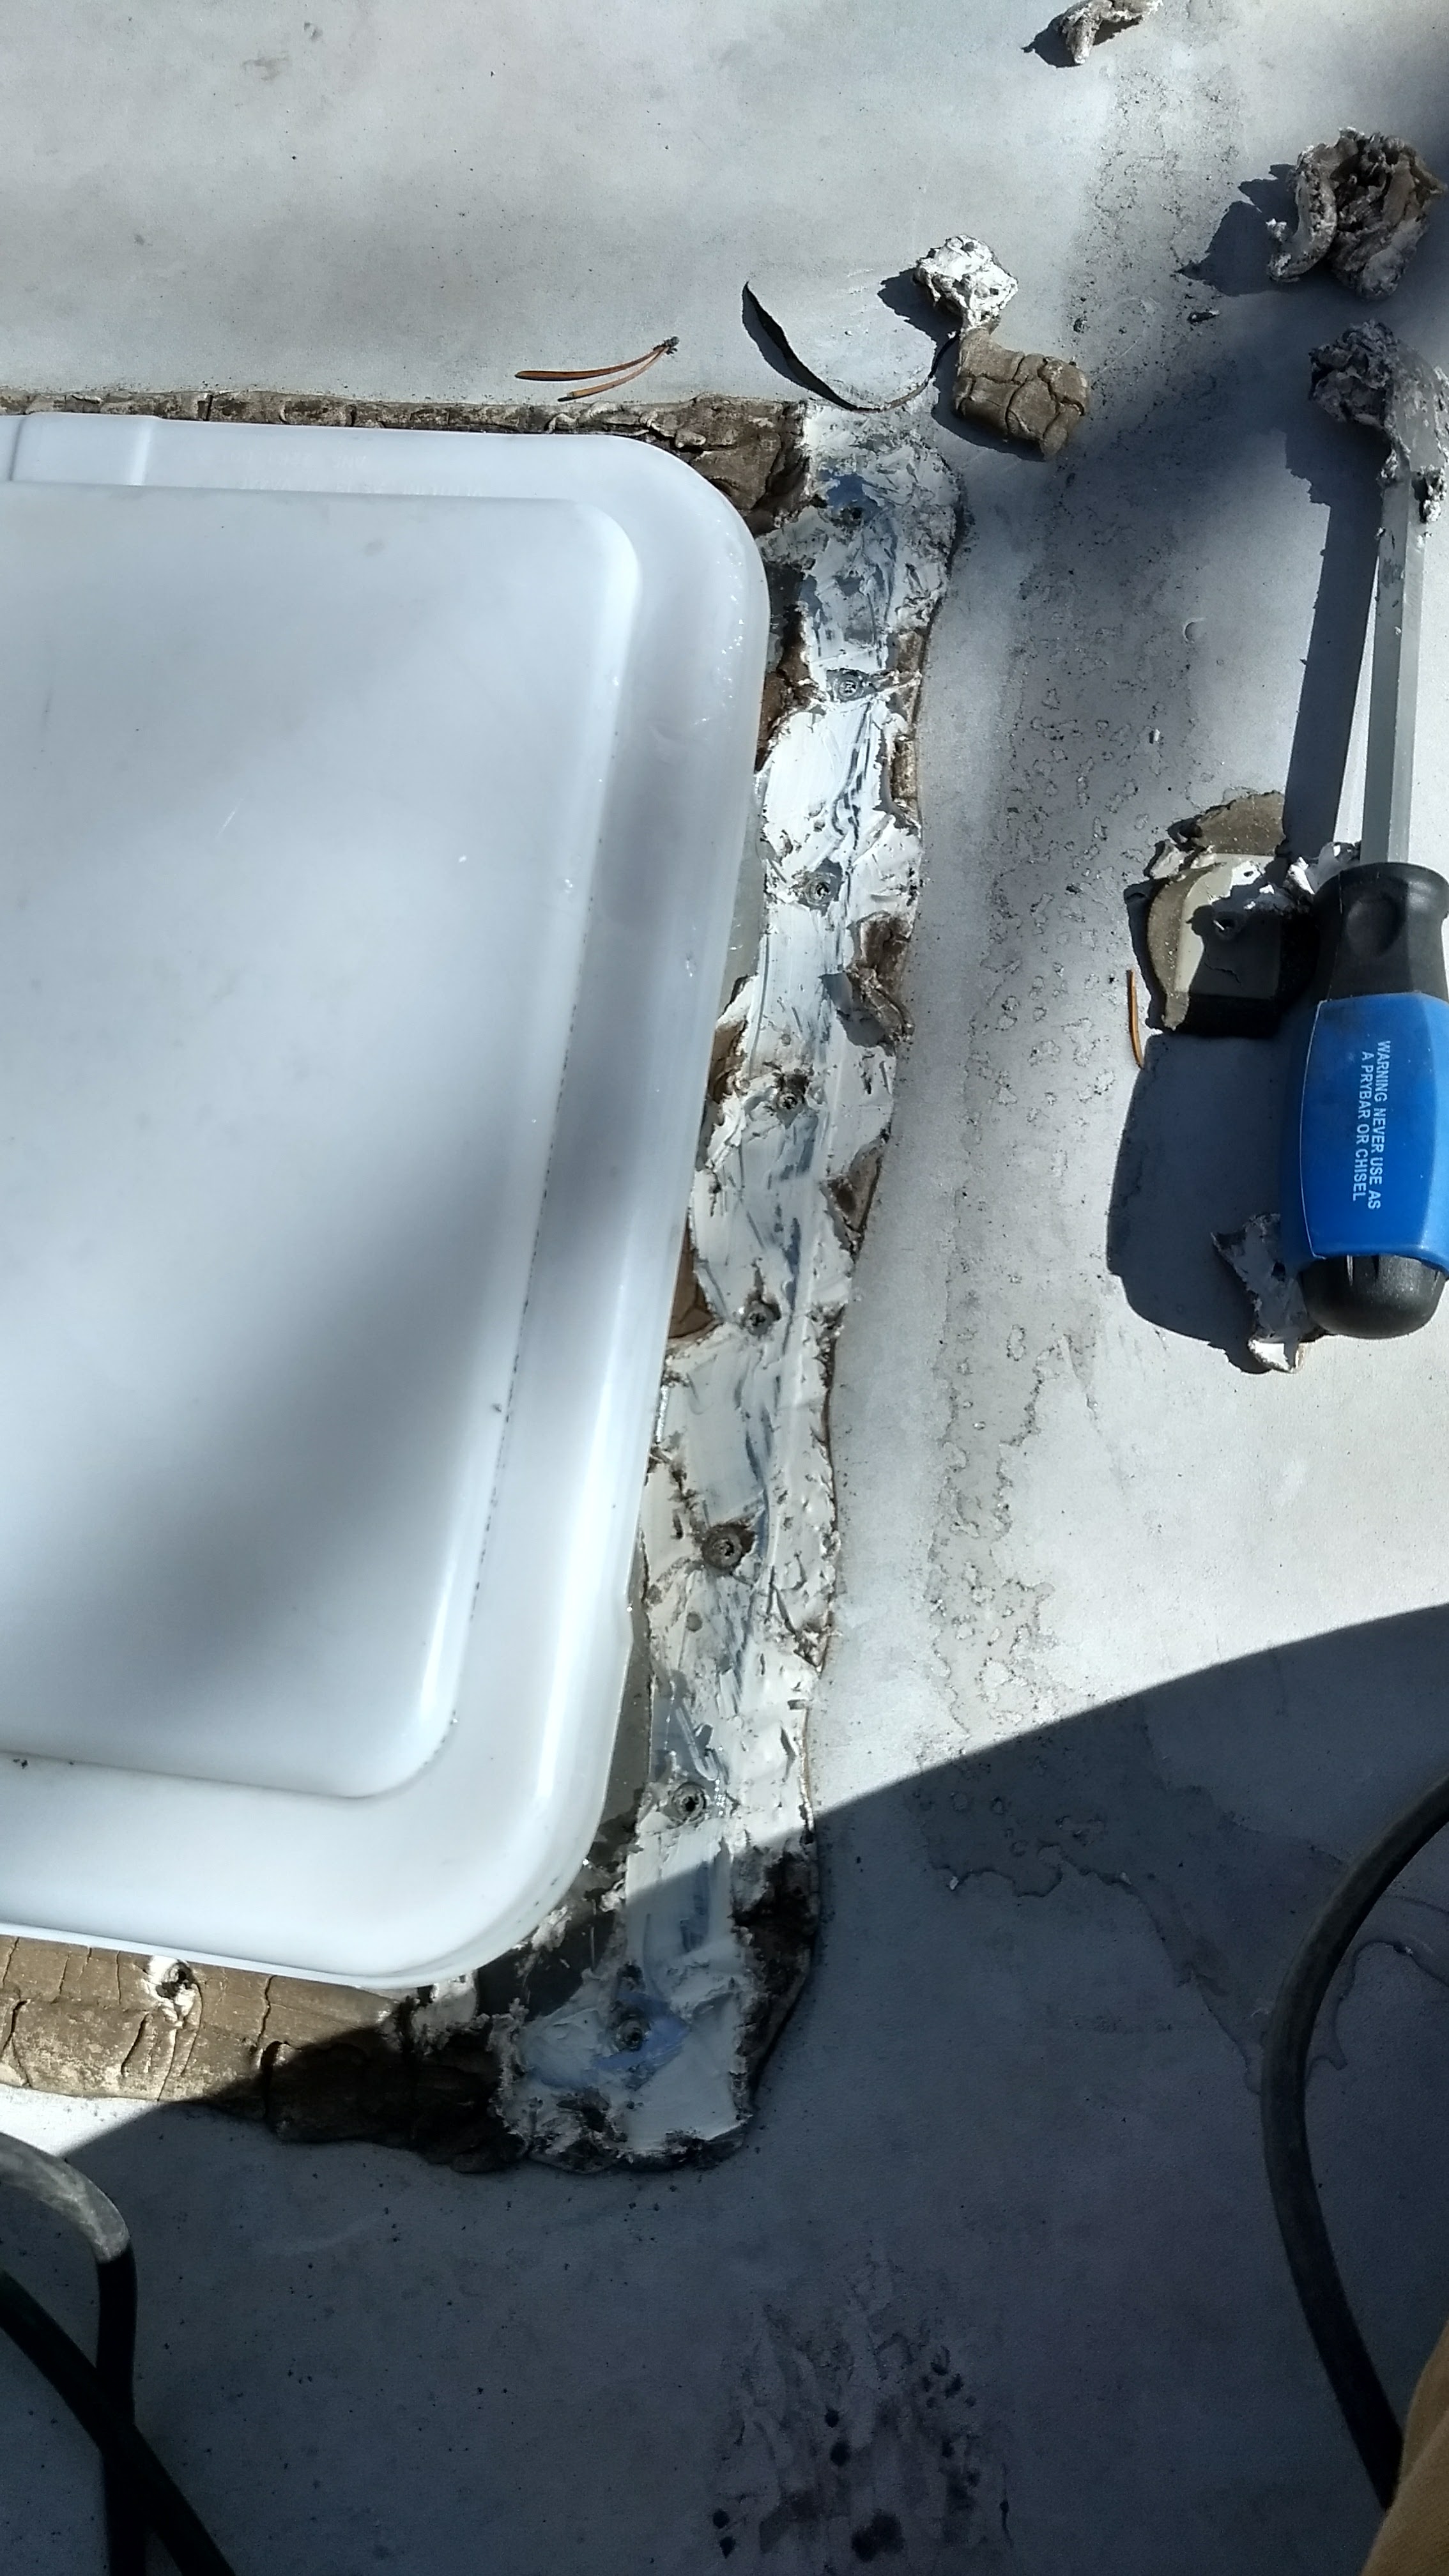
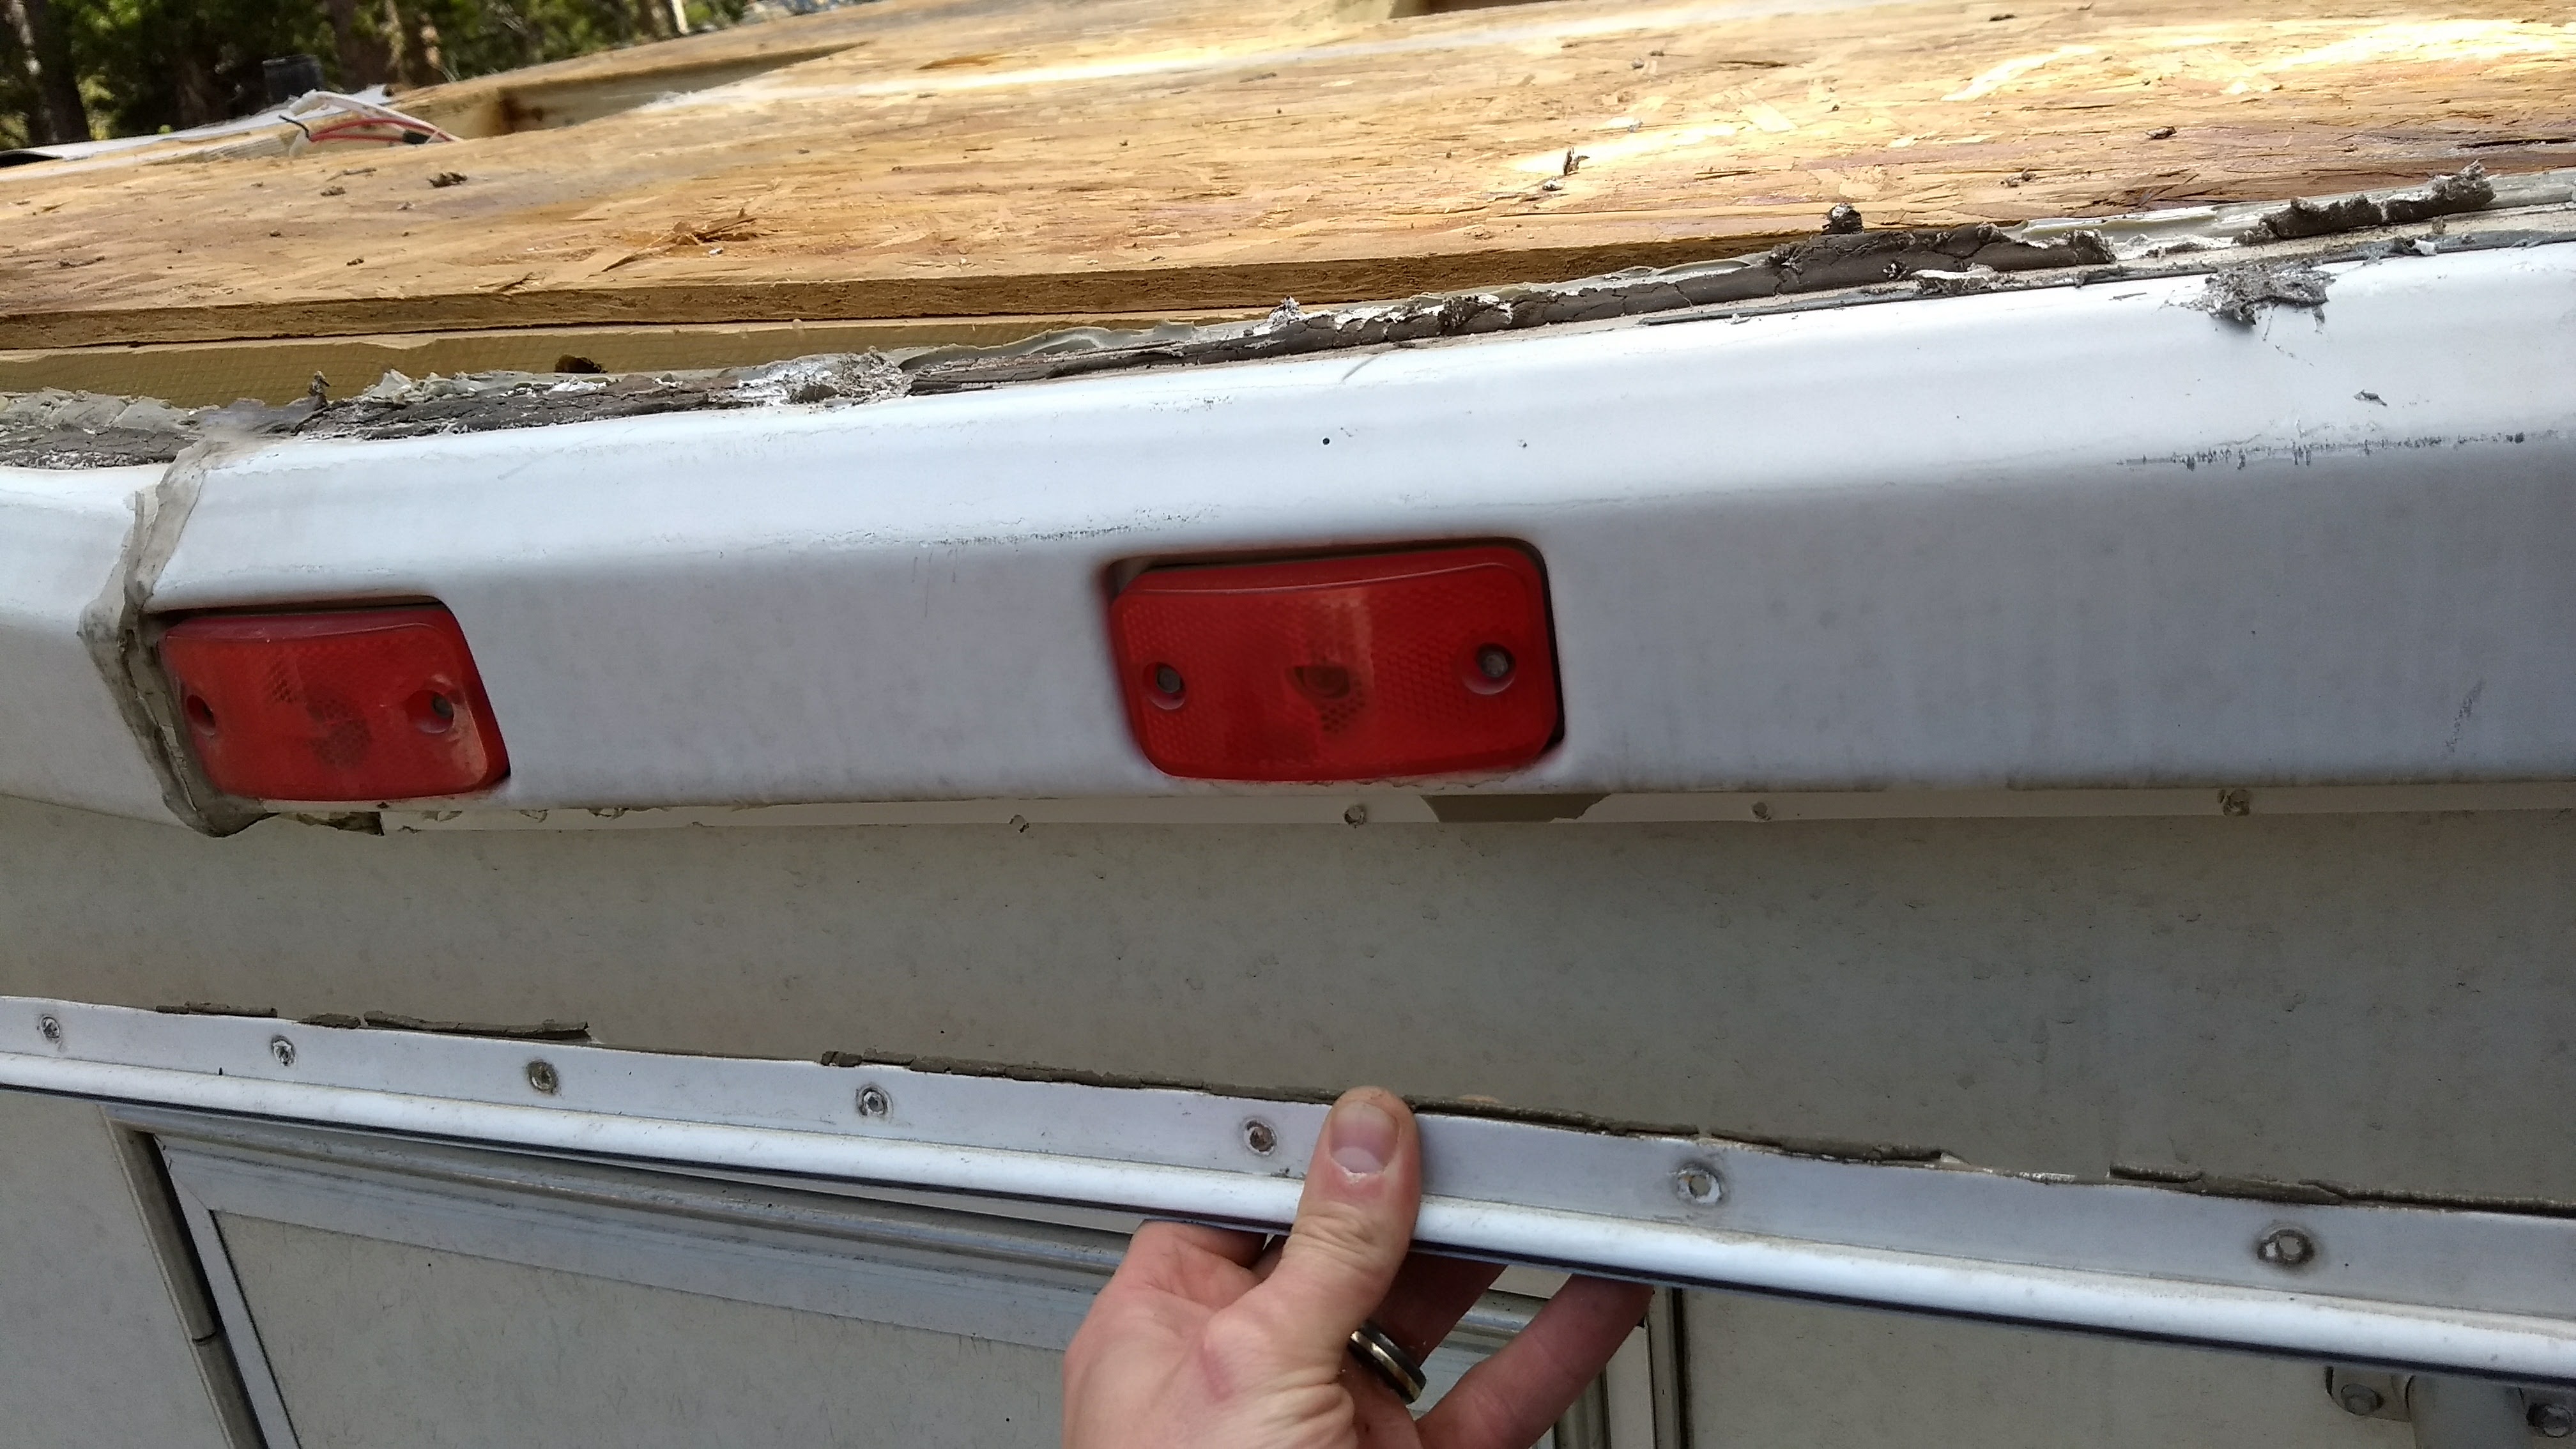
Next, I tackled the front and rear roof corners. These hold the EPDM roof on at all edges. I found another bazillion 1/4″ screws here.
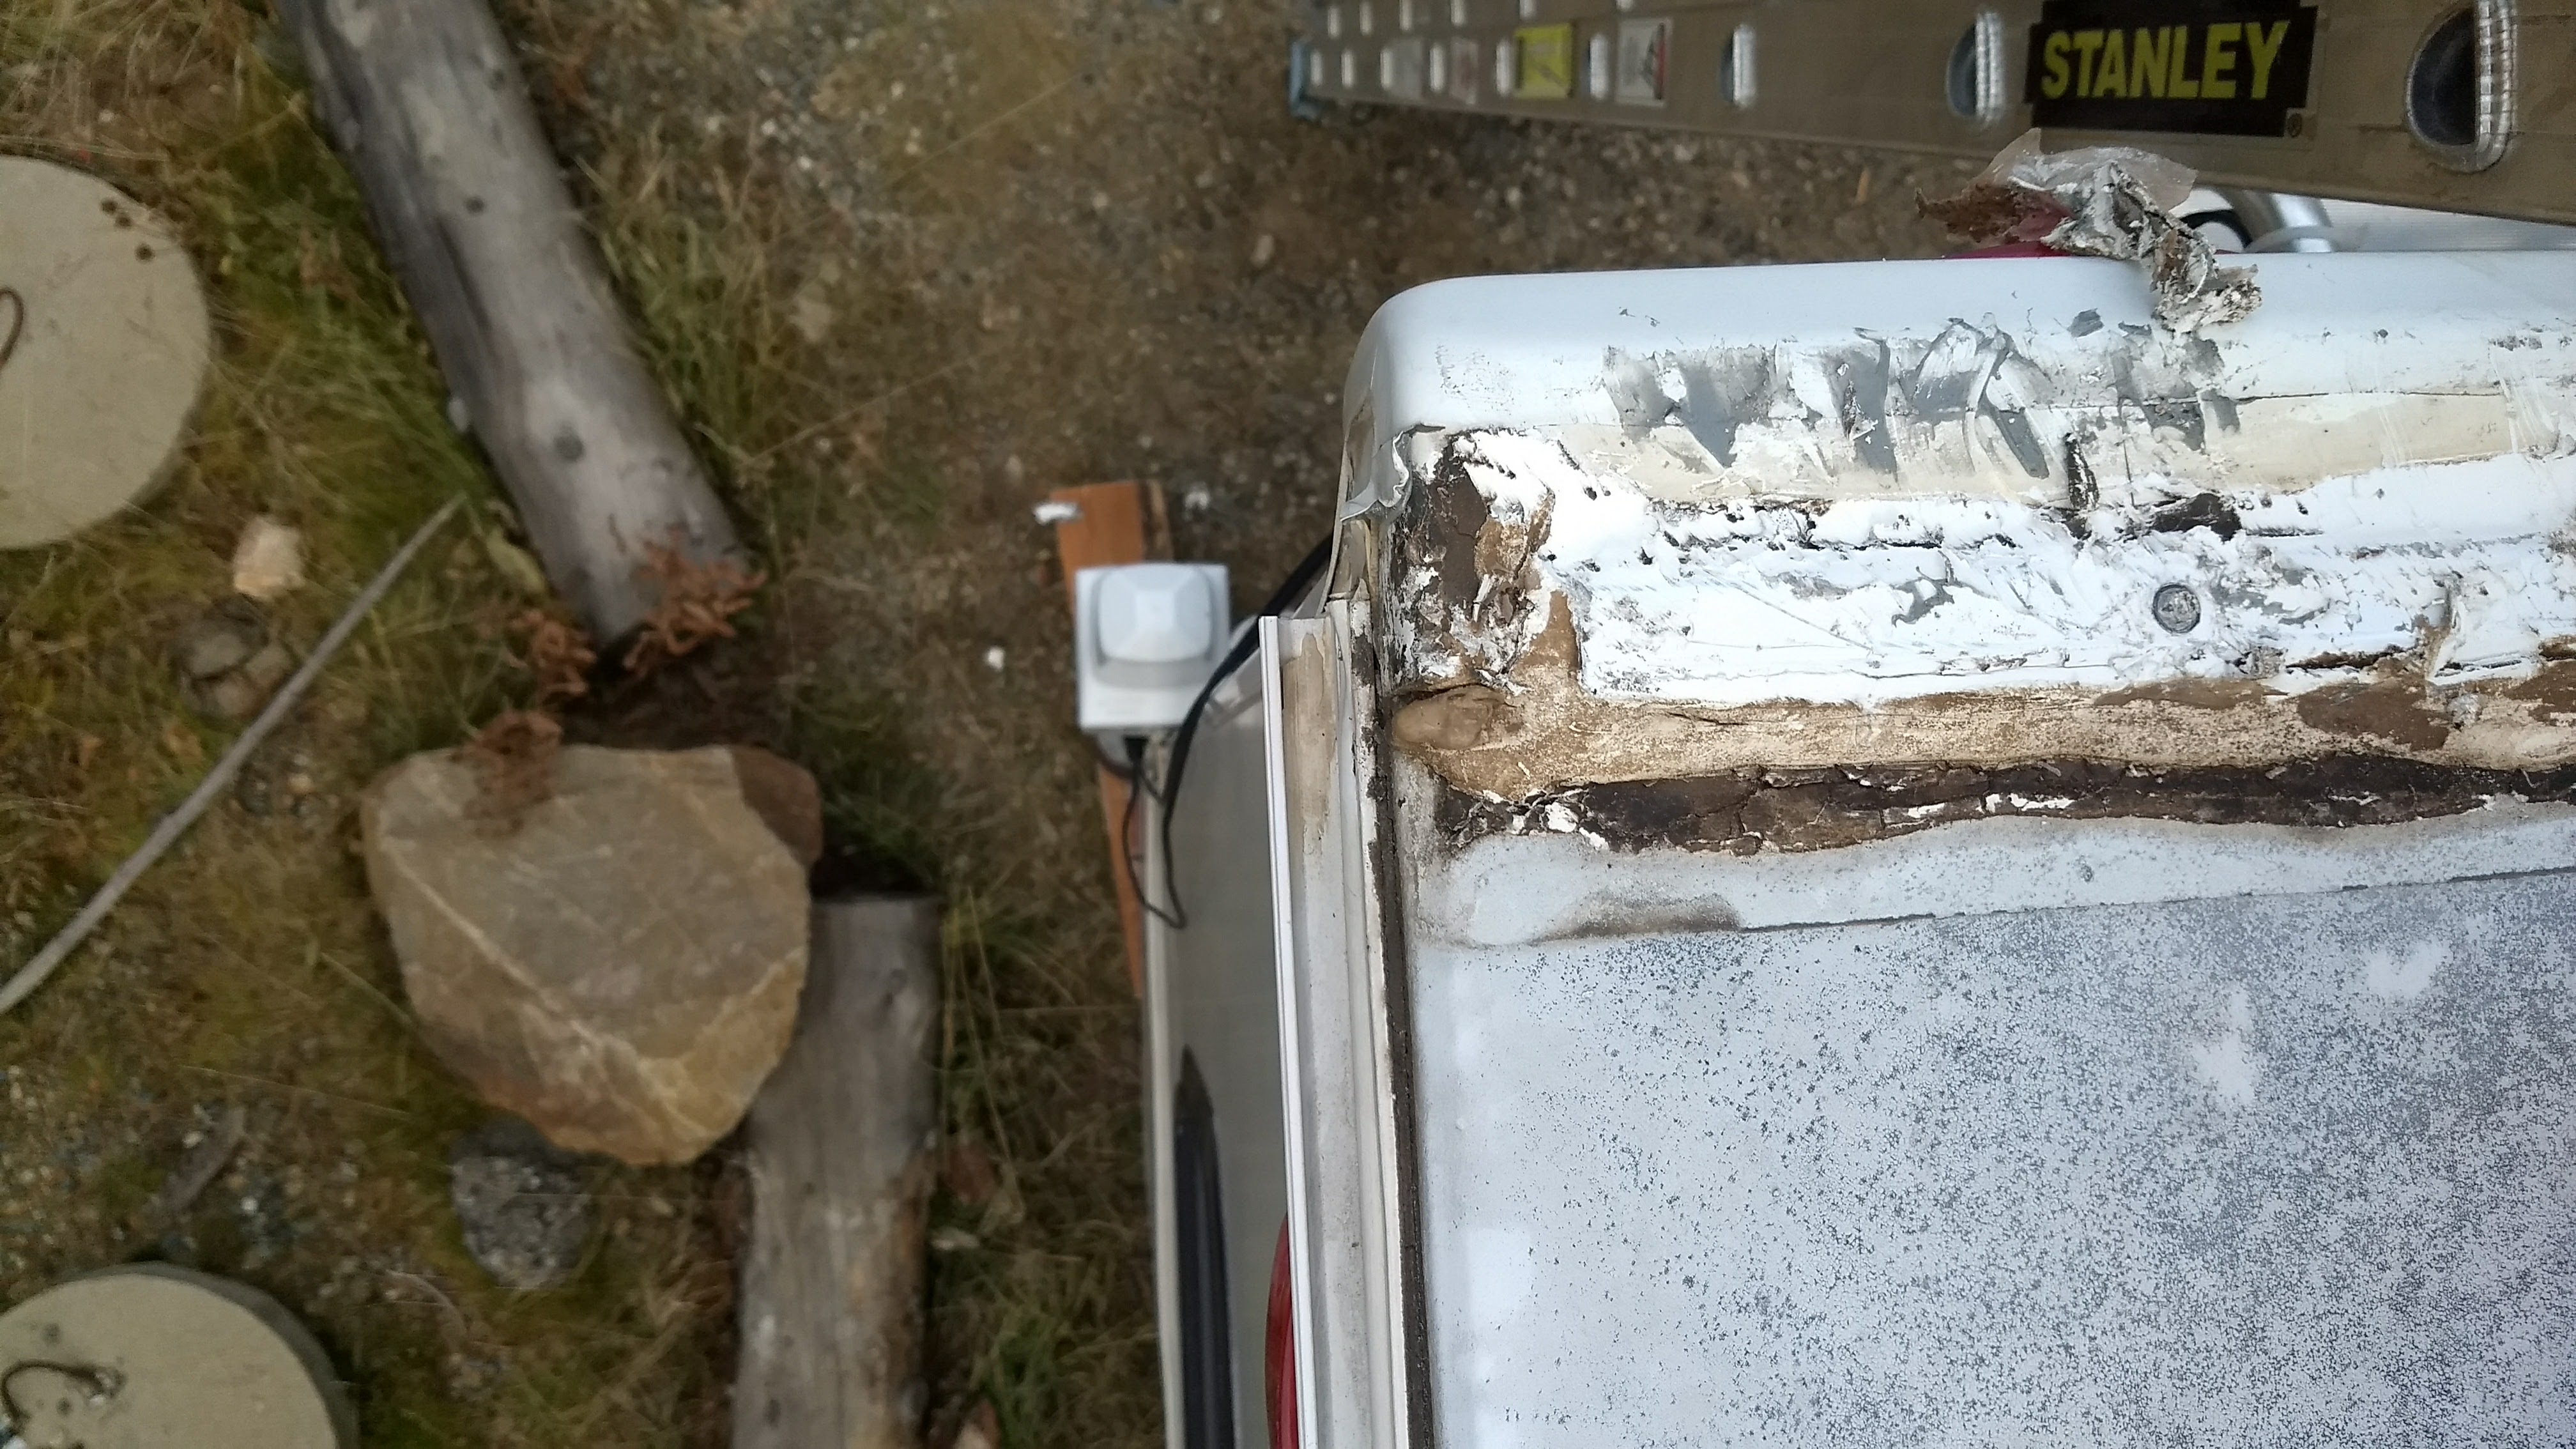
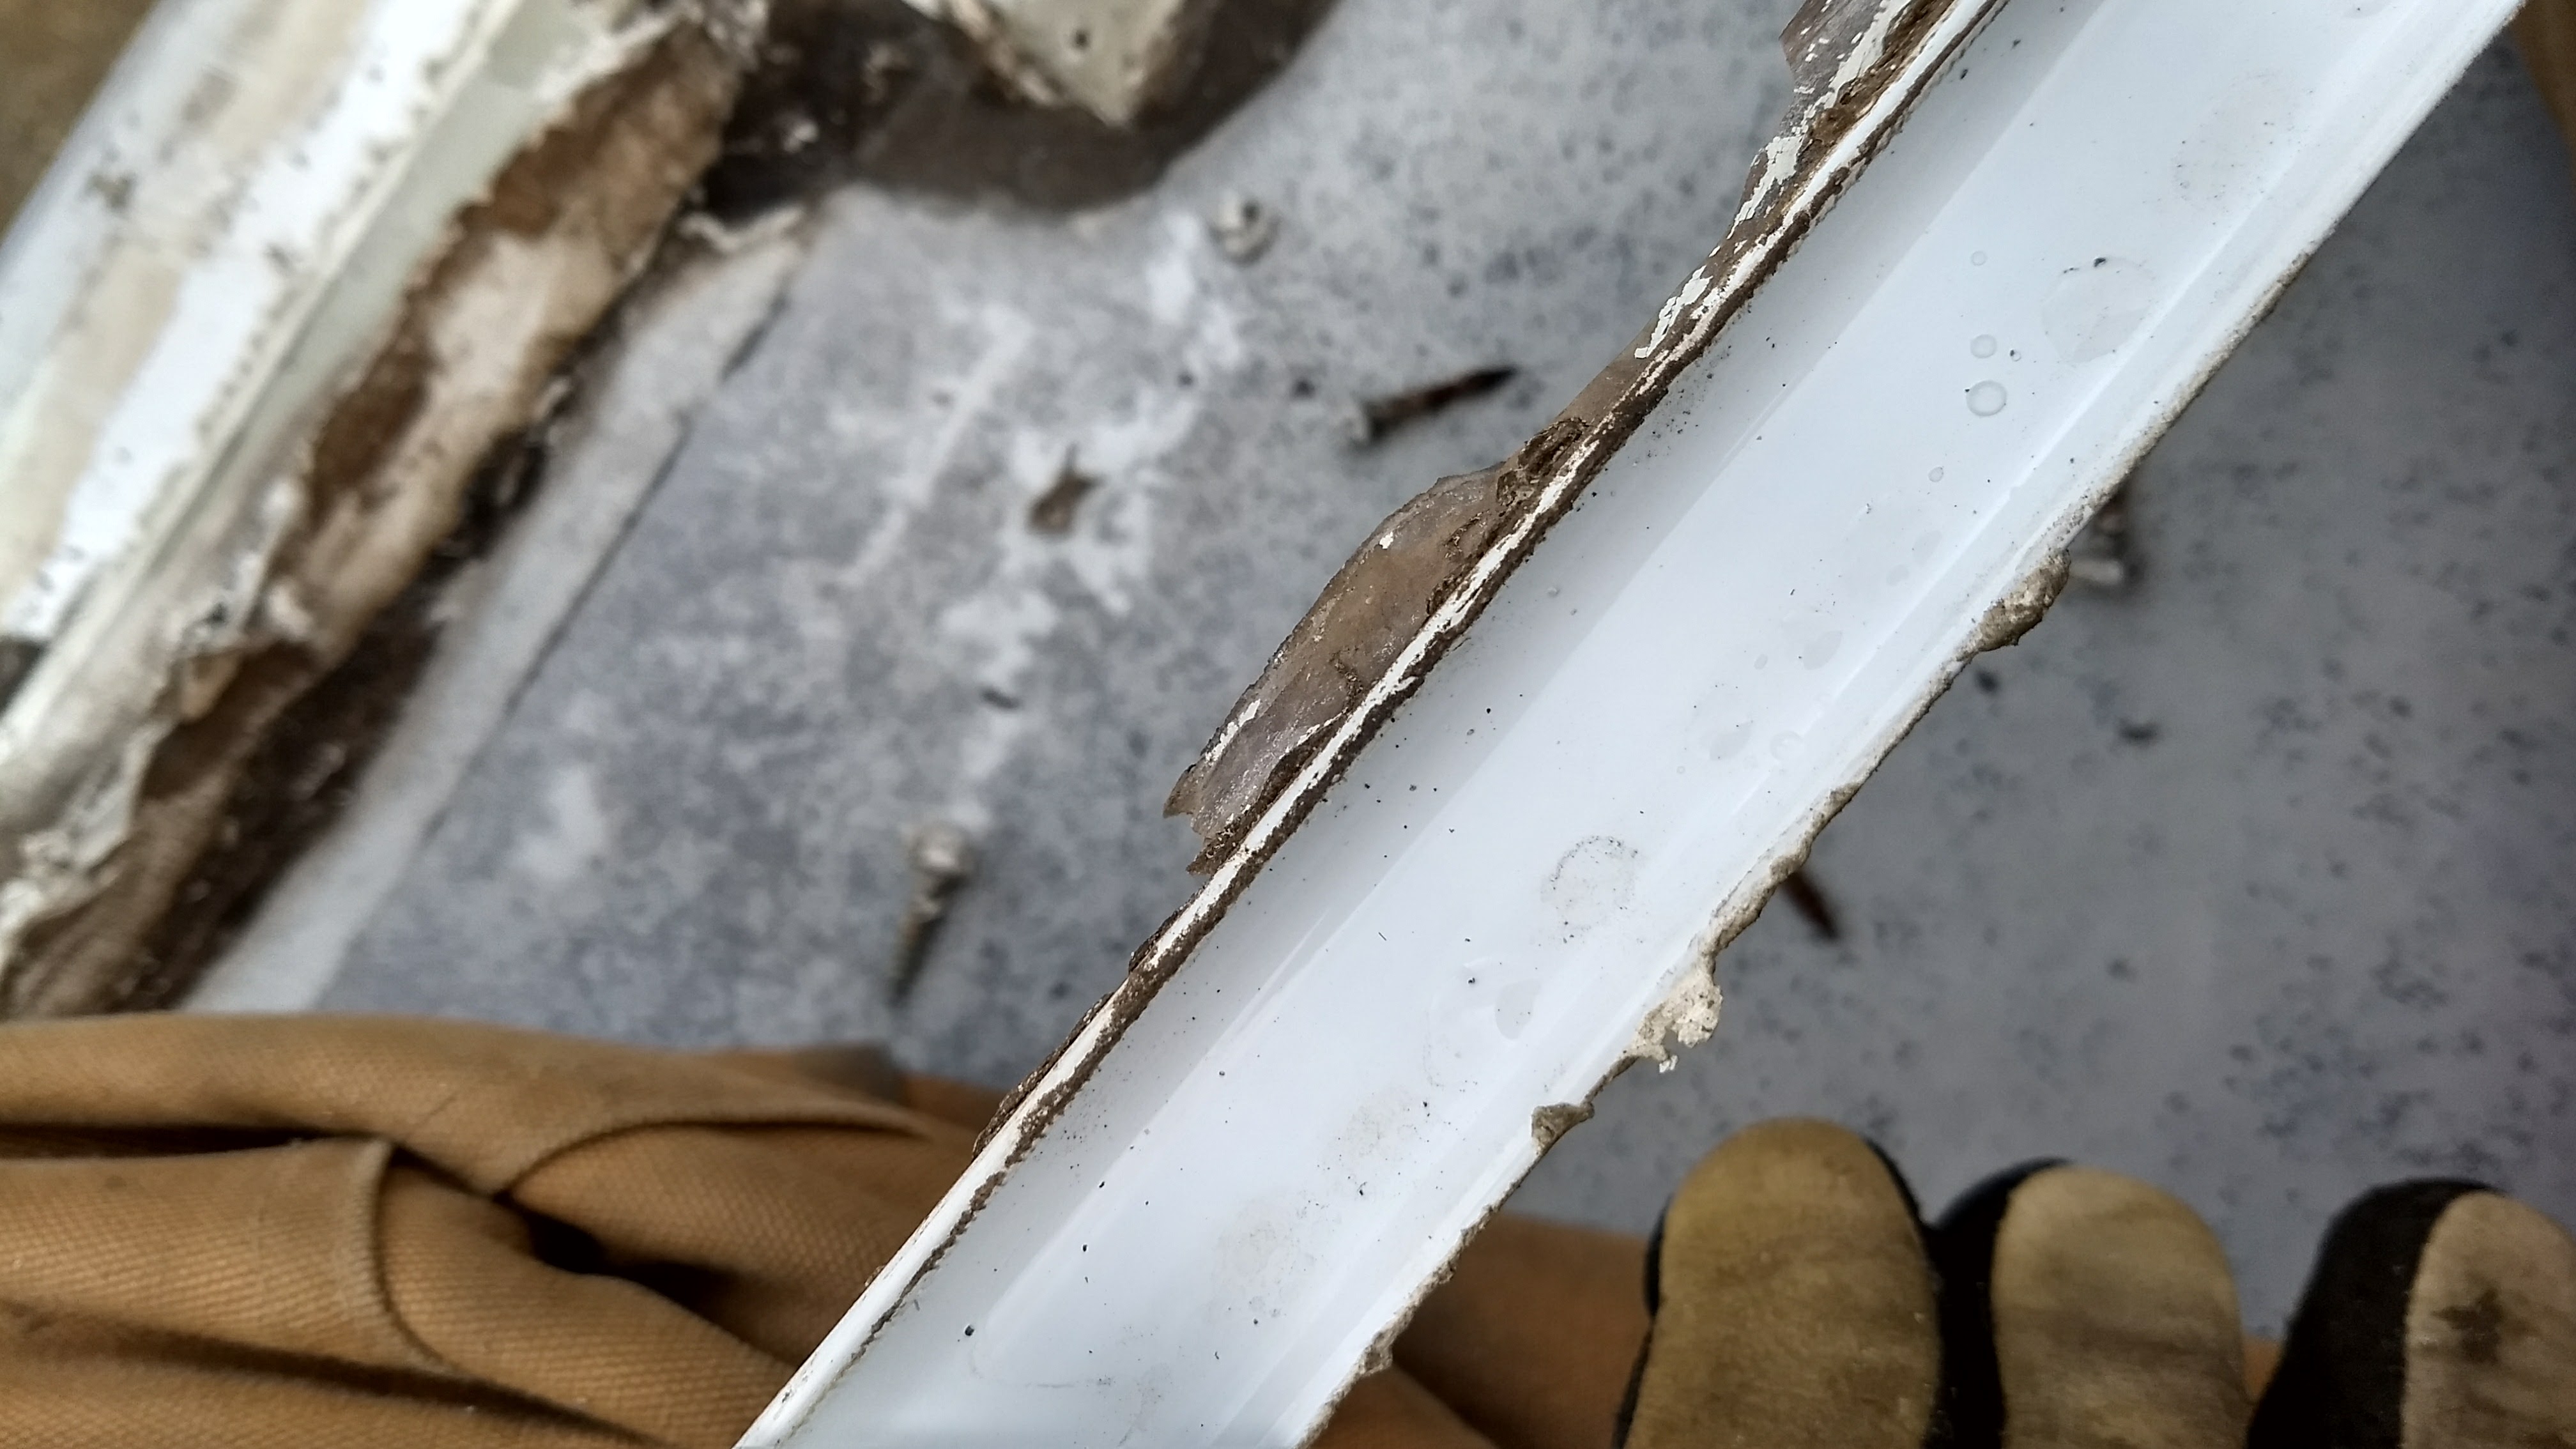
Digging through butyl sealant, self-leveling sealant, and dicor EPDM patches to get at the roof corners.
Right rear corner of roof.
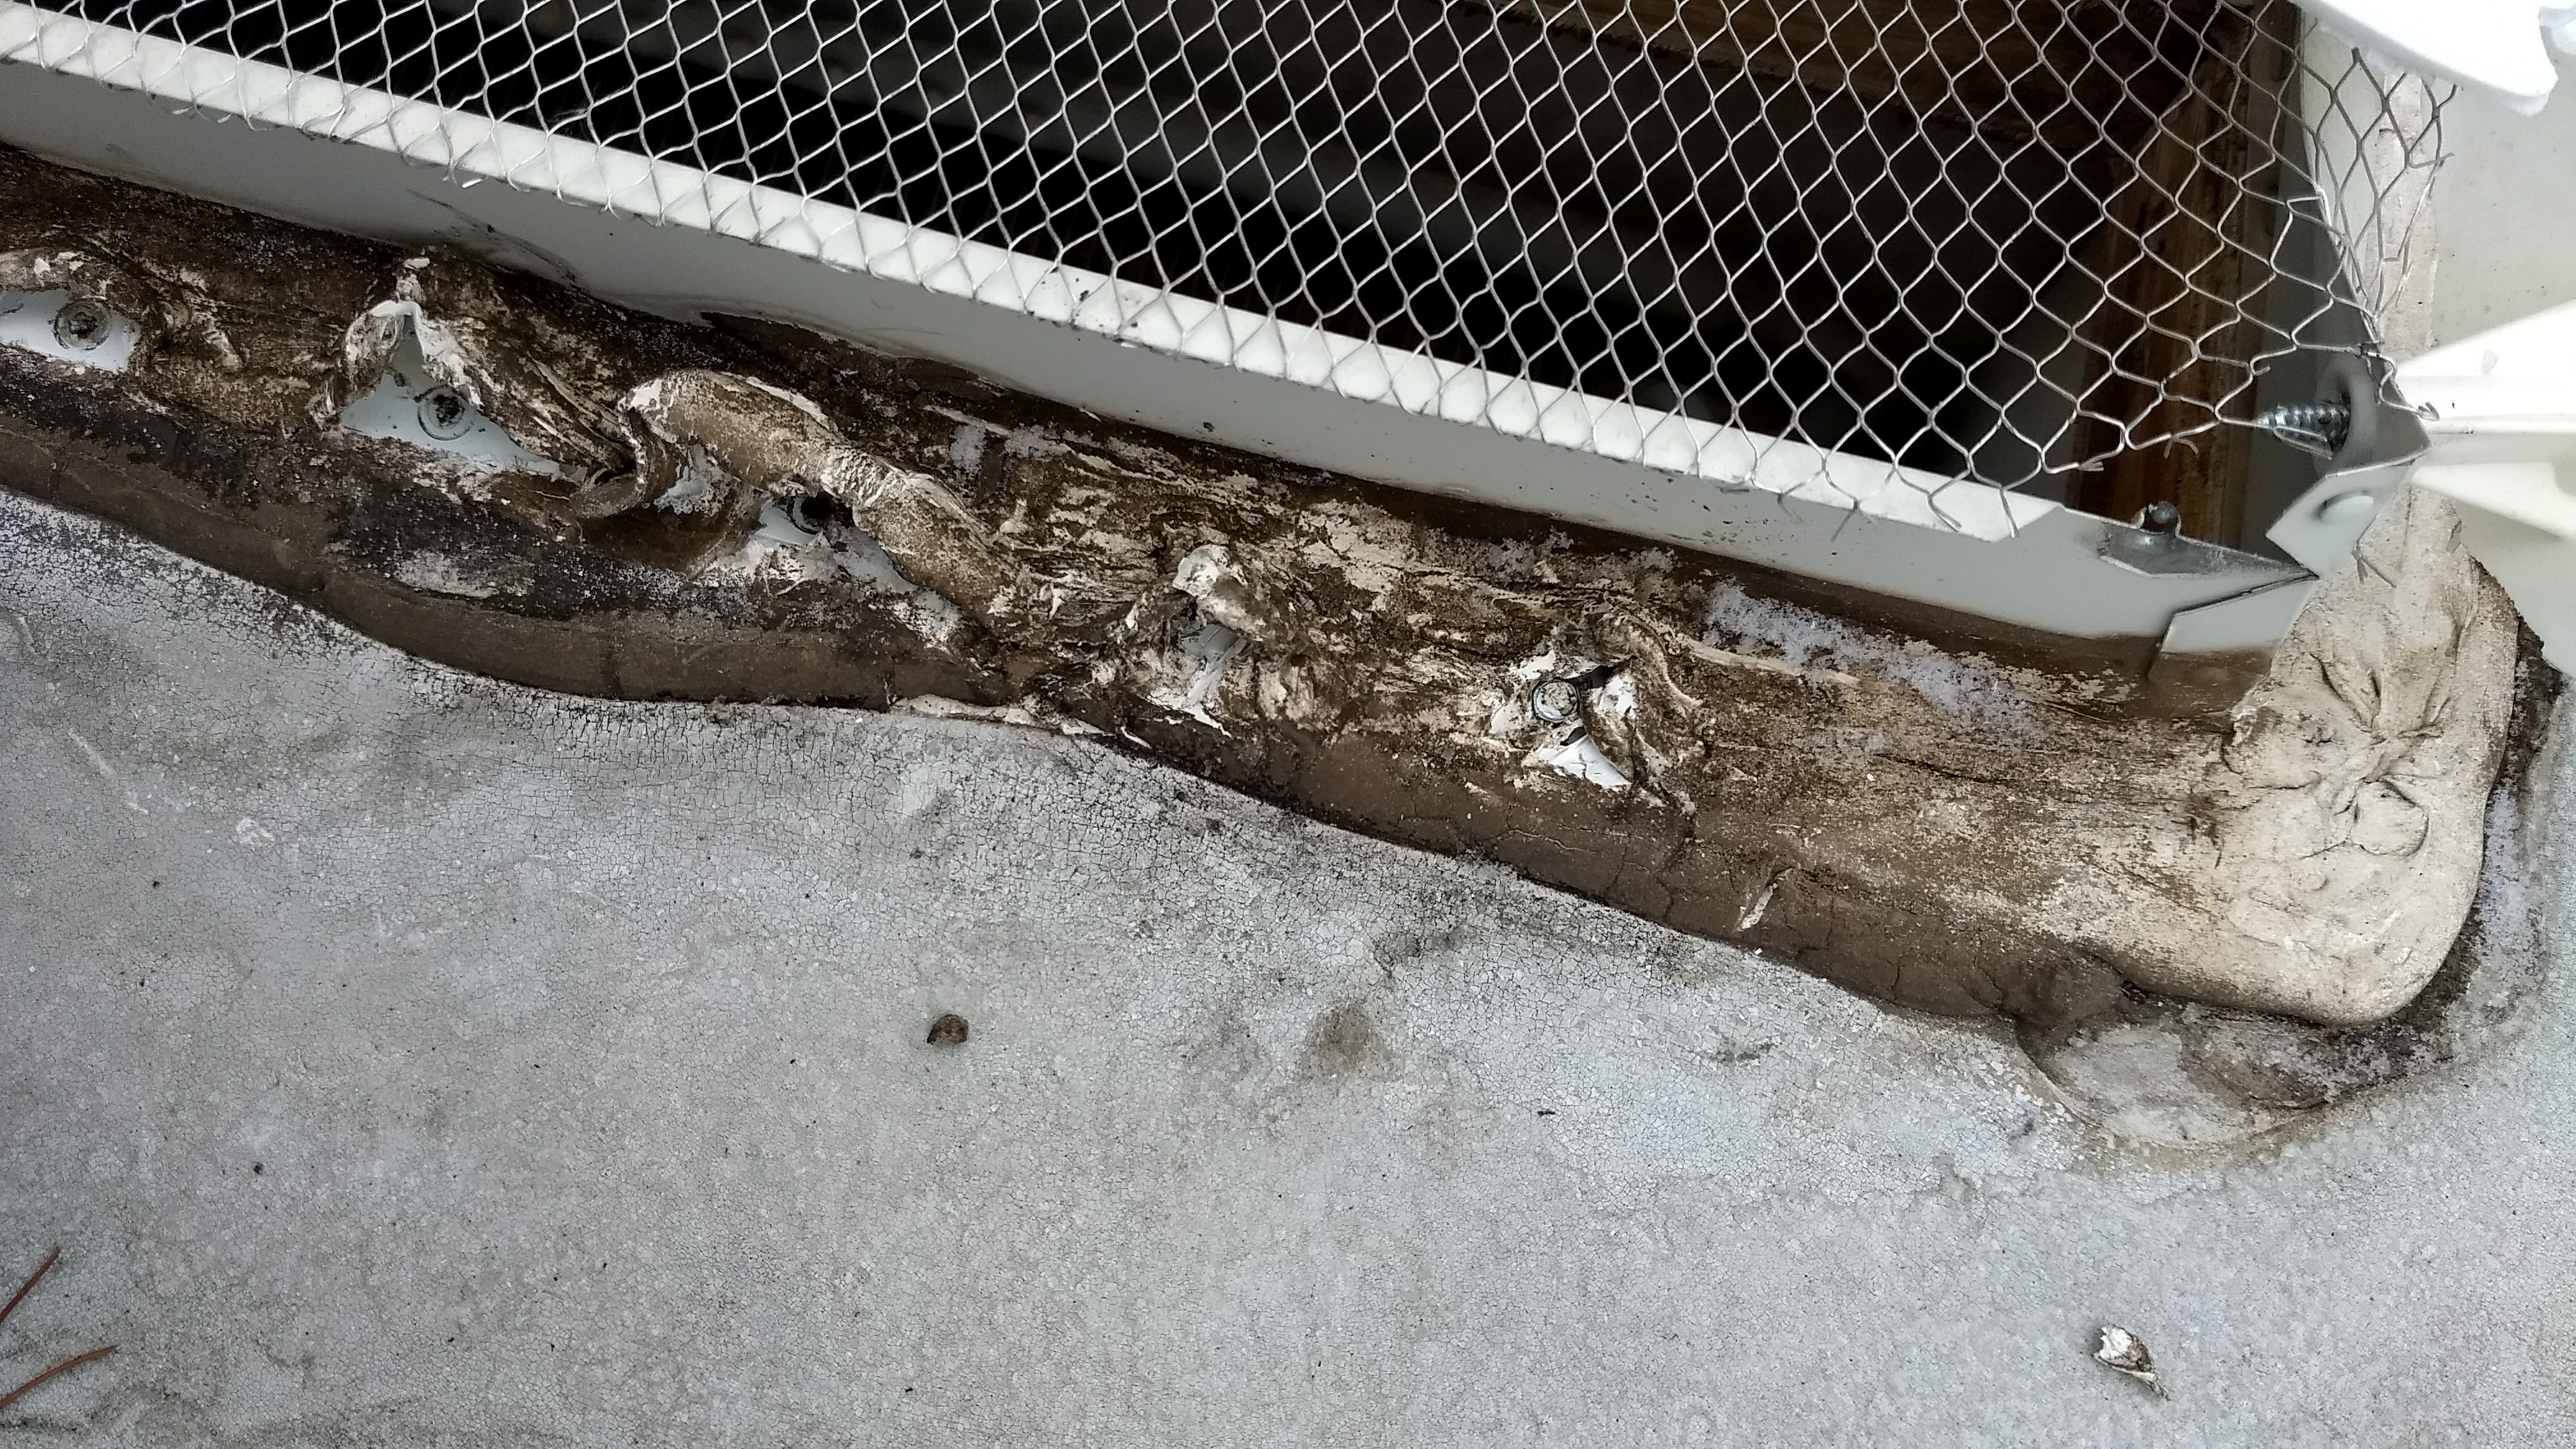
Rear corner bracket holding down old EPDM roof. I noticed condensation at this point.
Rear corner bracket coming off of rear corner molding.
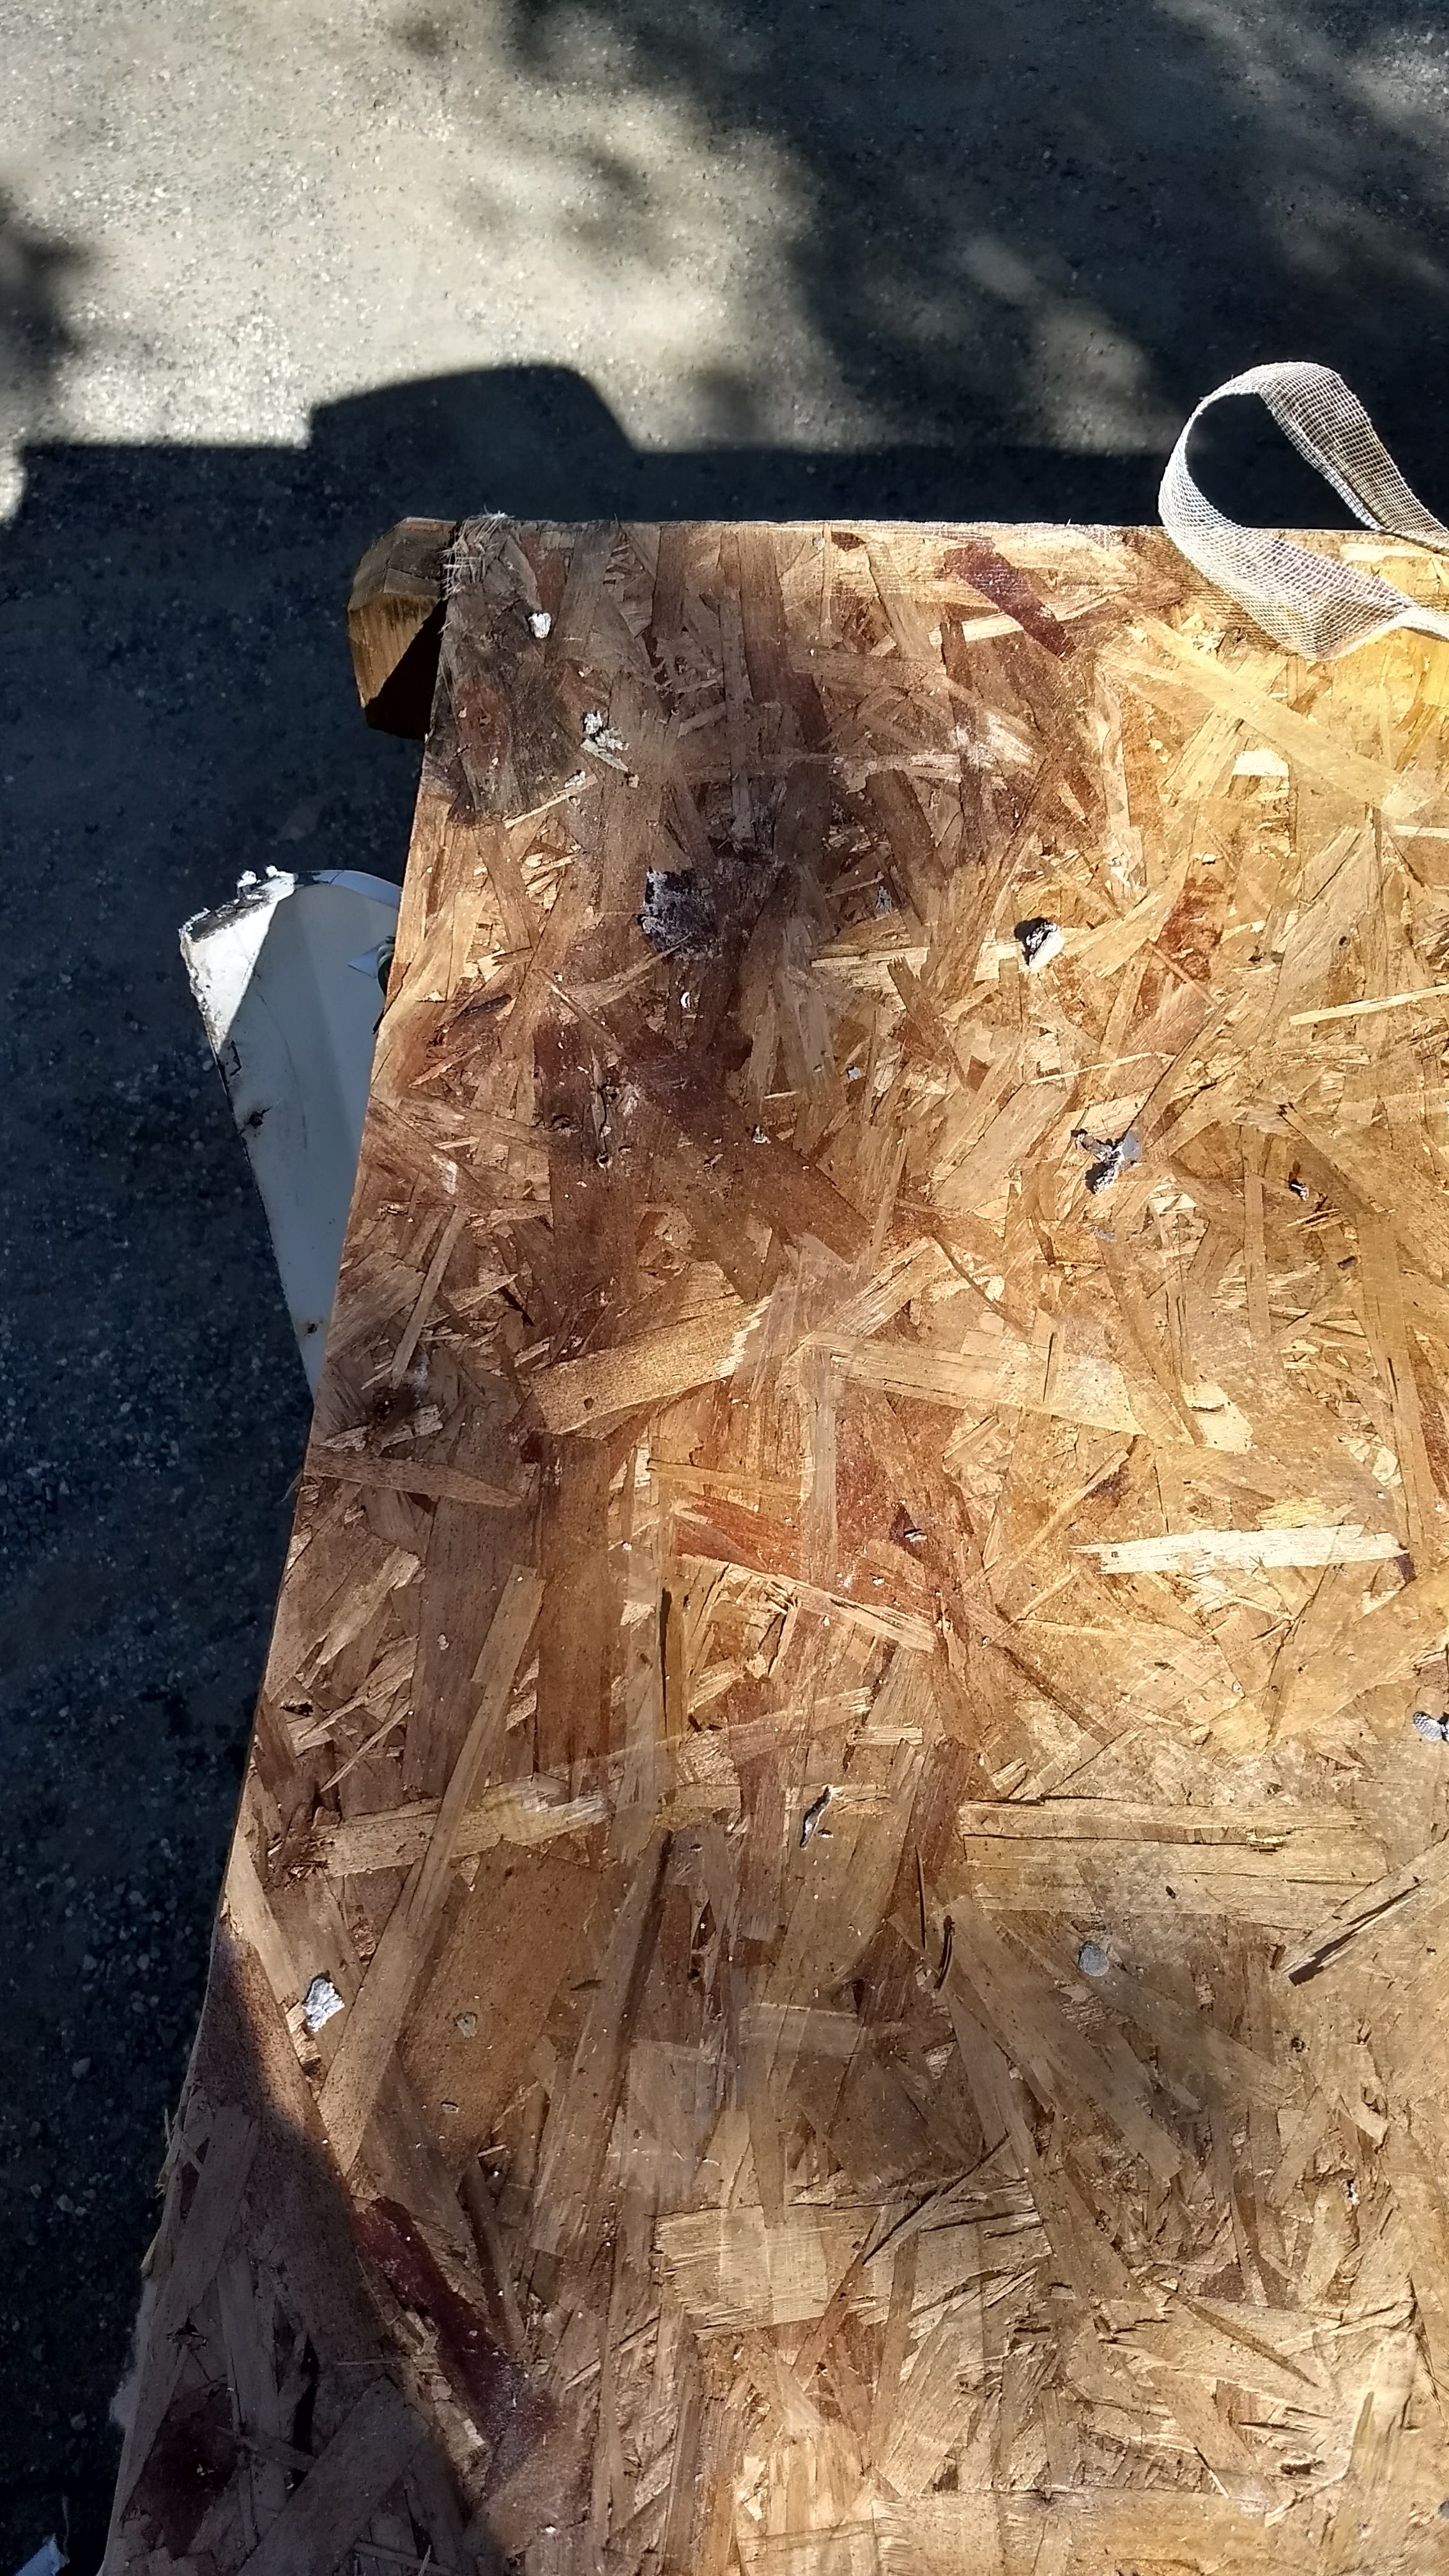
The old EPDM membrane was glued down with something NASA must have developed. It took a significant amount of pulling to remove and often the many of the plywood chips decided to part ways with the inferior plywood bonding glue and stay attached to the EPDM.
Bare plywood roof showing the old label from 1999 and the missing chips.
Water damage showing on right rear corner plywood.
Water damage on left rear corner.
Bare plywood roof. Note the A/C unit under the jacket.
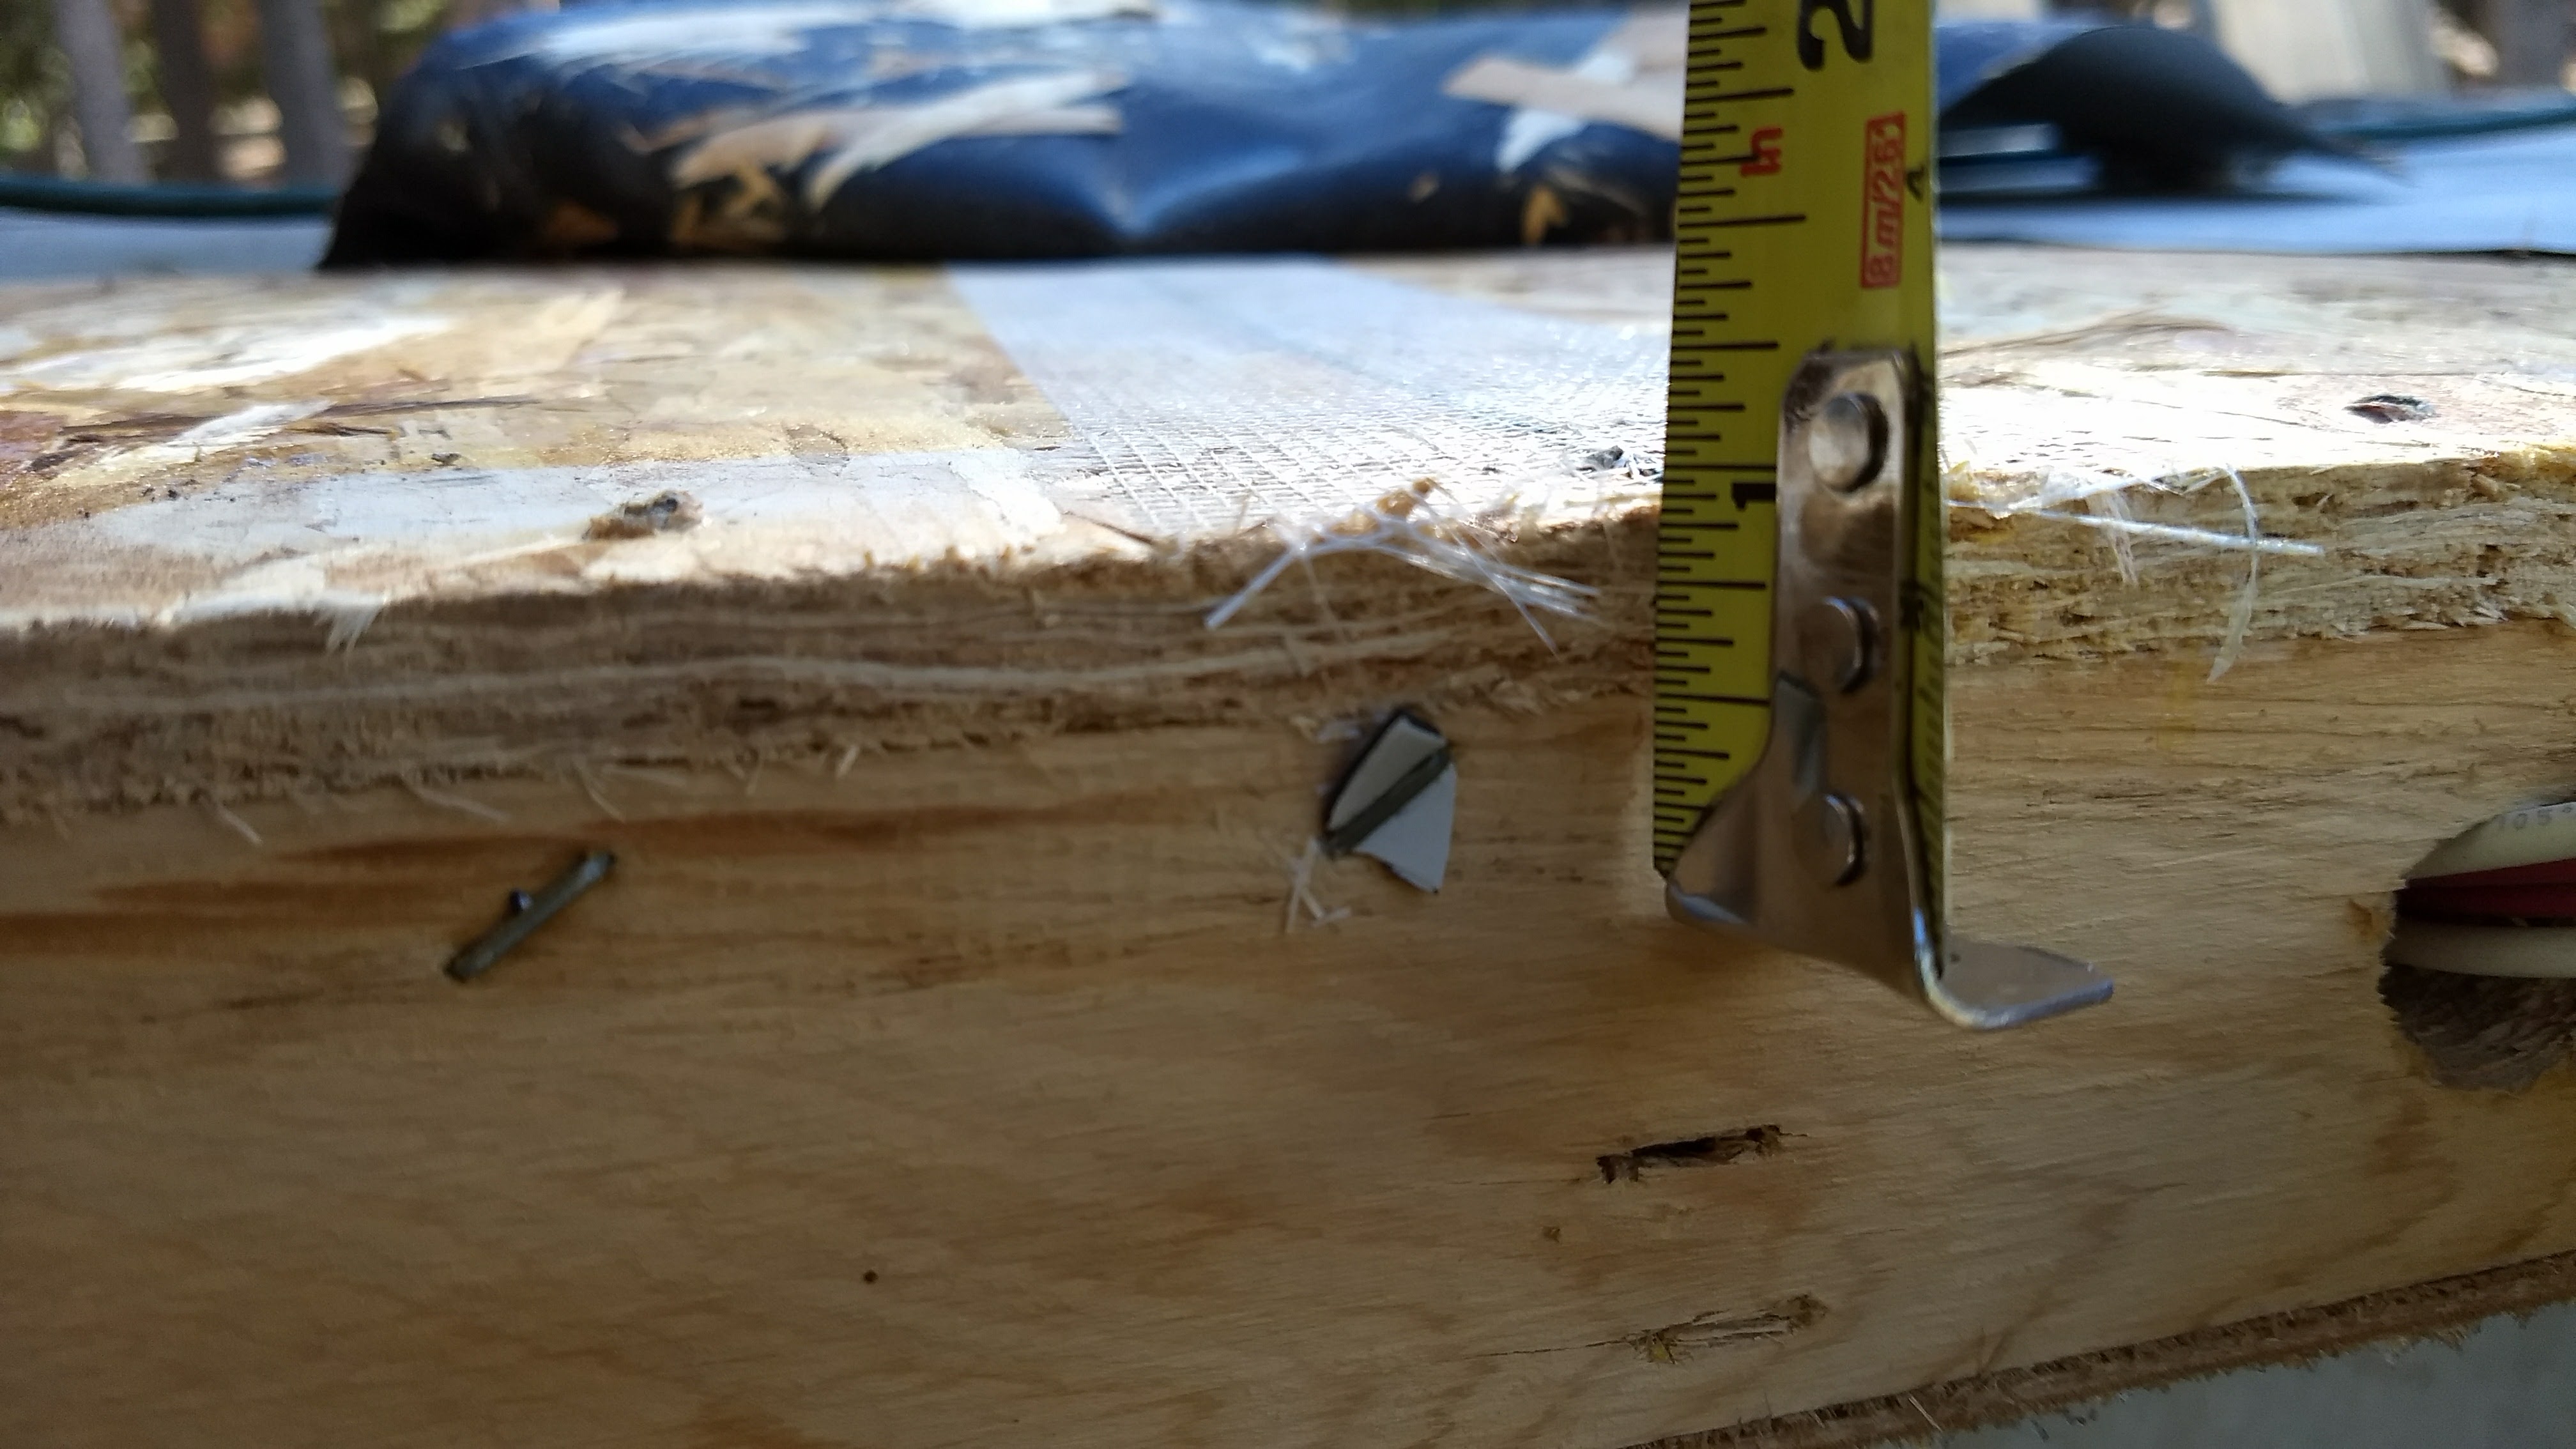
Step 3: Repair the damage.
I pulled the end plywood off the roof and replaced the soaked insulation. I was lucky that the luan ceiling was still serviceable. I cut a new piece of 7/16″ plywood and reinstalled it on the roof. I used drywall mesh on the seams.
7/16″ plywood
Replacing insulation and water-damaged plywood.
Step 4: Install new EPDM membrane.
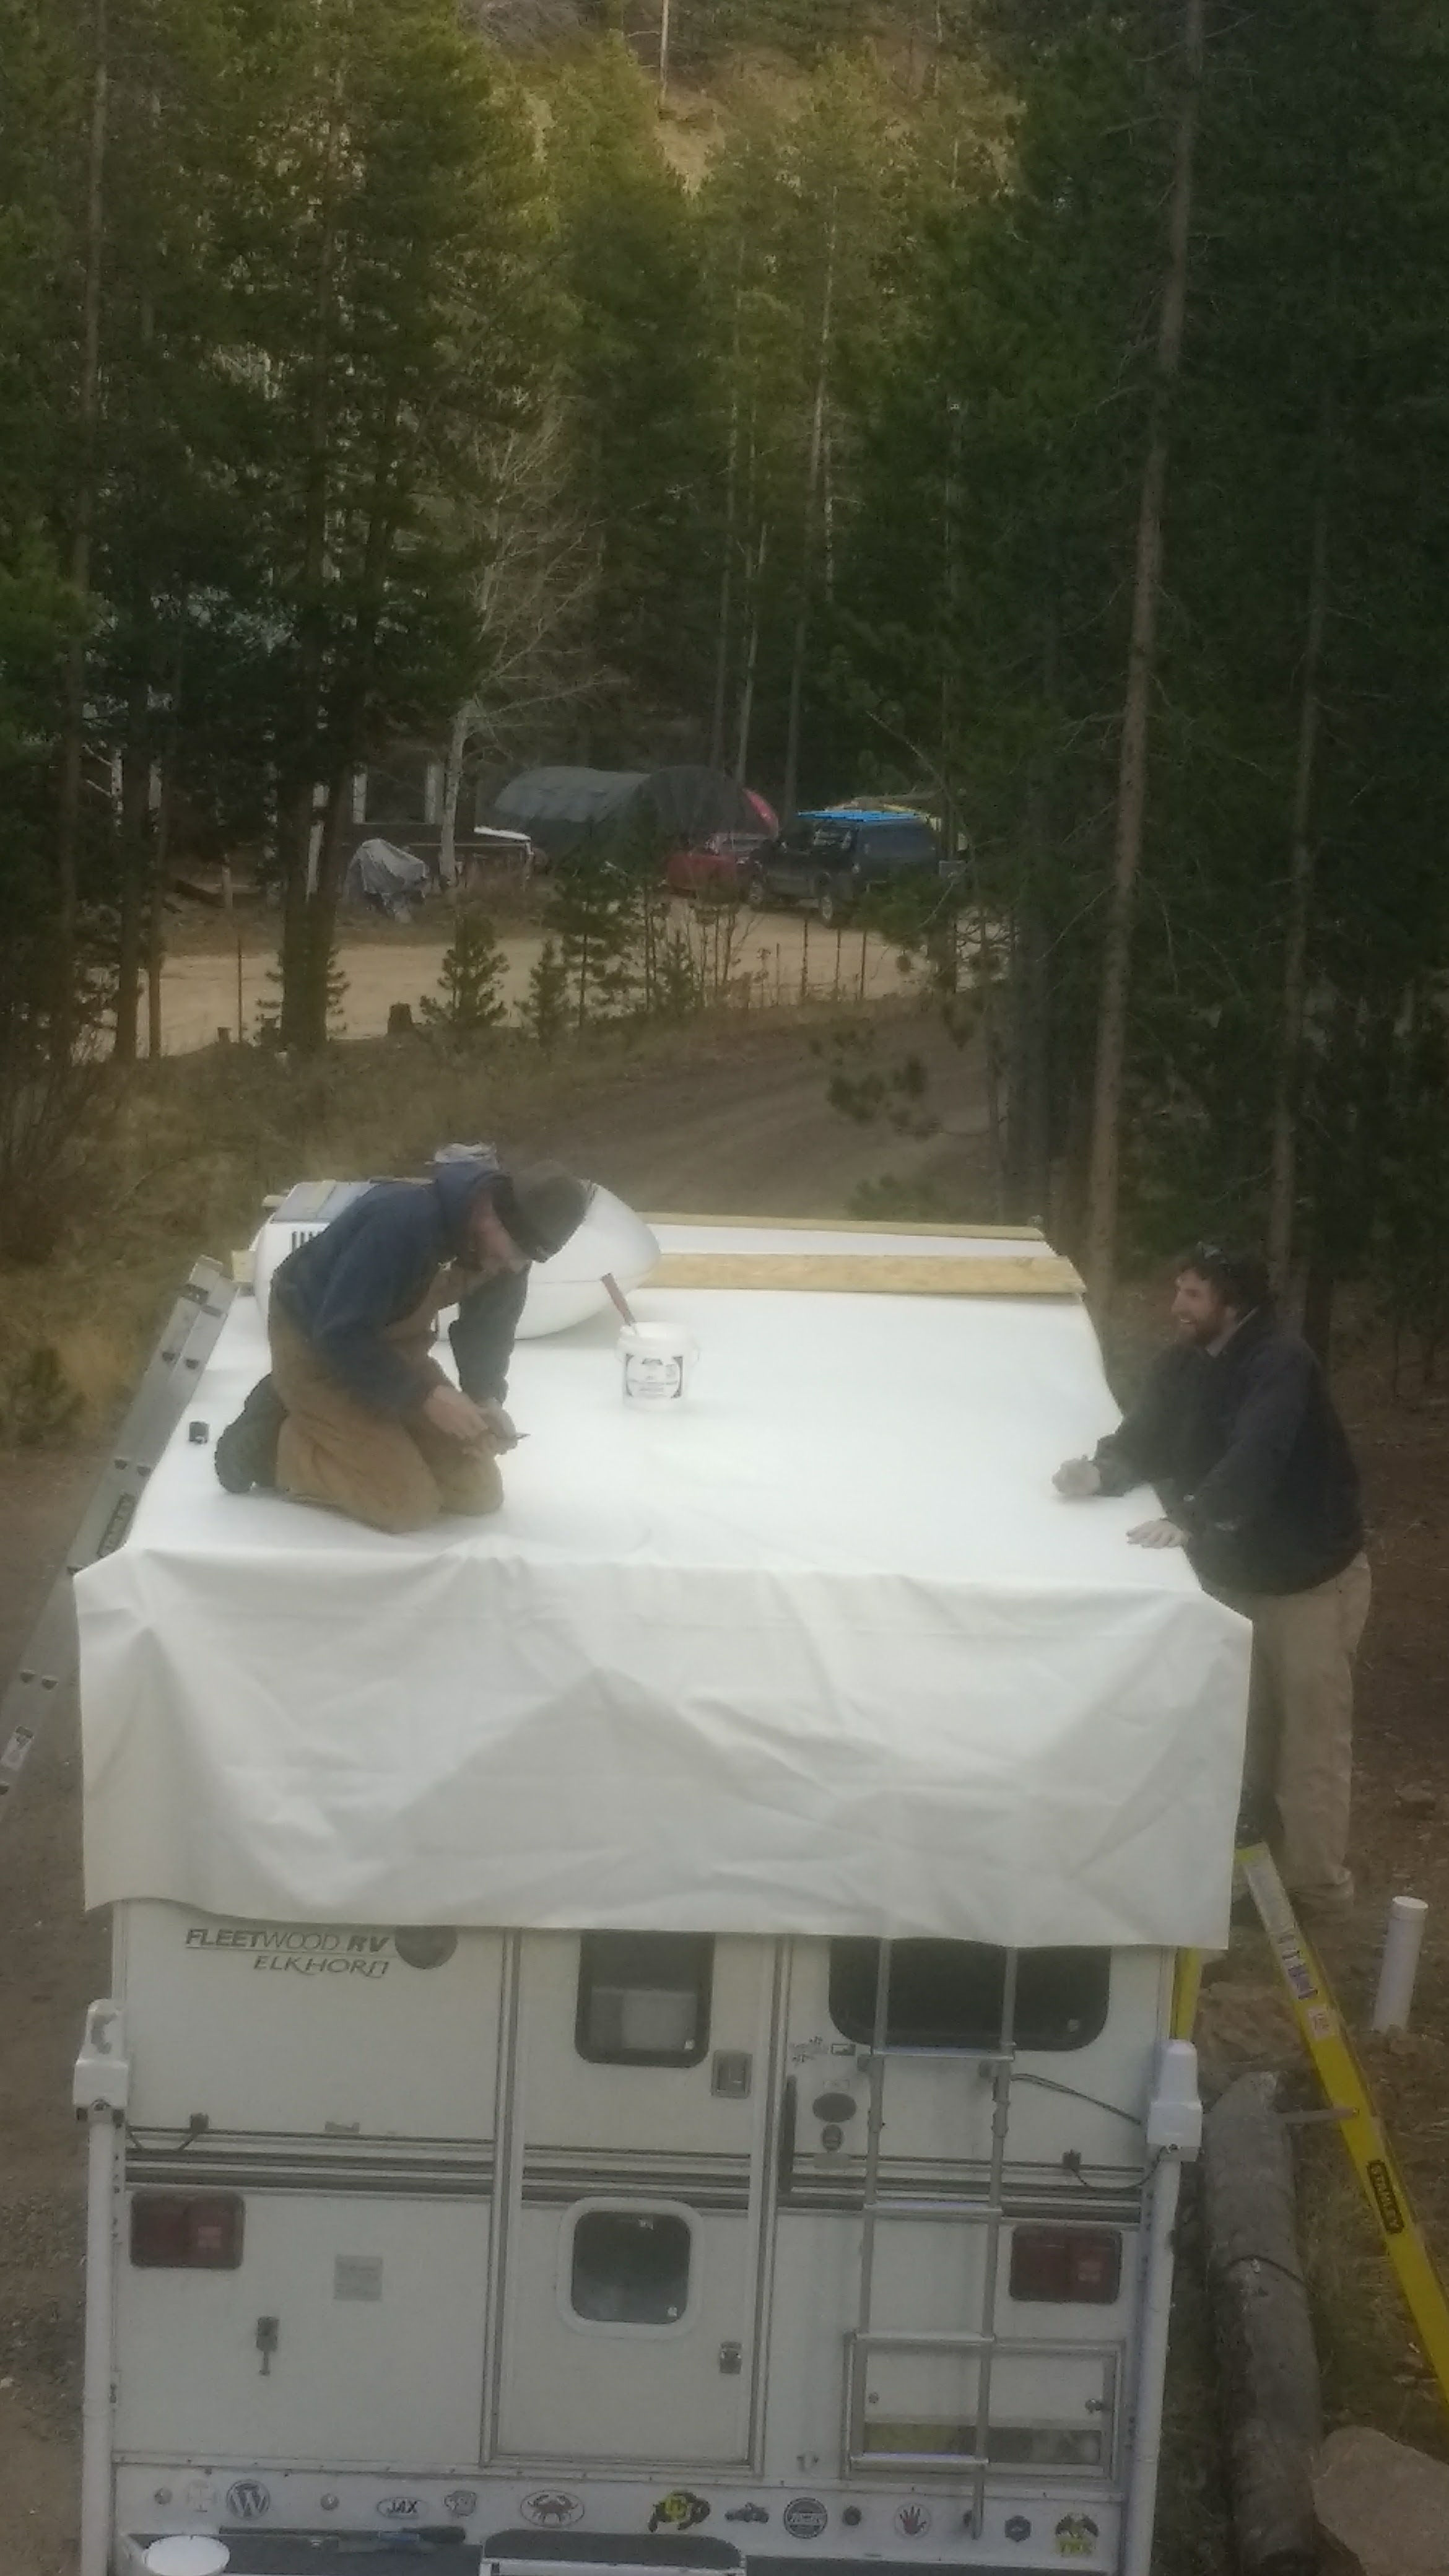
A buddy and I test fit the new EPDM membrane on the roof and then starting working from the front back. I used a paint roller to apply the RV rubber roof adhesive and we slowly worked the EPDM back. We pressed the air pockets out. Thankfully, this membrane was significantly wide enough on the sides to allow for an imperfect placement.
We moved the A/C unit to the front and completed the installation at the back half of the camper. Once the roof was on properly, we installed the side brackets to clamp the new roof down. The roof adhesive allowed for plenty of work time.
Installing the EPDM membrane.
Installing side corner brackets to clamp roof edges down.
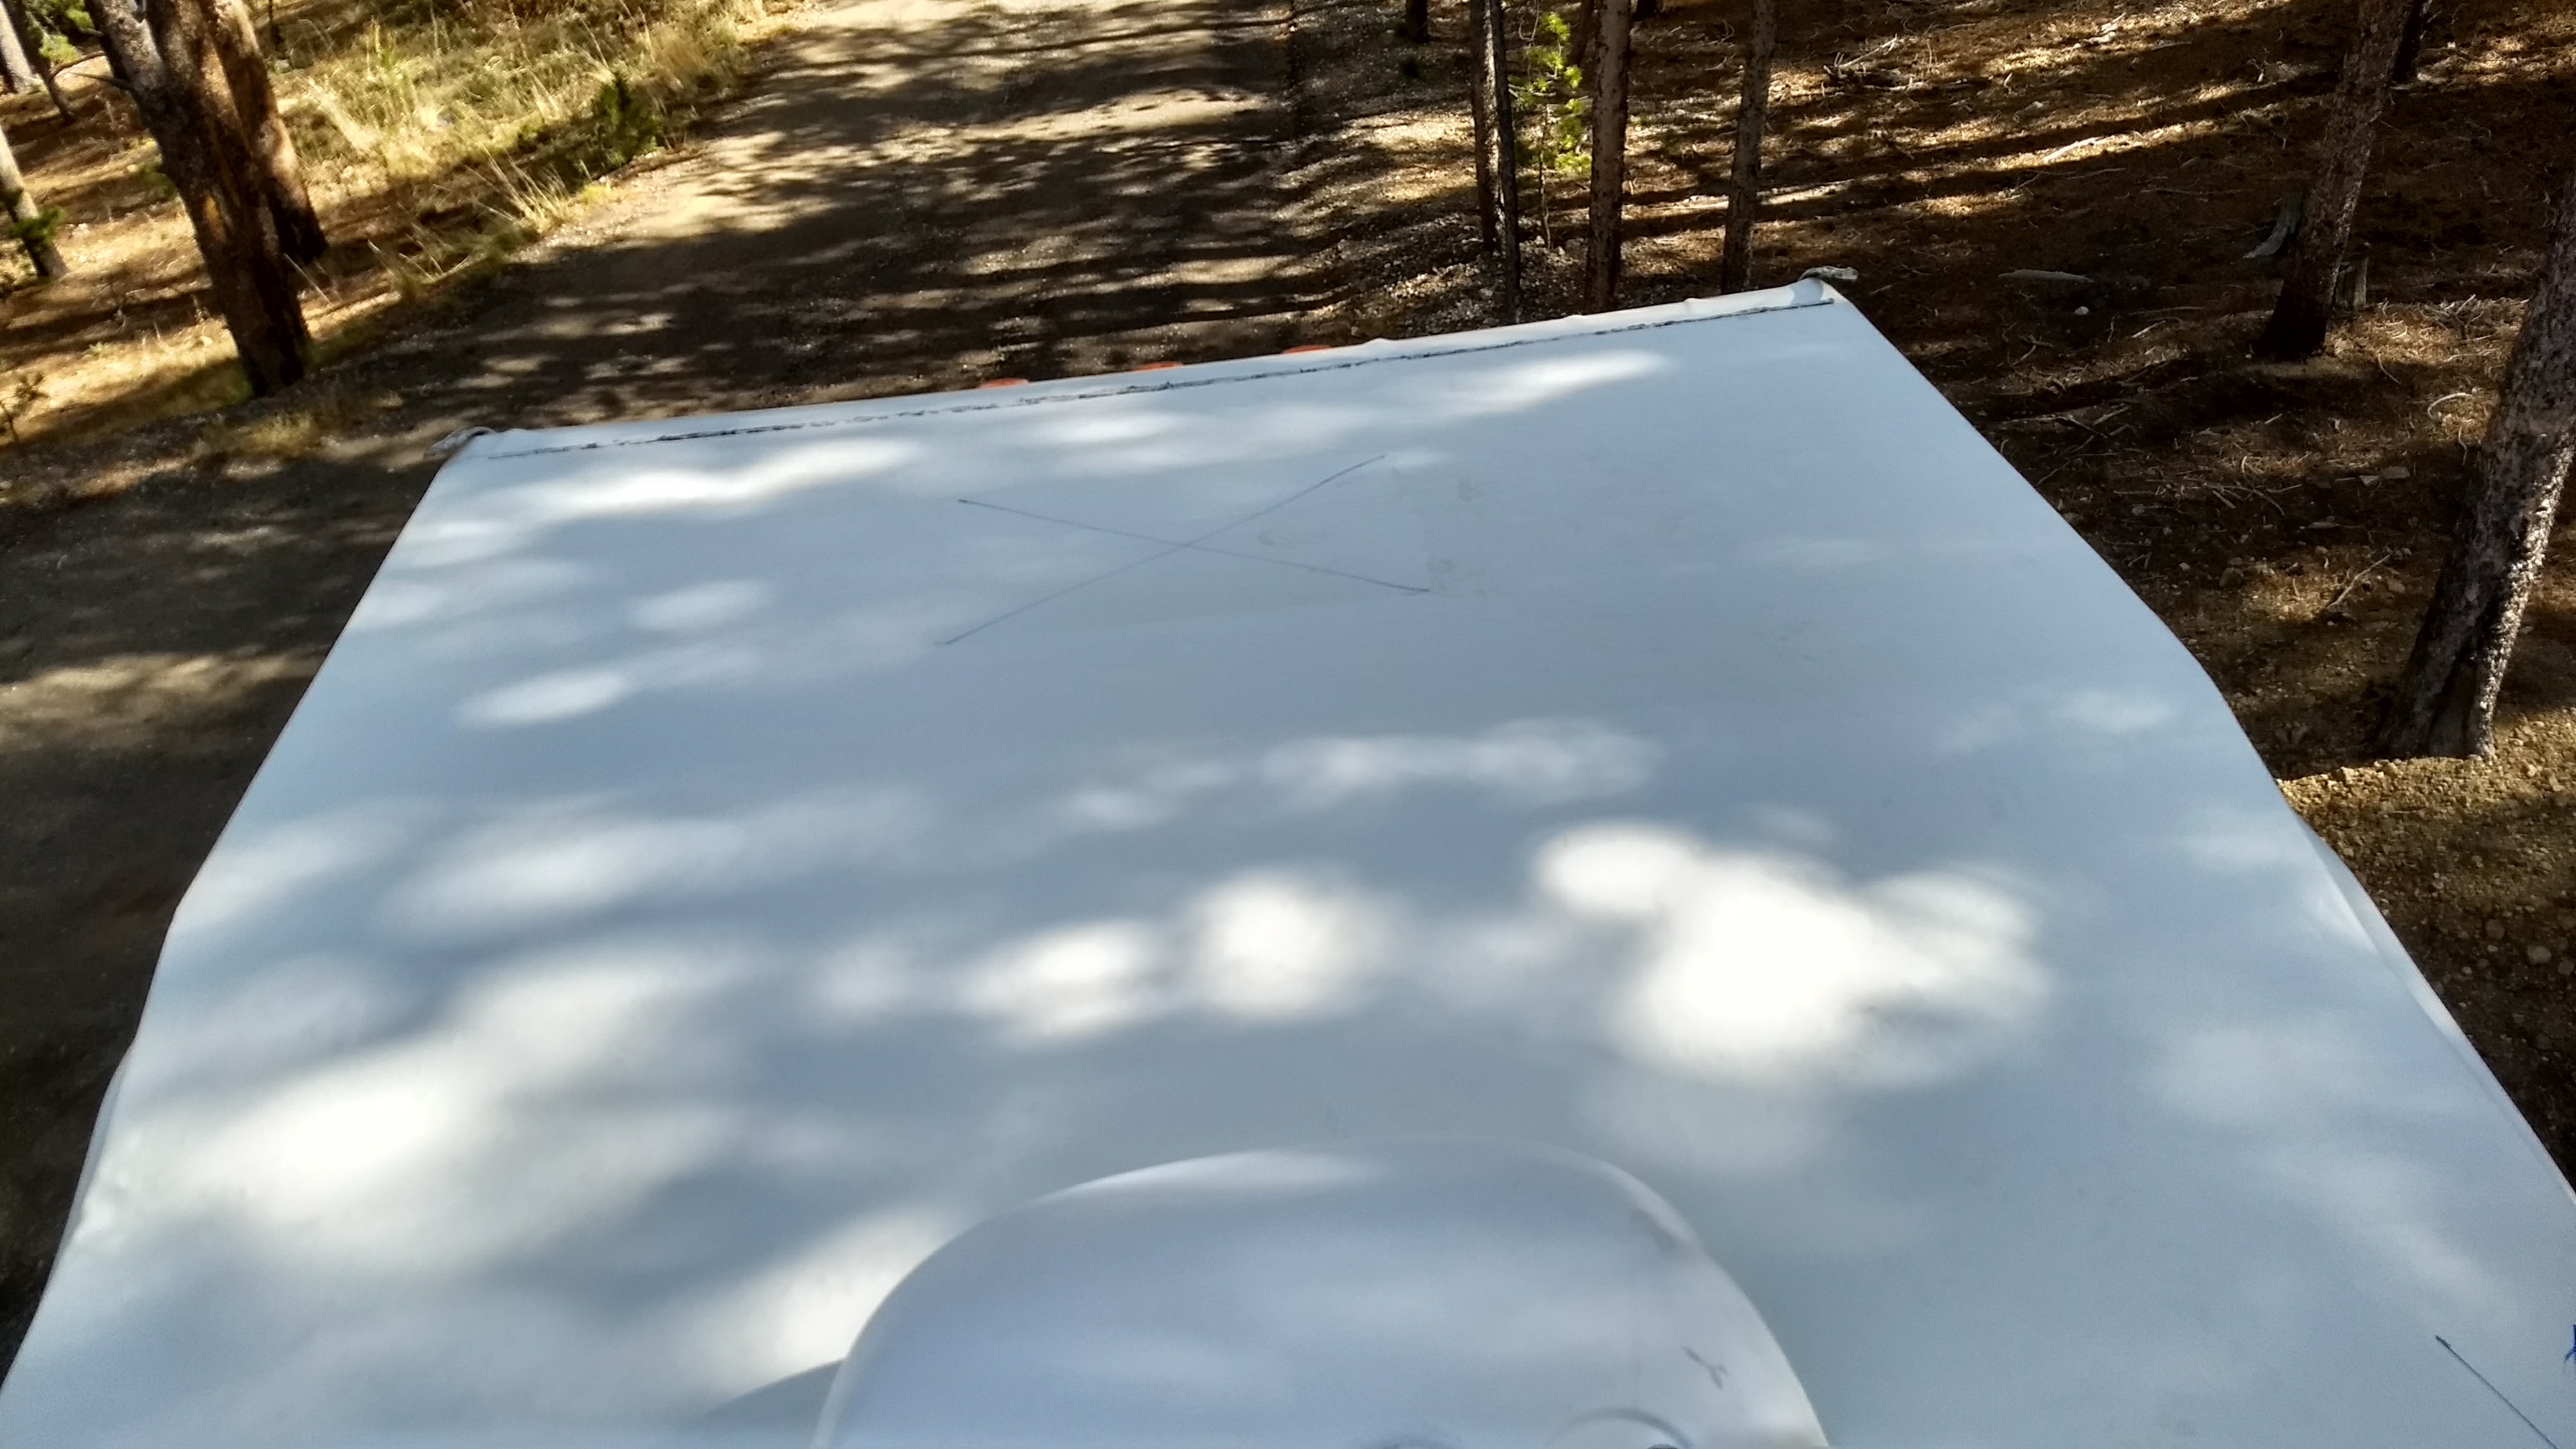
Marked cutout for the front escape hatch.
Step 5: Install fixtures.
Since most of the Elkhorn’s roof fixtures were severely sun damaged, I ordered new replacements from Amazon. These were installed with new 1/4″ x 1″ screws, butyl tape, and a liberal application of self-leveling sealant.
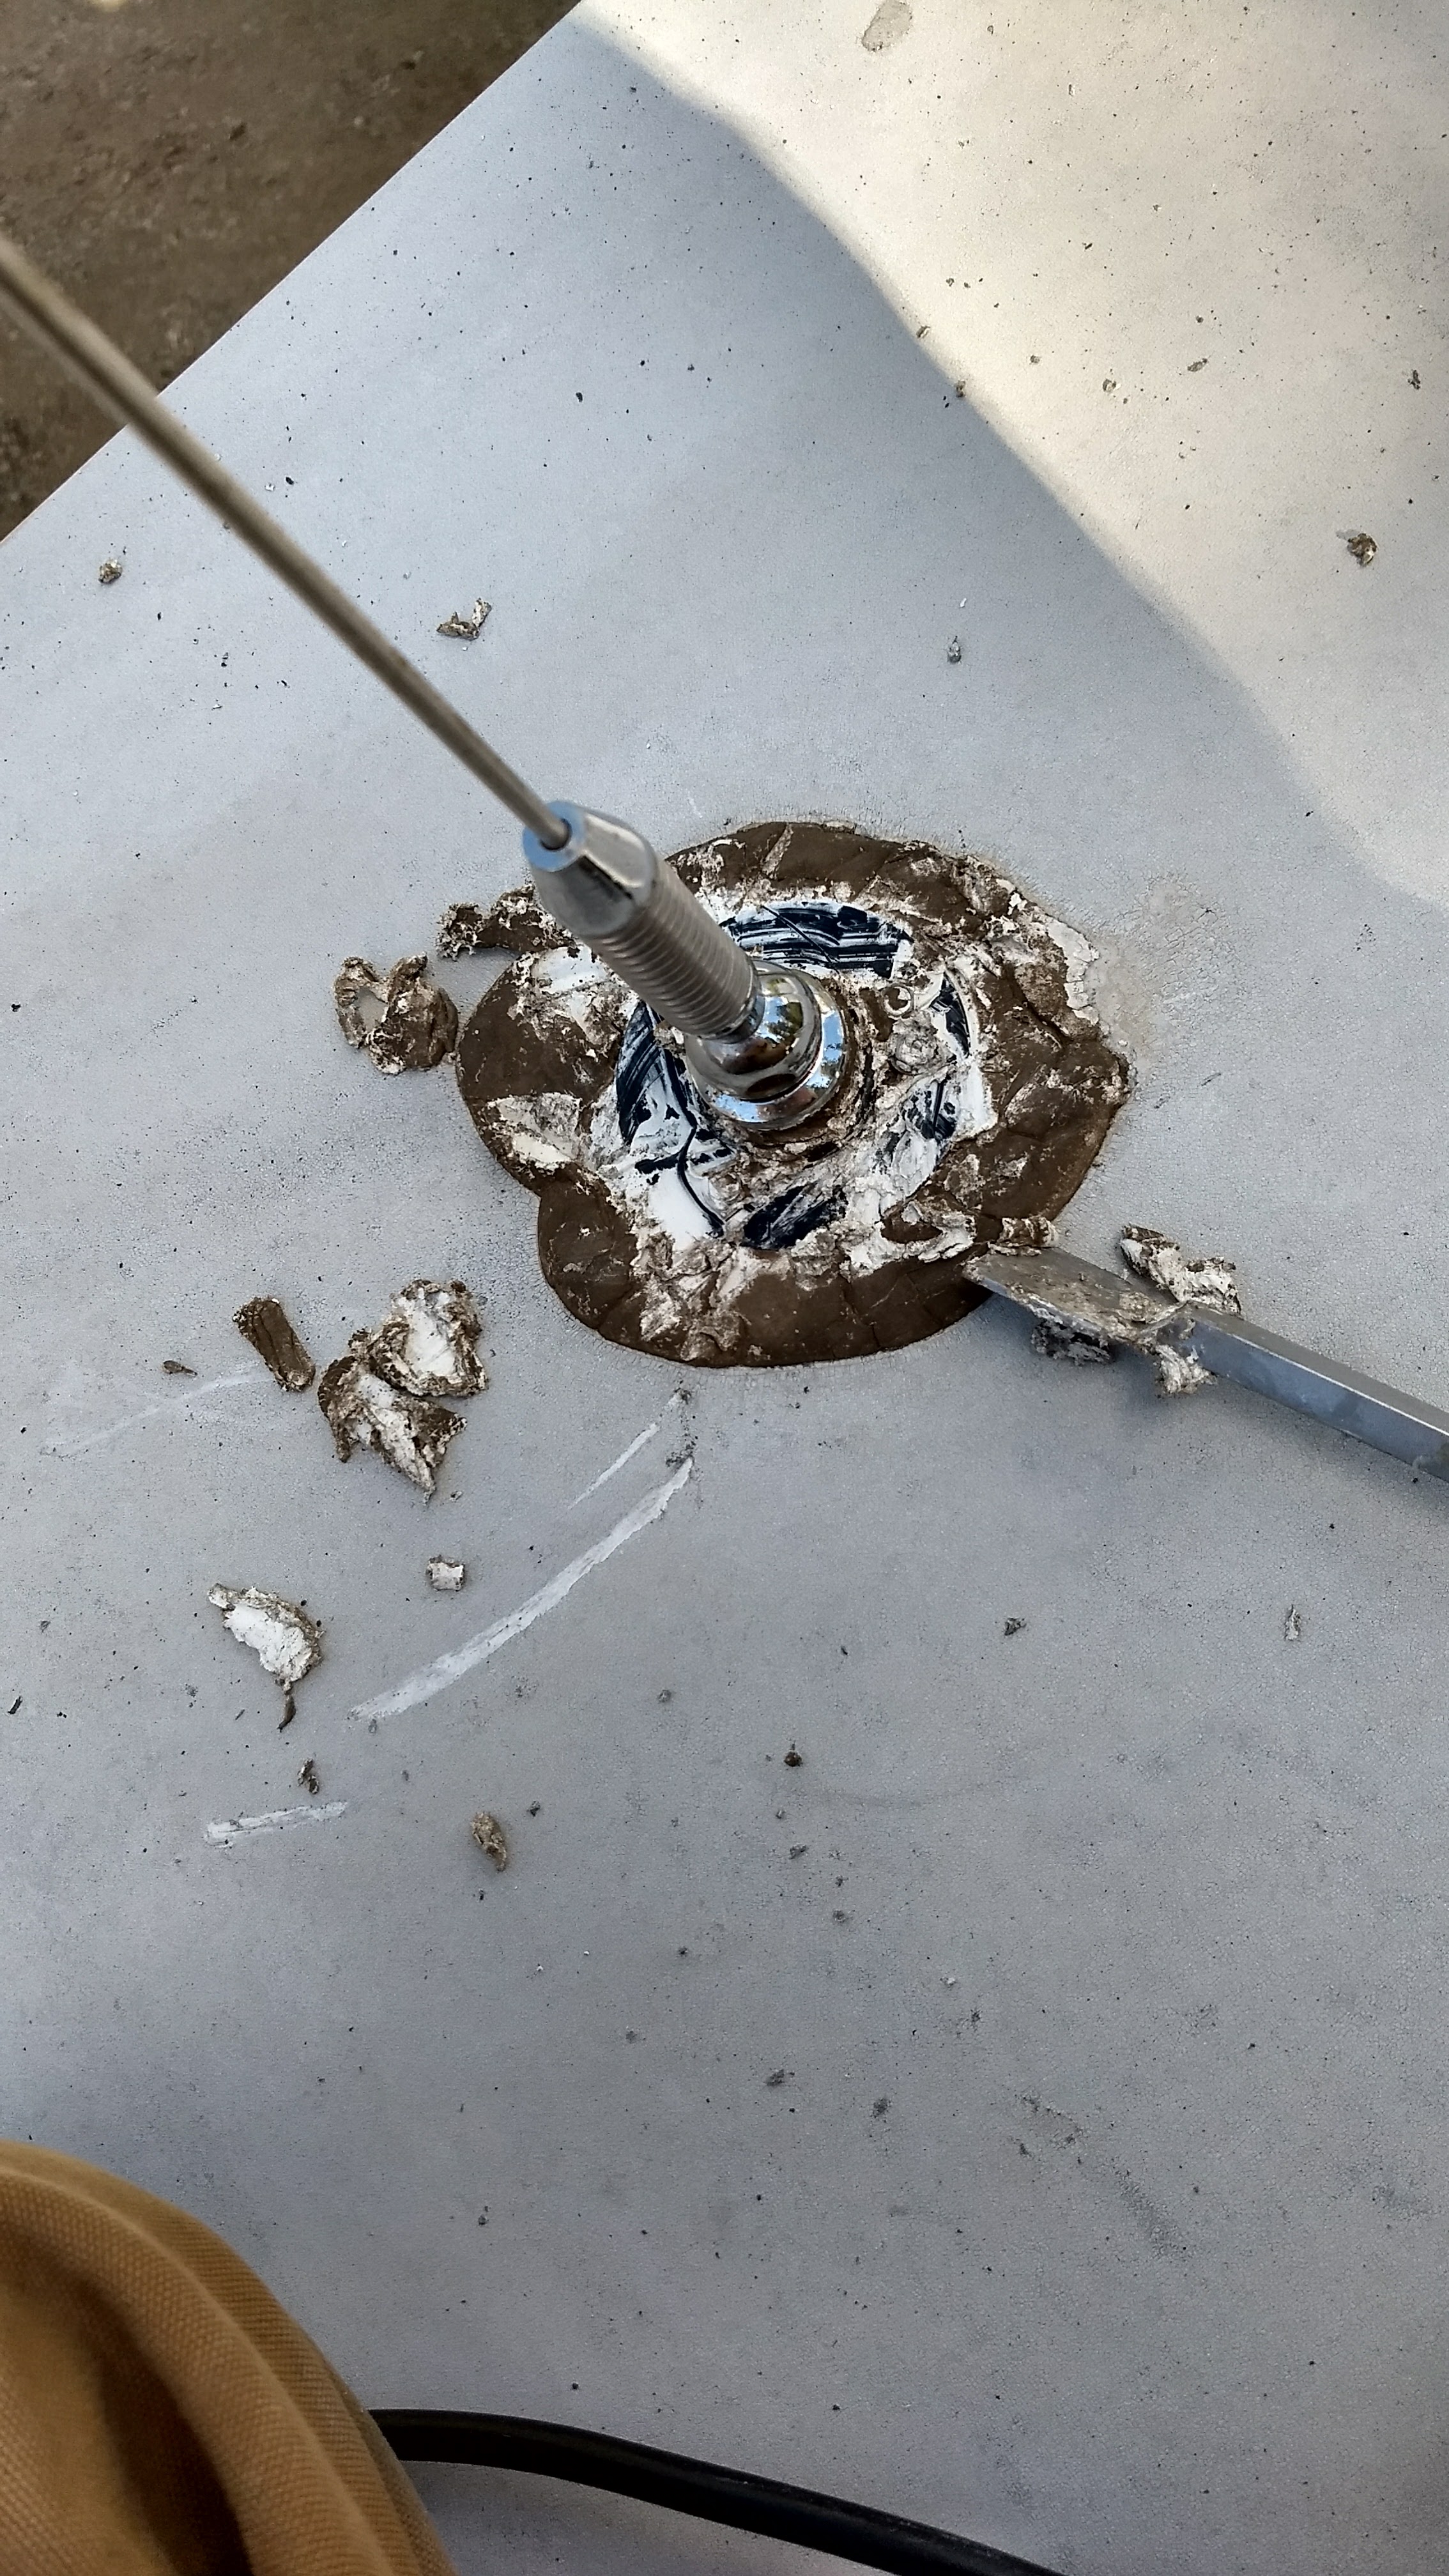
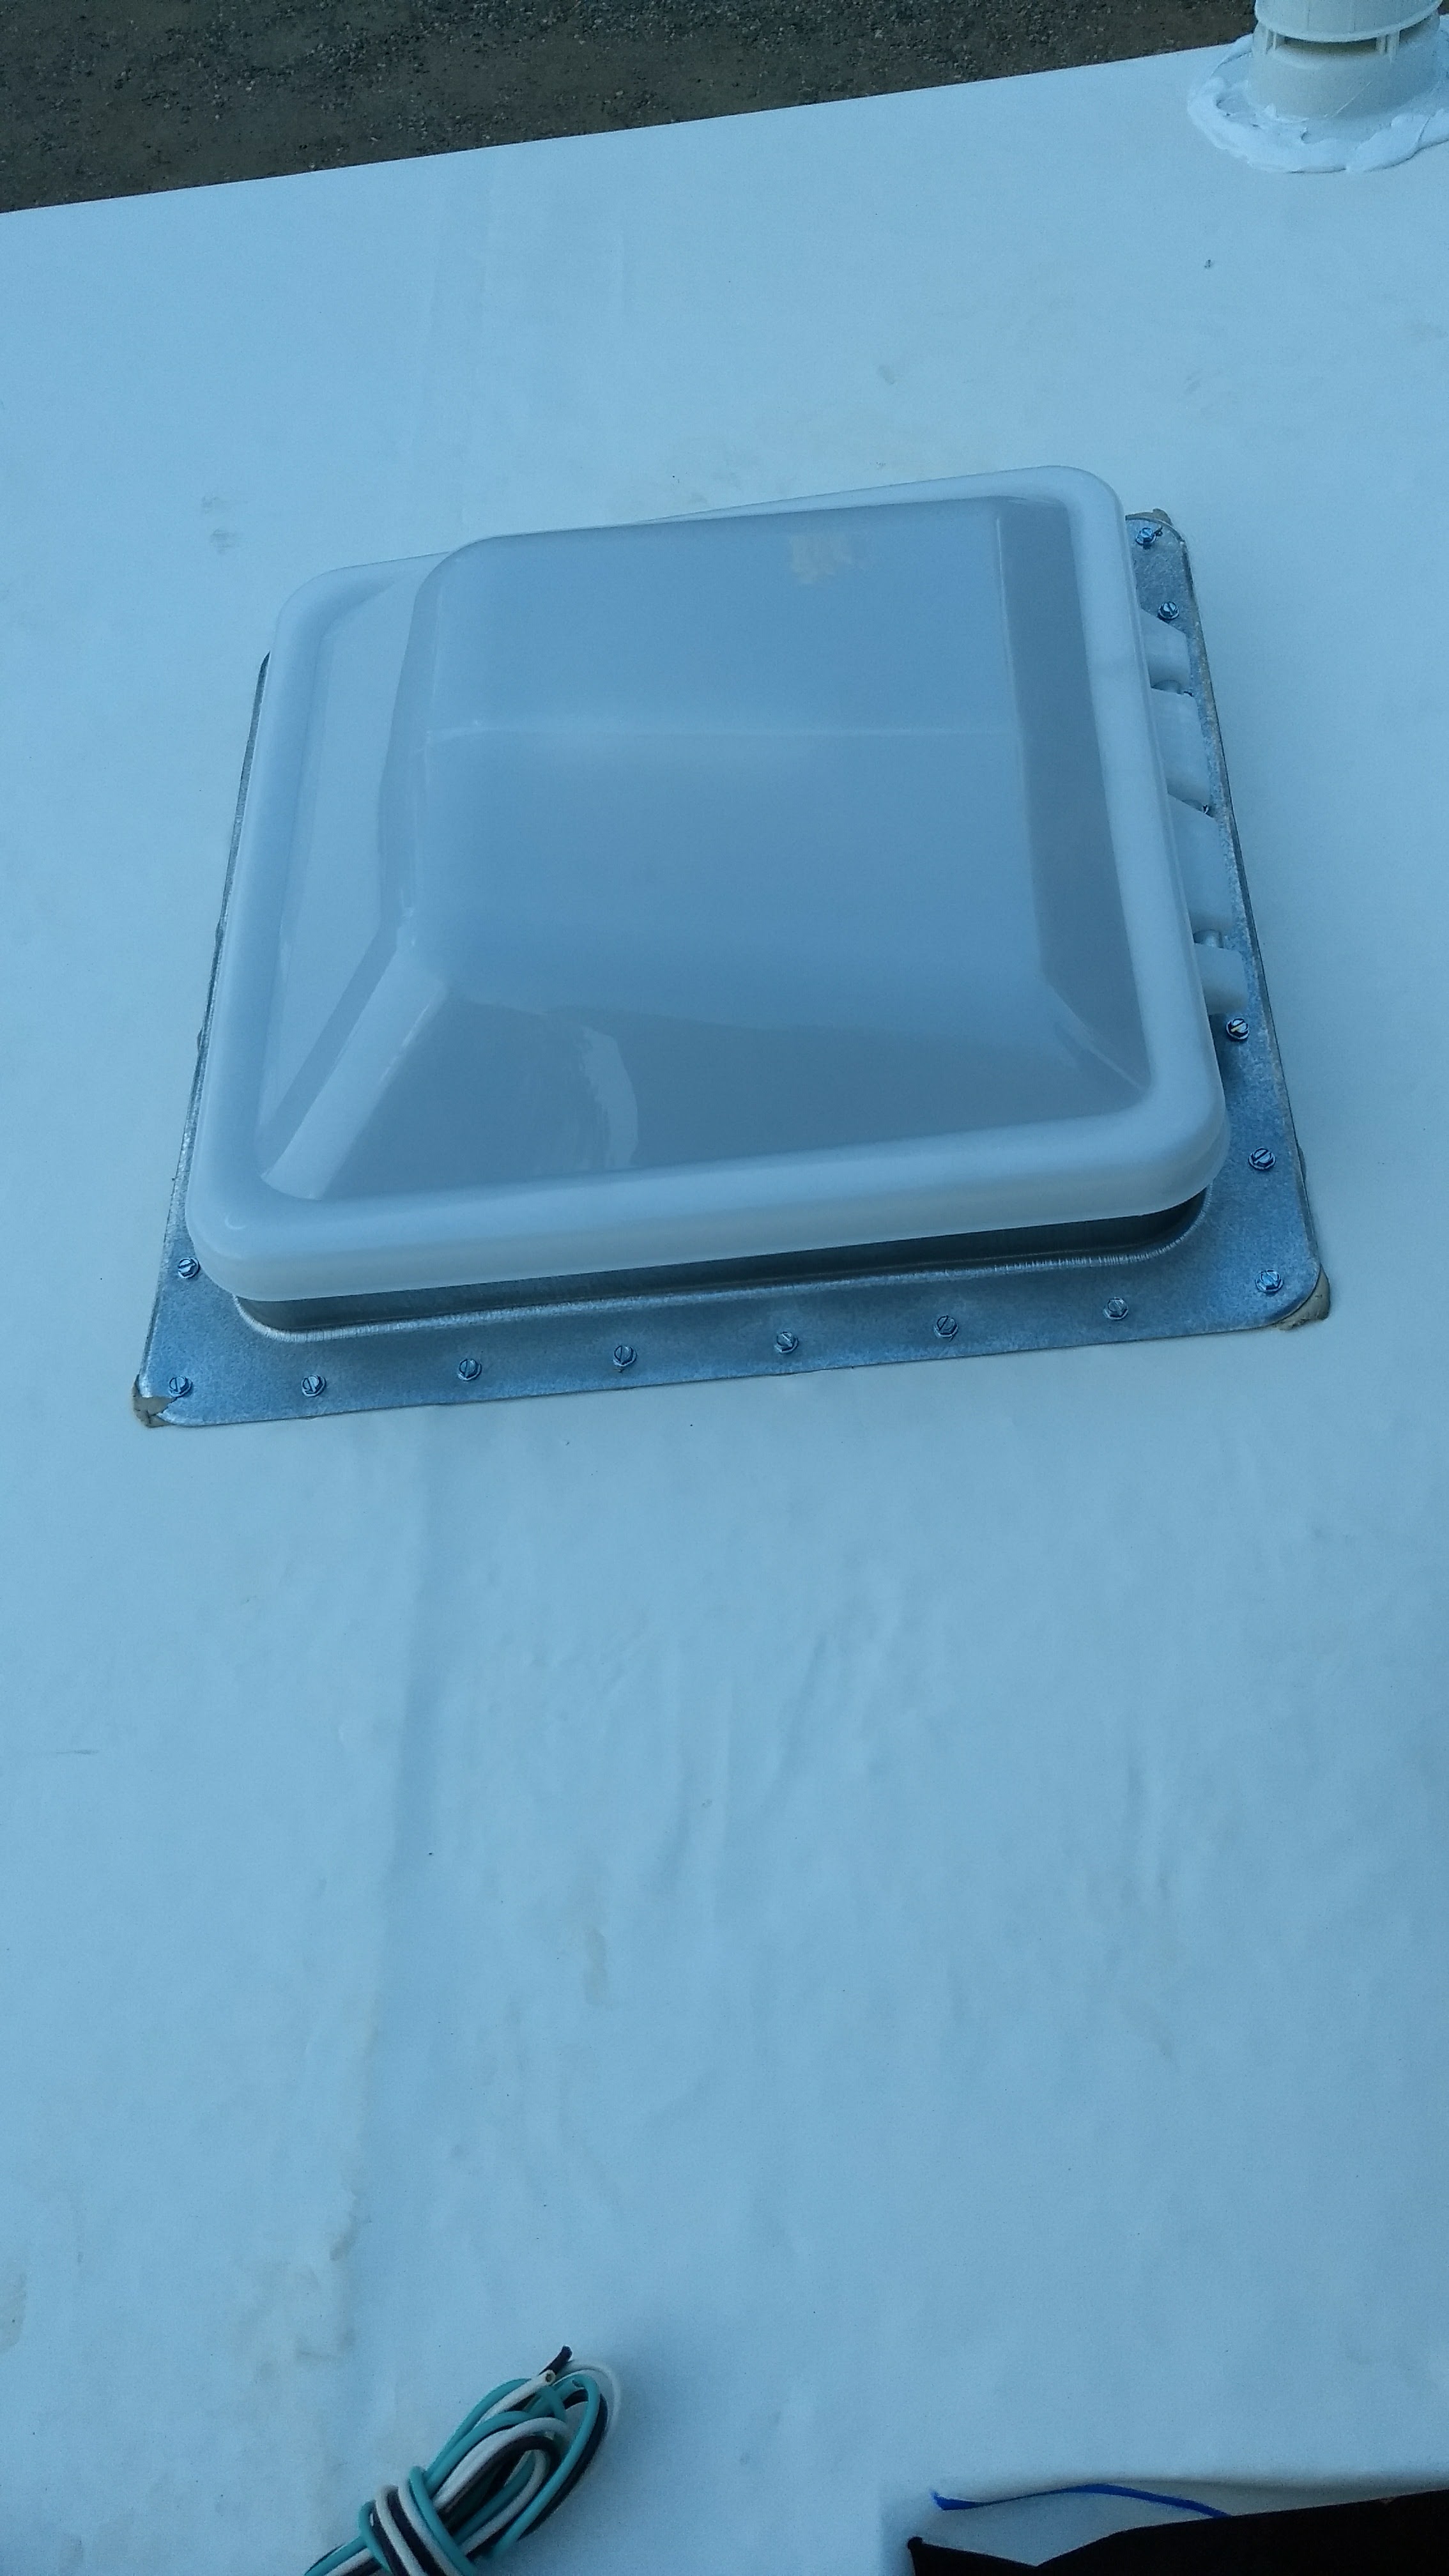
Hole for Ventline roof vent.
Installed Ventline vent before applying self-leveling sealant.
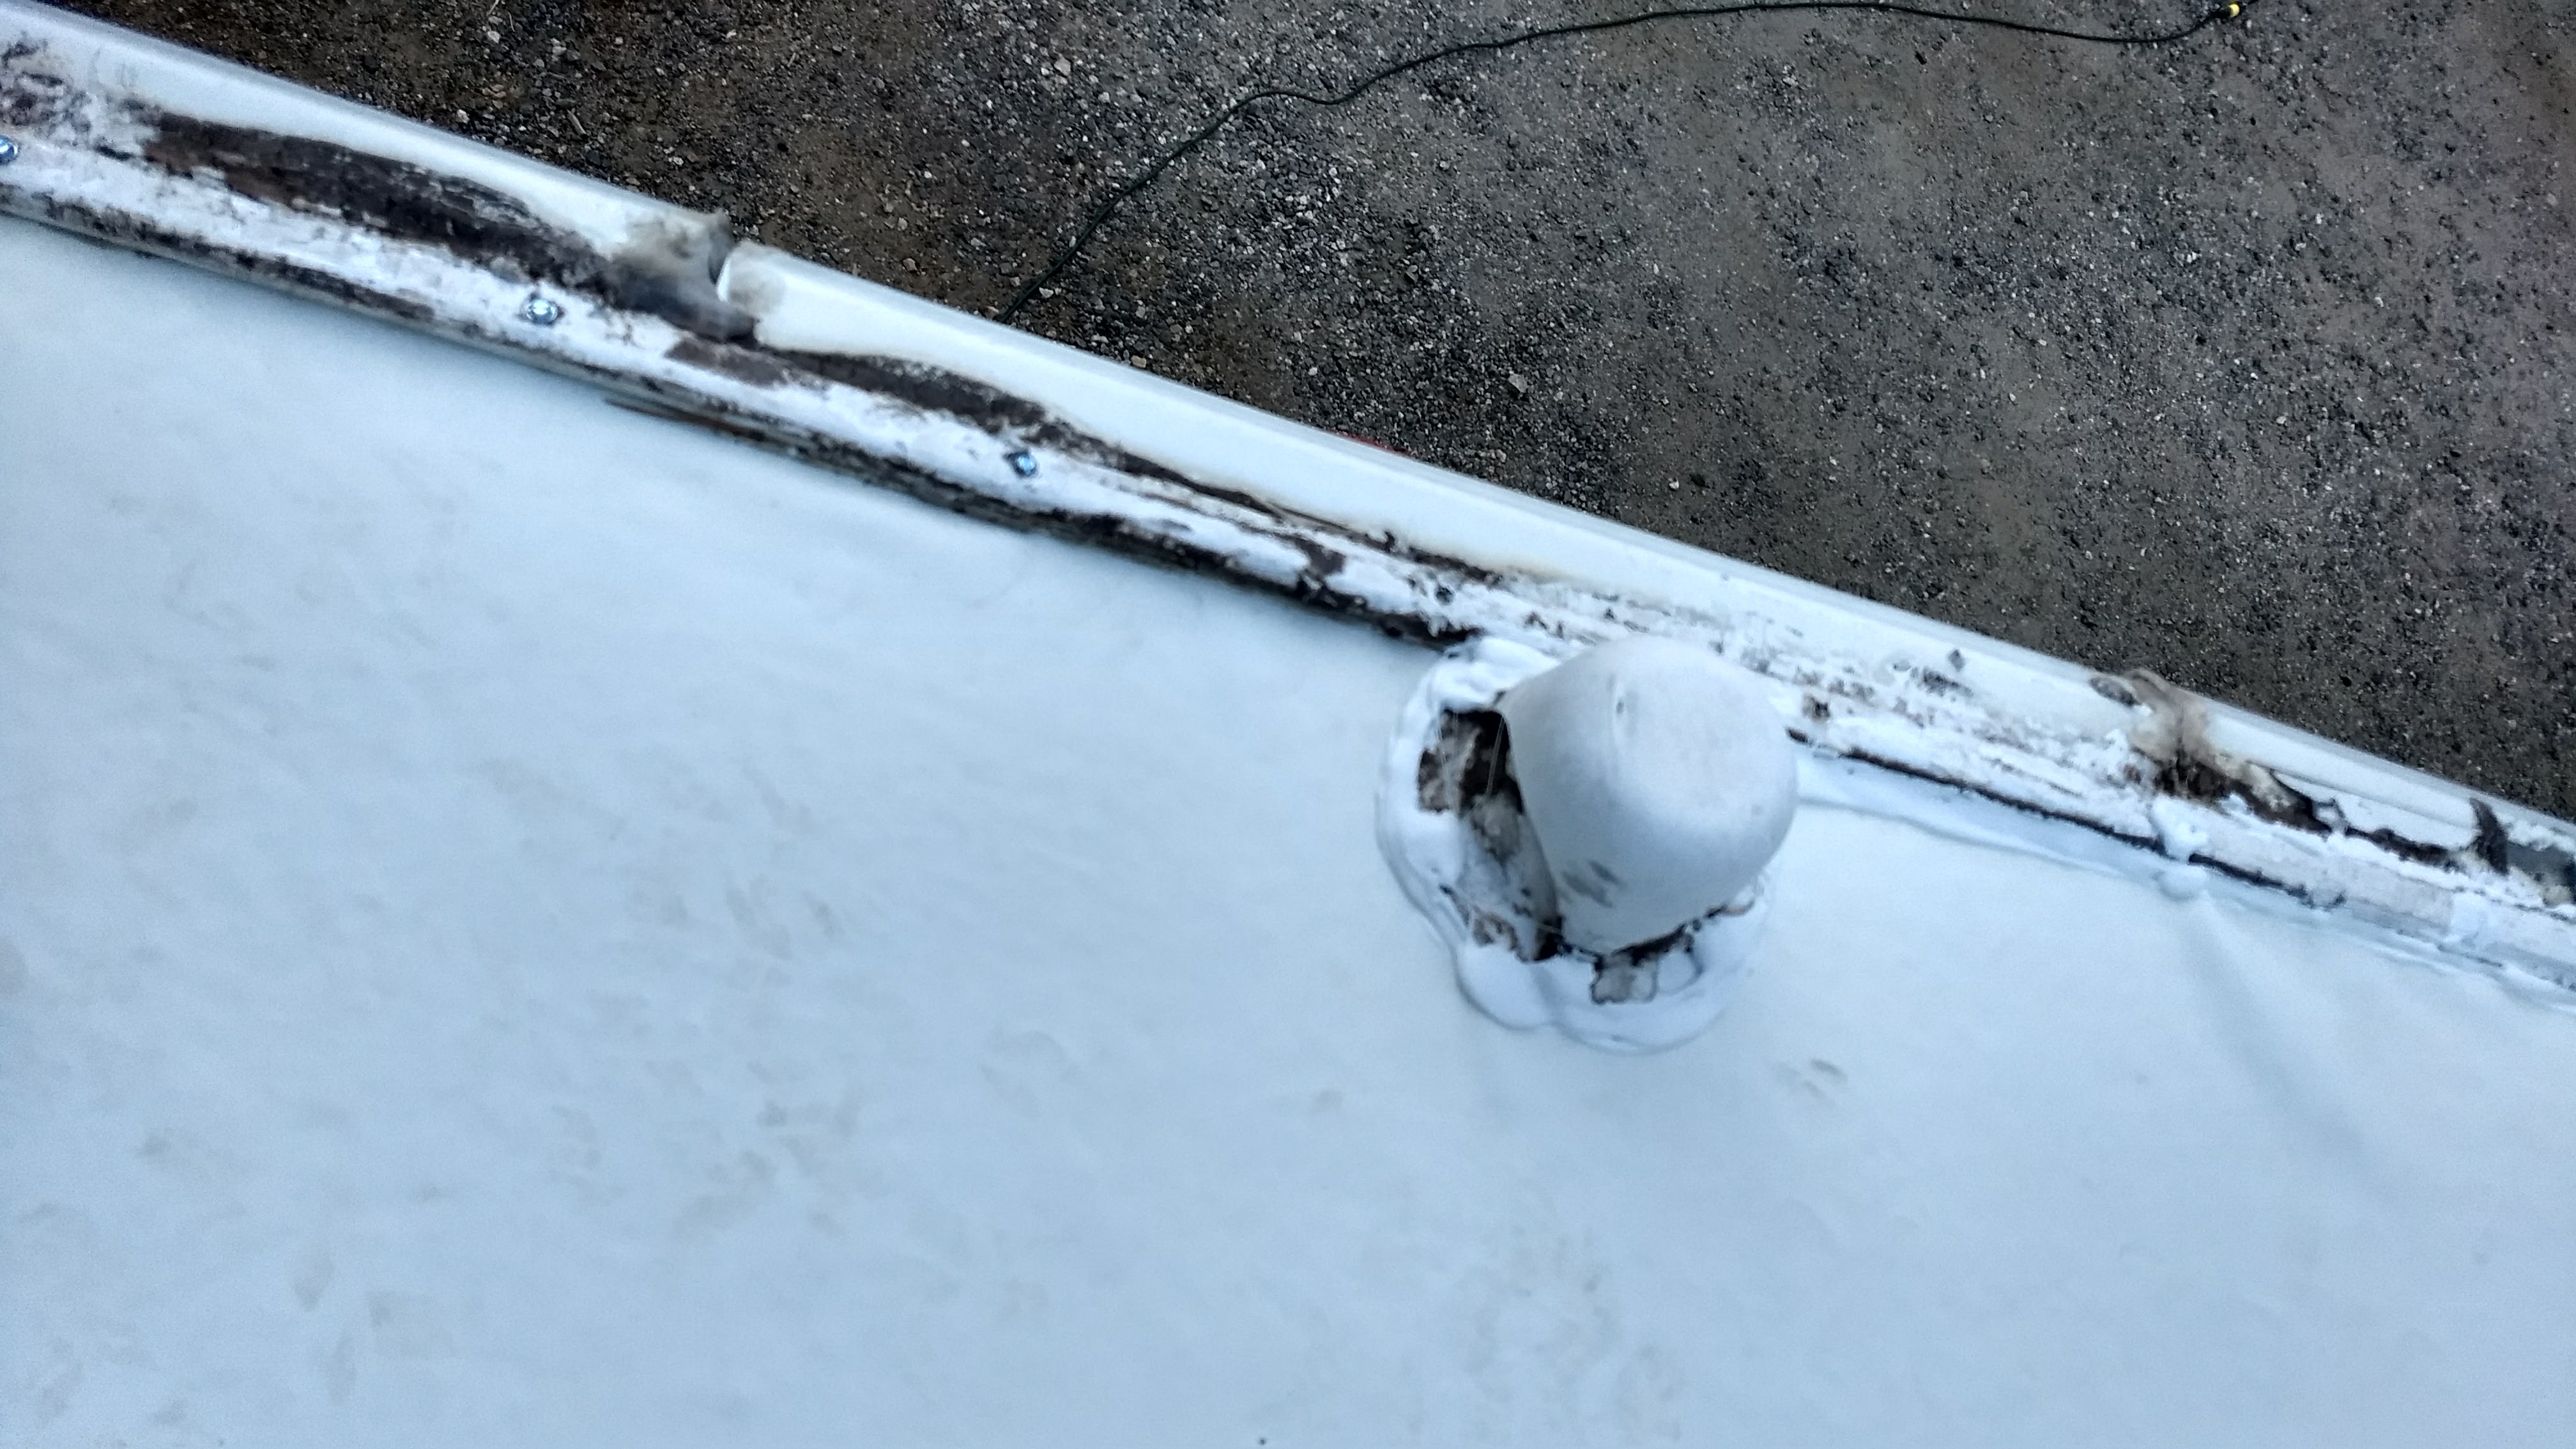
Reused plumbing vent. One of the rear plumbing vent pipes was cut too short from the factory so I couldn’t use the new cap. I had to clean and cut the old cap.
Step 6: Final punch list.
I installed the A/C with new seals, put in all the bazillion screws for all the corner clamps and fixtures. I applied self-leveling sealant liberally on all roof fixtures. I replaced the vinyl trim inserts. The excess EPDM was trimmed. I applied caulking to all edges.
Before EPDM trimmed.
Lessons Learned
There’s a reason that the RV houses had such high quotes to replace the roof. It was a bear, but I’m glad I did it. Looking back, I could have easily prevented the leaks and extended the life of the roof by a few more years with basic maintenance. When the sealant on this roof starts cracking, I’m going to scrape it off and replace it. I’ll coat the EPDM membrane with a dicor sealant when it starts chalking. Hopefully, I’ll get another 17 years out of this roof.